BRAIGO – A Lego Braille Printer

Accessibility devices tend to be prohibitively expensive, and it’s always nice to see a hacker apply their skills to making these devices more affordable. BRAIGO is a low cost braille printer by [Shubham Banerjee]. He built the printer using parts from the LEGO Mindstorms EV3 kit, with a few additions. This LEGO kit retails for $349, and a standard braille printer costs over $2000.

The BRAIGO print head uses weights and a pin to punch holes in standard calculator paper rolls. LEGO motors are used to feed the paper and align the head for accurate printing. It takes about 5 to 7 seconds to print each letter, which are entered on the Mindstorms controller.

While this is a great prototype, [Shubham] intends to continue development with the goal of creating an affordable braille printer. He’s a bit swamped with media requests right now, but is working on releasing BRAIGO as an open source project so others can contribute. It’s an impressive project, especially for a 12 year old student. After the break, watch the BRAIGO do some printing.

Continue reading “BRAIGO – A Lego Braille Printer”

An Arduino Programmable Load

Having a big block of hot to dump current into is a very useful thing to have if you’re testing batteries, power supplies, high power LEDs, electroplating, or any thing else that would normally require a huge resistor. [Jakub] found himself in need of an electronic load, and instead of a transistor and a pot, decided to make something more automatic: a programmable load built around an Arduino shield.

The idea behind this load is pretty simple: connect a device to a FET and shunt resistor to measure current. Drive the gate of the FET with an op-amp that maintains either constant current or constant voltage. Control everything with a DAC, and you have a programmable load controlled by an Arduino.

With such a small form factor, getting rid of all that heat was bound to be a problem. For this, [Jakub] is using a 50×50 mm BGA style heat sink with a 5V fan. If it’s good enough for a big CPU, it should be able to handle dumping 70 Watts into a FET. There’s also a conservative application of thermal paste and a very small thermistor underneath the FET that’s able to be read by the Arduino. It might slowly heat up your room, but it’s not going to catch fire.

With the Arduino sketches [Jakub] wrote for his load he was able to characterize a pair of Idea batteries and figure out how much charge a three-year-old recyclable battery had. It’s a great piece of work, and if [Jakub] is willing to go through the hassle of a Kickstarter, it would make a fine crowdfunded product.

The BitBox Console Gets Upgraded

BitBox Rev2

The Bitbox, an open source game console, has received a number of updates in the past couple of months. Last time we covered this DIY console, [Makapuf] had just managed to get the first revision to run a simple game. The second revision will increase the colors to 32k, add another channel of sound for stereo, switch controllers from PS2 to USB, and add support for Olimex’s UEXT expansion devices.

While the hardware upgrades are impressive, there’s been a lot of work on the Bitbox software as well. A new game demo called Fire was created as a set of tutorials to help people start developing for the console. There’s also a BitBoy, a GameBoy emulator for the Bitbox. BitBoy is a ported version of gnuboy for the ARM Cortex-M4 processor that powers the Bitbox. It successfully emulates a number of commercial GameBoy ROMs.

We’re looking forward to seeing what’s next for the Bitbox. After the break, check out a video of BitBoy running on the Bitbox.

Continue reading “The BitBox Console Gets Upgraded”

SoundCube: A Companion Cube That Can Talk

sound_companionCube

The Enrichment Center likely disapproves of the SoundCube: a portal music box in the form of a Portal Companion Cube. [Andreas] finished this project a couple of years ago, but we’re glad he’s finally had time to give a rundown on the details at his blog.

The build is primarily a modified speaker box cube—constructed out of what appears to be MDF—with four Alpine SXE-1725S speakers placed at the center of the middle faces. The faces were routed out to resembled the Companion Cube, while the electronics mount and the speaker grills were 3d printed. Inside is a homemade amplifier built around an Arduino Mega, with a TDA7560 quad bridge amplifier, a TDA7318 audio processor, a Belkin bluetooth receiver, and a 3.5″ touchscreen for volume control and for input selections.

Two 12v 7.2Ah lead-acid batteries keep the cube functional for an entire weekend of partying, but probably add a few pounds to the already hefty MDF construction. Check out [Andreas’s] blog for more pictures and his GitHub for all the necessary code.

Hackaday Links: February 23, 2014

hackaday-links-chain

You can pick up a tiny laser pointer on the cheap if you know where to look. But when it comes time to replace the multiple button cells that power it be prepared to clean our your wallet. [KB3WZZ] got around that with the cap from a ball-point pen. He drilled holes in the end plug of the pointer, and used wire and a plastic pen cap as a battery adapter. He’s powering it from USB, but now that you have wires exiting the case you can use any source you wish.

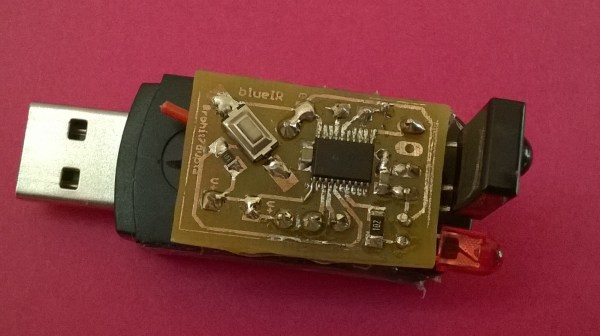
[Gerben] tipped us off about the trinket clone he built himself. It’s a tiny sliver of a PCB which he etched, populated with through-hole parts only, and finished off with some finger nail varnish to prevent shorting and corrosion. The solder-covered edge connector for USB was left unvarnished of course.

If you live in a college town you are probably quite used to seeing futon pads and frames on the curb waiting for the garbage collector. A little bit of ingenuity, and some added lumber, will turn a futon frame into a respectable shelving unit. [Thanks Martin]

Complicated bench equipment + good lighting + a great camera = an awesome teardown. This time around it’s the guts of a Keithly 2002 8.5 digit mulitimeter laid bare. [Thanks David]

Here’s a PCB laminator hack that is definitely worth a look. The original unit was acquired on eBay for about $25 and had a thermostat whose performance wasn’t optimal. A bit of alteration for the thickness of the substrate, and you’ll never hand iron a toner transfer board again! [Thanks William]

Last summer we heard about Scout, an ocean-going drone trying to cross the Atlantic. We just checked the live tracking and the craft is still at sea. But a much smaller 5ft vessel made it from New Jersey to Guernsey (an island between the UK and France) after traveling for about 14 months. [Thanks Rob]

3D Printed RGB LED Bracelet

3dprintedrgbbraclet

[Marcus’s] 3D-printed LED bracelet has moved through a number of revisions recently, but each iteration is impressive in both simplicity and functionality. Inspired to experiment with his print of [nervoussystem’s] Diagrid Bracelet, [Marcus] took the opportunity to add some LEDs with his first build, which combined a strip of RGB LEDs, a small battery, and an Adafruit Trinket microcontroller.

A second build soon followed, which overhauled the bracelet’s design into a more solid form and managed to double the amount of LEDs by upgrading to a different strip. The bracelet is currently in its third revision, cycling through the spectrum for around 3.5 hours on a single charge. This build also sports a 3-axis accelerometer: when the wearer shakes the bracelet, the colors skip around. If shaken long enough, the bracelet will enter a dazzling flurry of color flickering. Stick around after the break for a few demonstration videos. If you want to print your own, head over to [Marcus’s] Thingiverse file.

Continue reading “3D Printed RGB LED Bracelet”

Advanced Beer Carrier, Or How To Get Beer Onto A Plane

beer-import-case

[Badmonky] was facing a life crisis. How could he enjoy the hard-to-find German beers from his homeland while living in Princeton, New Jersey? Sure, you can find many good imports if you try, but that may come at a hefty price. Plus, the lesser known beers are completely unavailable in the States. Of course the solution is to import them himself after each trip home. He just needed a way to get as much beer on a plane as he possibly could.

We’d have no problem walking down the aisle with a couple of cases of cold ones, but let’s be honest here. Security won’t even let you on the plane with a bottle of water these days much less a case of tallboys. [Badmonky] hacked together this custom carrier so that it could be checked as luggage while protecting the frothy goodness. Two limiting factors to consider are size and weight. He started with the latter, calculating that 24 bottles would remain under his 50 pound limit. From there he selected a sports bag and picked up sheets of foam which were perforated using a hole saw. Alas the size constraint forced him to leave three of the (now empty?) vessels behind.

The bottles ride upside down and made the international voyage without incident. In retrospect he would have picked a roller-bag as this thing is hard on your shoulder after a trip through the airport and the public transit ride home.

The real question in our mind: why didn’t he check a keg?