It only takes one mistake to realize electrolytic capacitors have a polarity, but if you’re working with old tube gear, tube amps, or any old equipment with those old orange dip, brown dip, or green dip foil capacitors you also have to watch your polarity. These old caps were constructed with a foil shielding, and there’s always one side of these caps that should always be connected to the chassis ground. If you don’t, you’re going to get interference – not something you want in an amplifier circuit.
Old caps that have long since given up the ghost usually have a black band designating whatever side of the cap the ‘foil ground’ is. This is the side that should be connected to ground. If you look at modern foil caps, you might also see a black band on one side of the cap, which should – if we lived in a just world – also designate the foil ground. This is not always the case.
To properly test foil caps and determine which side should be closer to ground, you can construct a small tester box that’s more or less an h-bridge with a single switch and a pair of alligator clips in the middle. Connect the cap to the clips, put the output of the circuit in your scope, and flick the switch: the direction that has the least amount of interference is the denotes the foil ground of the cap. Replace those old caps in your vintage equipment with a new, correctly oriented cap, and you’re well on your way to having a great sounding amplifier.
Video below.
Continue reading “How To Tell If You’re Installing Foil Capacitors Backwards”


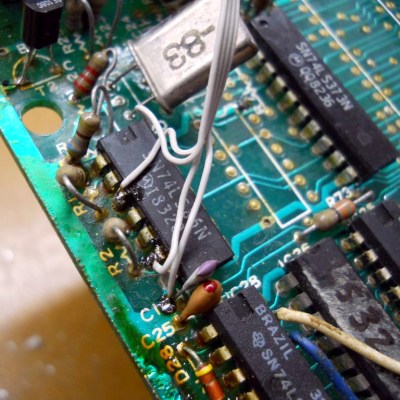 Before he could do any of this, he first had to debug and fix the TK-85 which seemed to be having several age related issues. After swapping out several deteriorating IC sockets, he was able to get it running. He soldered wires directly to one of the logic chips that had the video and sync signals present on them, along with the +5V and GND connections and hooked them up to a breadboard. He then tested his circuit consisting of the TTL multiplexer, DIP switches and resistors. This worked, but not as expected, and after some digging around, he deduced that it was due to the lack of the back porch in the video signal. From Wikipedia, “The back porch is the portion of each scan line between the end (rising edge) of the horizontal sync pulse and the start of active video. It is used to restore the black level (300 mV.) reference in analog video. In signal processing terms, it compensates for the fall time and settling time following the sync pulse.”