Since it’s launch way back in 2006, Twitter has become a magnet for techies. Maybe it’s the simple interface, maybe it’s the 140 character limit. Whatever the reason, you can find plenty of hackers, makers, and engineers tweeting about their daily activities. It didn’t take long for folks to start incorporating Twitter into their projects. Ladyada’s Tweet-a-watt is a great early example of this. This week’s Hacklet is all about some of the best tweeting projects on Hackaday.io!
 We start with [Henry Conklin] and A Twitter account for my dog. [Henry’s] dog [Oliver] loves to bark and finding a solution became his entry to The Hackaday Prize. Rather than bring Cesar Millan in, [Henry] decided to embrace [Oliver’s] vocalizations by sending them up to the cloud. A Raspberry Pi with a USB microphone uses some custom Python code to detect barks and ruffs. The Pi then sends this data to Twitter using the python-twitter library. The Pi is connected to the internet via a USB WiFi dongle. You can see the results of [Henry’s] work on [Oliver’s] own Twitter page!
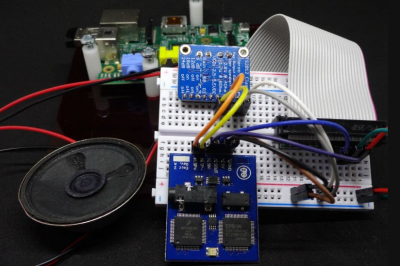 Next up is [troy.forster] and tweetie-pi. Rather than constantly check his phone or computer, [Troy] wanted a device to read his tweets. A bit of NodeJS code later, and tweetie-pi was born. A Raspberry Pi connected to the internet pulls data through the Twitter stream API. When tweets directed at a pre-configured username are found, the data is sent to a an Emic 2 text to speech module. The Emic reads in that classic DECtalker style voice we all know and love from the movies. [Troy] even added code to properly handle usernames and retweets.
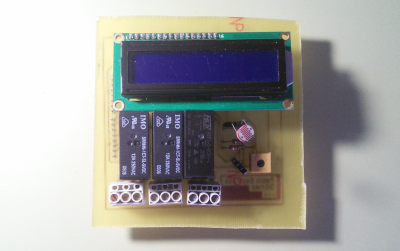 [SirClover] joined the internet of things by creating Home automation system with Twitter, his entry in the 2014 Hackaday Prize. This home automation system is based around an Arduino Leonardo and an Ethernet shield. [SirClover] rolled his own custom PCB to handle relays, a Cds cell, and a 2×16 character LCD. The system can be accessed through a simple web interface. This allows the user to open or close blinds, turn on lights, all that great smart home stuff. Every time it executes a command, the home automation system reports status to Twitter.
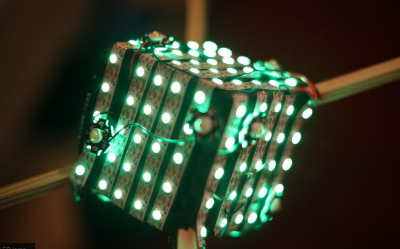 Finally we have [Jakob Andrén] with A danceable notification cube, which is [Jakob’s] entry in the 2015 Hackaday Prize. The cube itself is a translucent box that contains a metric crapton of LEDs. 148 Neopixels and 12 3W power LEDs to be exact. All these LEDs are driven by a Teensy 3.1, which serves as the main processor for the entire system. The Teensy reads position data from an MPU6040 IMU. This allows it to change brightness and color as the box is moved around – or “danced”. An ESP8266 provides the cube with data from the interwebs, specifically Facebook and Twitter. The cube lights up and flashes whenever it receives a message.
If you want to see more tweeting projects, check out our new projects that tweet list. Did I miss your project? Don’t be shy, just drop me a message on Hackaday.io. That’s it for this week’s Hacklet, As always, see you next week. Same hack time, same hack channel, bringing you the best of Hackaday.io!