We’re happy to announce 16 winners of the Sci-Fi Contest! The Hackaday Crew is thoroughly impressed with pretty much everything that was entered. The 50 projects which were marked as “complete” spanned a wide range of Science Fiction universes, and showed off the talent of the hackers who posted them.
As a quick side note: Some people have confused this contest with The Hackaday Prize. That one is still on, runs into November, and offers a trip into space as the grand prize. Get hacking!
Prizes

We have a range of prizes for the winners. The Grand Prize winning team can choose between two packages, one is anchored by a pair of oscilloscopes (an OWON DS7102 and a Rigol DS1052E), the other swaps out the OWAN for a soldering station and a rework station. Top Prize winners can choose between three packages which offer a rework station, a soldering station, or a collection of dev boards. And finally, the community favorites can choose from several Sci-Fi themed prizes like Blu-Ray, DVD, coasters, toothbrushes, and other kitsch. For a complete list of the prizes, check out the contest announcement.
Grand Prize: Demolition Man Verbal Morality Statute Monitor
 The Verbal Morality Statute Monitor project was an early favorite of ours because the choice of Sci-Fi tech was perfect; a symbolic centerpiece of a dystopian future that can be perfectly replicated with current technology.
[tdicola] and his suspect partner [colabot] moved far beyond that favored status with a solid build that included mechanical design (which was quite a hack), hardware, and software.
The shiny unit hangs on the wall and listens for profanity, sounding an alarm and printing a citation whenever one is detected. We do hope that this ends up in a public space — perhaps a hackerspace full of foul-mouthed members. The delight of the Morality Monitor is that it can generate extra revenue and we suspect offenders will be happy to pay-up… well, maybe at first.
Second Place: Animatronic Iron Man MKIII suit
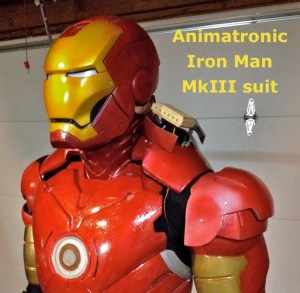 The scope of this project, which is the work of [Jerome Kelty] and [Greg Hatter], is impressive. The full-size Iron Man suit is wearable, true to the look of the film version, and packed full of animatronics. It won’t stop bullets, blow up bad guys, or fly… but it looks as if it can do all of that.
From helmet to boots the exoskeleton is packed with electronics. These are comprised mostly of things that light up, and things that move parts of the suit. But you also need a way to control that functionality and this is one of the most clever aspects of the design.
Each glove has an RFID tag reader in the palm area, with tags on the fingertips of the third and fourth finger. Closing your fingertip to your palm initiates a programmed sequence. All of this is well-documented in the Project Details section, with code and schematics for each subsystem shared as Build Logs.
Third Place: M.A.R.S.
 This rover looks like an elegant insect. In a world full of clunky-looking robotics projects that’s high praise. The name of the project is an acronym for the MADspace Advanced Robtics System; a project which, from the start, sought to recreate an Open Design version of the NASA Rovers known as Spirit and Opportunity.
[Guus van der Sluijs], [Paul Wagener], and [Tom Geelen] turned this project into a showcase of what today’s widely available design software and fabrication tools can accomplish. Most of the connecting pieces were 3D printed (check out all of them in the components list), with 10mm aluminum tubing making up the rest of the chassis, and rockers to support the six wheels. Speaking of wheels, check out all the fab work that went into those! And we haven’t even mentioned the hw/sw which drives the thing!
Fourth Place: Back To The Future Time Circuit Clock
 This one has a very visceral hacked feeling which immediately made us take note. When you start to dig into the work which [Atheros] and [bwa] put into the Time Circuit Clock from the movie Back to the Future, the project really stands in a place of its own. Inspiration to build this came from a design which was posted by Hackaday alum [Phil Burgess] over at Adafruit.
The large collection of 14 and 7 segment display modules which make up the three parts of the clock are all hosted on about 23 PCBs which were etched as part of the development process. The electronic assembly is solid, with ribbon cables and modular design to keep it as tidy as possible. The frames for the displays are cut out of wood and the entire thing is controlled from a keypad. The clock, alarm, and FM radio make this a perfect bedside device — if you can abide being blasted by three colors of LED displays as you try to sleep.
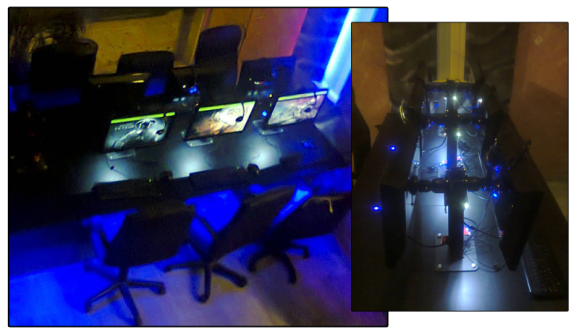
Fifth Place: Marauder’s Map
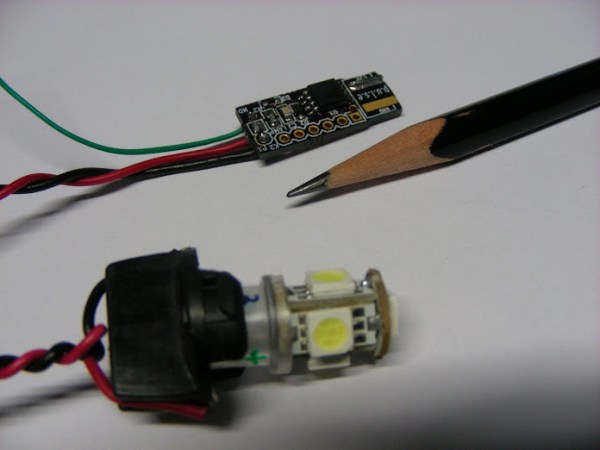
 This one is hard to sum up with a single image, because The Marauder’s Map uses radio frequency communication to track beacon locations of boards like the one pictured here. Well, they tried to use this custom hardware but were unable to work out all the bugs and ended up showing the proof of concept using some EZ430-RF2500 dev boards.
We’re certainly not holding that against [phreaknik] and [ wahwahweewahh]. The amount of software that went into the mapping system is arguably more impressive than a bug-free prototype board would have been. The system can take the dimensions for any room, as well as locations of the base stations. It then polls the base stations to triangulate relative position of the beacons with great accuracy.
We have confidence that the custom boards will work at some point (this would actually make a great entry for The Hackaday Prize, right?).
Honorable Mentions
 It was heartbreaking that these Peril-Sensitive Sunglasses didn’t make it into the top five. This, and the five projects above, were all in a tight race for the prizes. Since this project isn’t going to make the list of Skulled or Followed projects we’ve decided to award it one of those prize packages anyway in recognition of the wonderful work [Minimum Effective Dose] and his AI partner [Colabot] pulled off. The project is, of course, based on [Douglas Adams’] Hitchhiker’s Guide to the Galaxy tech which allows the wearer to avoid getting upset in times of peril. The shutter glasses originally meant for 3D television viewing have been modified to sense danger and block the wear’s view of it.
The rest of the Honorable Mentions are awarded the honor of being mentioned (in alphabetical order):
Community Favorites
There are also prizes for the most Skulled and most Followed projects. Here are those winners in rank order. This list was a snapshot from Wednesday, May 7th, and since Hackaday.io is a living site the totals will change over time. The five top winners are excluded from these prizes; Skulled winners cannot also win for Followers:
Most Skulled:
Most Followers:
Complete Entries Get Shirts
All hackers who submitted what we deem to be a complete entry will receive a shirt. We’ll email with instructions on how to tell us your shirt size and mailing address.