Made sometime in the 1790s or 1800s London, the Maillardet Automaton has a long and storied history. It was exhibited around England for several decades, brought over the Atlantic by [P.T. Barnum], nearly destroyed in a fire, and donated to the Franklin Institute in Philadelphia in the 1920s. From there, this amazingly complex amalgam of cogs, cams, and linkages eventually became the inspiration for the book – and movie – Hugo. Time hasn’t exactly been kind to this marvel of the clockmaker’s art; it has been repaired four times before receiving a complete overhaul in 2007 by [Andrew Baron].
[Fran], one of Hackaday’s sources for awesome projects, recently visited the Franklin Institute and posted a series of videos on the reverse engineering of the Maillardet Automaton. Being nearly destroyed and repaired so many times didn’t make this an easy job; it’s extremely possible no one alive has ever seen the eyes of the Automaton move as originally designed.
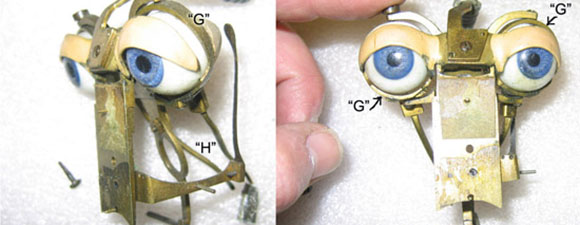
Even though the Maillardet Automaton has one of the largest series of cams of any mechanical draftsman, that doesn’t mean it’s simply an enlargement of an earlier machine. The automaton’s pen is like no other writing device on Earth, with a stylus acting as a valve to dispense ink whenever the tip touches paper. The eyes have linkages to follow the pen as it traces a drawing. In 1800, this automaton would have been a singularity in the uncanny valley, and watching it put pen to paper is still a little creepy today.
Below you’ll find a video from [Fran] demonstrating all seven drawings the Maillardet Automaton can reproduce. You can also find a whole bunch of pics of the mechanisms along with the 2007 repair report on [Andrew Baron]’s site.
Retrotechtacular is a weekly column featuring hacks, technology, and kitsch from ages of yore. Help keep it fresh by sending in your ideas for future installments.
Continue reading “Retrotechtacular: Restoring A 19th Century Automaton”