Automated PCB Panelization

panel

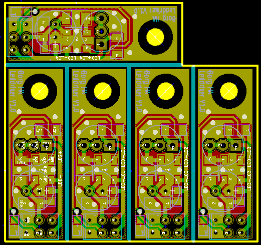
Some PCB production houses – Seeed Studio and itead studio, especially – allow you to upload a gerber file and receive a printed circuit board very inexpensively. The pricing structure for these board houses is based on predesignated board sizes – 5cm square or 5×10 cm – and sometimes a project is just too small to justify buying a full 25 square centimeters of board. This is where panelizing comes in: by putting multiple copies of a circuit board on one of the available sizes you can get more boards for the same amount of money. But how to panelize your boards without the (sometimes) hassle of cutting and pasting?

[Martin] came up with a way of panelizing PCBs with just a Python script. By creating one copy of a circuit board in KiCAD, he can fire up his script and tell the computer exactly how to duplicate his circuit to fit any size board.

By his own admission, [Martin]’s script is still a little clunky, but it does allow him to edit the panelized board in KiCAD and also copies the nets so the ratsnest doesn’t go between boards.

Custom Desk Is A Custom Computer Case

desk

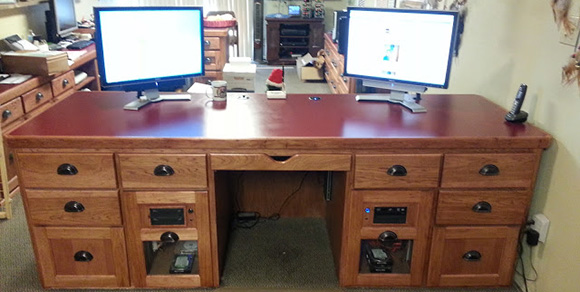
[Paul] had been kicking around his idea of a perfect computer desk for some time, and when given the opportunity to remodel his office decided it was time to build his dream computer case.

The desk itself is made of hickory with a formica top to match the other workbenches in [Paul]’s workspace, The two largest drawers house an ATX motherboard, power supply, disk drives, and a pair of CD drives. On top of the desk are two 24″ monitors – one for each computer – and a built-in powered USB hub that allows [Paul] to charge his phone or use an external drive.

As a computer tech, [Paul] needed a way to connect customer’s drives. He did this by putting two Startech UniDock2U USB to SATA and IDE converters in the top right drawer. It’s one of his most used features and very handy for duplicating bare drives.

Also included in [Paul]’s desk is a large UPC, and a pair of 120mm case fans venting to the front of the desk. It’s a wonderful piece of workmanship, and the removable computer cases make cleaning and upgrading a breeze.

Using Arcade Monitors With The Raspberry Pi

mame

Along with the growing popularity of the Raspberry Pi, we’ve also seen a related uptick in MAME arcade cabinet builds. Putting this $35 computer in an arcade cabinet makes a lot of sense, but connecting it to one of the monitors found in old arcade cabinets is a bit of a pain. Luckily, [Celso] figured out how to connect a Raspi to one of these 15kHz RGB monitors, making for a much more accurate emulation of old arcade classics.

The Raspi only has two video outputs – an HDMI port and an RCA composite jack. The old arcade CRTs have an RGB input, so directly connecting a Raspi to one of these CRTs is a no-go.

The solution comes from two converters: one to convert the HDMI output to VGA, and another video downscaler that takes the 31kHz VGA signal and translates it into a 15kHz RGB signal. [Celso] settled on the GBS-8100 video converter, a rather uncommon piece of kit that can fortunately be found on a few Chinese eBay auctions.

After connecting the old arcade cabinet power supply to the Pi, hooking up an audio amp, and converting the controls to USB, [Celso] has a very accurate MAME machine.

Electronically Controlled NFC Tag

P1010393

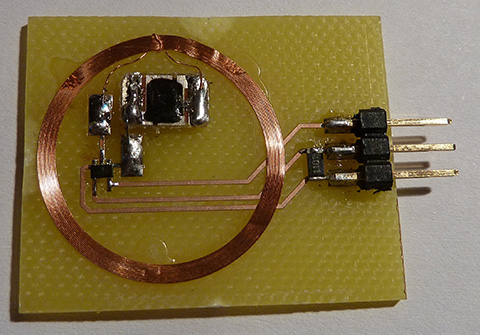
[Per] is replacing his car stereo with a Nexus 7 tablet. It’s a great modification to add GPS, navigation, and a good music player, but [Per] wanted to pause his tunes and tell the tablet to go to sleep with an NFC tag. This means building a an NFC tag he can turn on and off, an interesting problem to say the least.

The easiest way to do this is with a CMOS switch, but a chip like a 74HC4066 is overkill for a project this simple. What [Per] needed was a single CMOS switch, something he found and fabbed a board for.

Now, with a press of a button, [Per] can activate his NFC tag and pause the music in his new stereo. Check out the video of this electronically controllable tag after the break.

Continue reading “Electronically Controlled NFC Tag”

ATTannenbaum

attiny

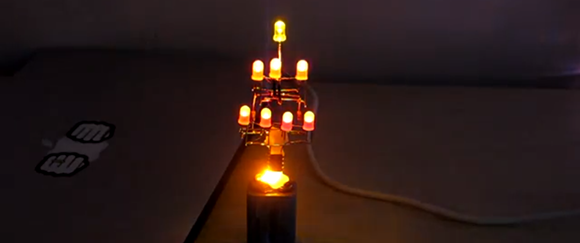
It’s that special time of year again where the smell of baking cookies fill the house and shopping mall parking lots are filled with idiots and very angry people. [Kevin] thought it would be a good idea to build an LED Christmas tree and ended up building a great looking tree that’s also very simple.

In the video, the imgur album, and the github, [Kevin] shows us the simplest way to make a color-changing LED Christmas tree. The circuit uses LEDs to drop the voltage and to provide a nice glow around the base of the tree. After that, it’s just an ATtiny13 and some LEDs in a very nice freeform circuit.

Of course, if LED Christmas trees aren’t your thing, [hb94] over on reddit created an LED menorah. Pretty nifty he used an 8-position DIP switch for the circuit. Let’s just hope someone gave him a soldering iron for the last night of Hanukkah.

Beautiful Tube Amp Uses A TV Tube

tube-amp-i

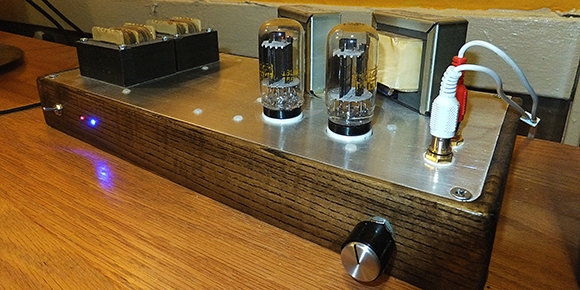
Most audio tube amps we see use common tubes – usually a 12AX7 for the preamp and one of the more common power tubes such as an EL34.[Daniel], on the other hand, decided to build his own audio tube amp with a 13EM7, a tube originally used for a television’s vertical oscillator. The resulting project is a wonderful stereo amp that sounds really good, to boot.

[Daniel] picked up the idea of using a 13EM7 tube from [Fred Nachbaur]’s MiniBlok SET amplifier. This very tiny 1-watt tube amplifier uses a single tube originally designed for use in old, old televisions. The secret behind this build is the fact this tube is actually two triodes in one package; one side of the 13ME7 has tons of gain but not much power, making it perfect for a preamp. The other side has a lot of power, useful for delivering two watts of power into a speaker.

After [Daniel] etched a few boards for his amp, he milled out a piece of wood for the chassis. When everything was mounted he had an awesome looking stereo amplifier that also sounds great.

Displaying Text On Random Strings Of Christmas Lights

lights

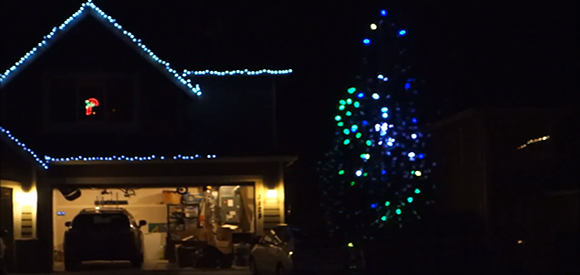
With the help of a microcontroller, a few strings of GE Color Effect Christmas lights can be easily turned into a fully programmable LED strip, or if you are so inclined, a huge RGB LED display. [Hubbe] had a few strings of these Color Effect Christmas lights, but didn’t want to spend the time arranging his light strings in an array simply to get a programmable display. His solution to this problem – the Chaos Display – turns strings of Christmas lights randomly thrown on a tree into a fully programmable display capable of displaying text and images.

[Hubbe] was inspired by QC Co-Lab’s light wall powered by GE Color Effect lights. Having a huge RGB LED display is very cool, but requires building a frame for each of the Christmas light pixels. [Hubbe] had a different idea – just throw the lights on a tree and use a web cam to figure out where each Christmas light is on the display.

The actual build consists of six strings of Color Effect lights. After throwing them on the tree, [Hubbe] set his phone on a tripod to record an image for each individual light. With some computing power, he was able to create a virtual display made of tangled strings of Christmas lights.

You can see a video of [Hubbe]’s work after the break.

Continue reading “Displaying Text On Random Strings Of Christmas Lights”