10 Ways To Etch PCBs At Home

[youtube=http://www.youtube.com/watch?v=Q4tWEse2rDI&w=580]

There are a ton of benefits for etching your own circuit boards at home, chief among them the ability to design a circuit in the morning and have a prototype in your hand by lunch. There’s always the question of how to etch the board, but [NurdRage] over on Youtube has all the chemistry covered on ten different etchant solutions for DIY PCB manufacturing.

The peroxide-based methods use simple over-the-counter Hydrogen Peroxide to remove all the copper on a PCB. By combining H2O2 with either Hydrochloric (muriatic) acid or Sulfuric acid, you’ll get a relatively easy to acquire and somewhat safe etching solution.

Historically, the favorite etchant for the home PCB manufacturer has been Ferric Chloride and is still surprisingly available at a few Radio Shacks around the US. Another chloride etchant – Copper Chloride – is one of the most reusable etchants available, able to be regenerated by simply bubbling air through the solution. You can actually make Copper Chloride etchant by reducing down the products of an H2O2 + HCl etchant, making this a very good etchant for PCB pros.

In the ‘miscellaneous’ category, [NurdRage] goes over some alternative etchants such as Bleach and HCl, Nitric acid, and potassium nitrate and HCl; the potassium nitrate etchant is fairly similar to aqua regia, so if you’ve ever wanted a gold PCB, this is the way to go.

Balancing the ease of production and safety of all these etchants, we’ll stick with our Hydrogen Peroxide and HCl etchant for now, at least until we move up to CuCl for the best etching machine we’ve ever seen.

Continue reading “10 Ways To Etch PCBs At Home”

FUBAR Labs Builds A Rocket Engine

engine

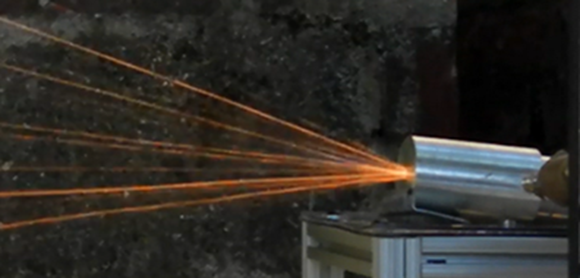
[Graham] over at FUBAR labs took it upon himself to build a rocket engine. This isn’t a simple solid-fuel motor, though: [Graham] went all out and built a liquid-fueled engine that is ignited with a spark plug.

The build started off with a very small ‘igniter’ engine meant to shoot sparks into a larger engine. This engine is fueled with ethanol and air – not the best fuel for a rocket engine by a long shot but save and cheap enough to do a few serious experiments with.

To test out this small engine, [Graham] made a test platform out of aluminum extrusion to remotely control the fuel and oxidizer valves. The valves are controlled by an Arduino and XBee for remote operation and a telemetry downlink for measuring the fluid flow into the engine.

After he had some experience with pressure, plumbing, valves, and engines, [Graham] upgraded his fuel and oxidizer to gaseous oxygen and ethanol. With proper safety protocol in place, [Graham] was able to a series of three 3-second burns less than a minute apart as well as a single burn lasting nearly 5 seconds.

Even though [Graham] eschewed the usual stainless steel construction of rocket engines (his engine is milled out of aluminum), he demonstrated it is possible to build a real liquid-fueled rocket engine at home.

The Burrito Bomber

Burrito Bomber

The Burrito Bomber, created by the folks at Darwin Aerospace, claims to be “the world’s first Mexican food delivery system.” The delivery process starts with the customer placing an order through the Flask based Burrito Bomber webapp. The customer’s location is grabbed from their smartphone using the HTML5 Geolocation API and used to generate a waypoint file for the drone. Next, the order is placed into a delivery tube, loaded onto the drone, and the waypoint file is uploaded to the drone. Finally, the drone flies to your location and drops the delivery tube. A parachute deploys to safely deliver the tasty payload.

The drone is based on a Skywalker X-8 airframe and the Quantum RTR Bomb System. The bomb system provides the basic mechanism to hold and drop a payload, but Darwin Airspace designed their own 3D printed parts for the delivery tube. These parts are available on Thingiverse. The drone is controlled autonomously by ArduPilot, which uses the webapp’s waypoint output to guide the drone to the target and release the payload.

Unfortunately, this can’t be a commercial product yet due to FAA regulations, but the FAA is required to figure out commercial drone regulations by 2015. Hopefully in 2015 we’ll all be able to order burritos by air.

For all the source and models, check out the group’s Github. There’s also a video of the bomber in action after the break.

Continue reading “The Burrito Bomber”

USB NeXT Keyboard

USB NeXT Keyboard

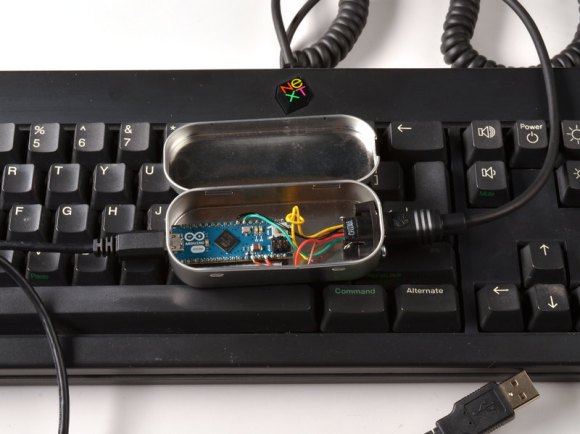
[Ladyada] and [pt] had an old keyboard from NeXT, but since it used a custom protocol it wasn’t usable with modern hardware. So they built a custom device to convert the NeXT protocol to USB.

The device uses a Arduino Micro to read data from the keyboard and communicate as a HID device over USB. It connects to the keyboard using the original mini-DIN connector, and is housed in the classic Altoids tin enclosure.

Since the protocol used by NeXT isn’t standard, they had to figure it out and write some code to interpret it. The keyboard communicates bidirectionally with the computer, so they needed to send the correct frames to key data back.

Fortunately, they hit on a Japanese keyboard enthusiast’s site, which had protocol specifications. They implemented this protocol on the Micro, and used the Keyboard library to create a HID device.

The final product is an adapter for NeXT to USB, which allows for the old keyboards to be used on any computer with USB. It’s a good way to bring back life to some otherwise unusable antique hardware.

160 Mac Minis, One Rack

Mac Rack

[Steve] needed an alternative to the Xserve, since Apple stopped making it. His solution was to stick 160 Mac Minis into a rack. That’s 640 real cores, or 1280 if you count HyperThreading.

First, Steve had to tackle the shelving. Nobody made a 1U shelf to hold four Minis, so [Steve] worked with a vendor to design his own. Once challenge of this was managing the exaust air of each Mini. Plastic inserts were designed to ensure that exaust wasn’t sucked into the intake of an adjancent Mini.

mac-miniAn array of 160 computers is going to throw a lot of heat. To provide sufficient airflow, [Steve] built a custom cooling door out of four car radiators fans, connected to a 40A DC motor controller. This was all integrated into the door of the rack.

Another challenge was getting power to all of the Minis. Since this deisgn was for a data center, the Minis would have to draw power from a Power Distribution Unit (PDU). This would have required a lot of PDUs, and a lot of cables. The solution: a one to four Y cable for the Minis. This allows each shelf of four to plug into a single outlet.

The final result is a professional looking rack that can replace a rack of Xserves, and has capacity to be upgraded in the future.

More Fun With Syma 107 Reverse Engineering

Syma Reverse Engineering

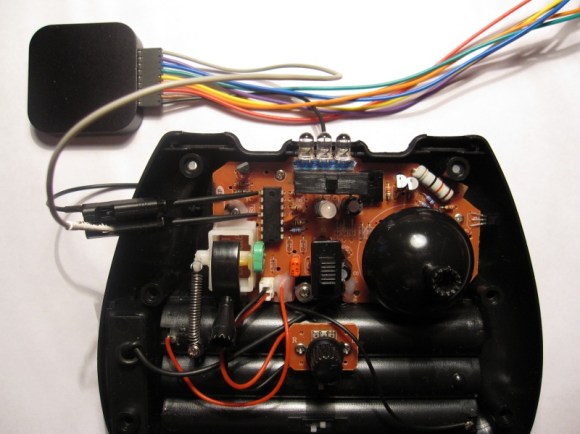
[Jim] used a logic analyzer to do some in depth analysis of the Syma 107G helicopter’s IR protocol. We’ve seen work to reverse engineer this protocol in the past, but [Jim] has improved upon it.

Instead of reading the IR output of the controller, [Jim] connected a Saleae Logic directly to the controller’s circuitry. This allowed him to get more accurate timing, which helped him find out some new things about the protocol. He used this to create a detailed explanation of the protocol.

One of the major findings is that the controller used a 3 byte control packet, which contradicts past reverse engineering of the device. There’s also a new explanation of how multiple channels work. This allows multiple helicopters to be flown without the controllers interfering.

The write up is quite detailed, and explains the reverse engineering process. It also provides great information for anyone wanting to hack one of these low cost helicopters. From the details [Jim] worked out, it would be fairly easy to implement the protocol on your own hardware.

[Staci Elaan]’s Awesome Portable Tesla Coils.

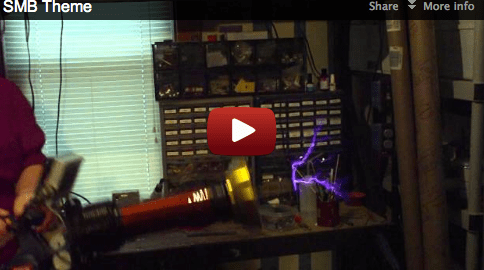
We stumbled onto [Staci’s] videos a while ago when we posted this big tesla gun. While it wasn’t the first portable coil we had seen, it was certainly an impressive implementation. In the comments we found [Staci] had already been making these for a while. Hers were big and small, had awesome modulation, and looked freaking cool too.

It also should be pointed out that [Staci] donates her coils to people when she’s done! Let me say that again, she gives them away to groups of people that could use them. That deserves some respect.

Unfortunately, [Staci] didn’t document her builds in great detail at the time. She has added some information recently though.   You can read about her first working prototype from 2006, or a slightly more modern one here.

Of course, the real fun is in seeing them work.

Continue reading “[Staci Elaan]’s Awesome Portable Tesla Coils.”