Very Easy 3D Scanning Software With ReconstructMe

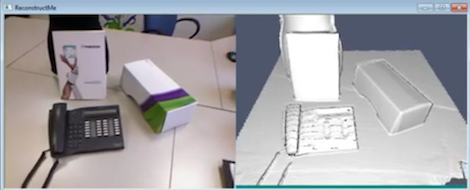
[Maxzillian] sent in a pretty amazing project he’s been beta testing called ReconstructMe. Even though this project is just the result of software developers getting bored at their job, there’s a lot of potential in the 3D scanning abilities of ReconstructMe.

ReconstructMe is a software interface that allows anyone with a Kinect (or other 3D depth camera) in front of a scene and generate a 3D object on a computer in an .STL or .OBJ file. There are countless applications of this technology, such as scanning objects to duplicate with a 3D printer, or importing yourself into a video game.

There are a few downsides to ReconstructMe: The only 3D sensors supported are the xBox 360 Kinect and the ASUS Xtion. The Kinect for Windows isn’t supported yet. Right now, ReconstructMe is limited to scanning objects that fit into a one-meter cube and can only operate from the command line, but it looks like the ReconstructMe team is working on supporting larger scans.

While it’s not quite ready for prime time, ReconstructMe could serve as the basis for a few amazing 3D scanner builds. Check out the video demos after the break.

Continue reading “Very Easy 3D Scanning Software With ReconstructMe”
Building Your Own Portable 3D Camera

diy-3d-camera

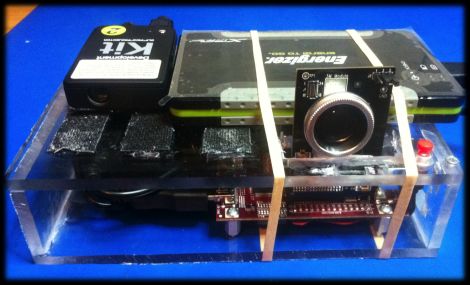
[Steven] needed to come up with a project for the Computer Vision course he was taking, so he decided to try building a portable 3D camera. His goal was to build a Kinect-like 3D scanner, though his solution is better suited for very detailed still scenes, while the Kinect performs shallow, less detailed scans of dynamic scenes.

The device uses a TI DLP Pico projector for displaying the structured light patterns, while a cheap VGA camera is tasked with taking snapshots of the scene he is capturing. The data is fed into a Beagleboard, where OpenCV is used to create point clouds of the objects he is scanning. That data is then handed off to Meshlab, where the point clouds can be combined and tweaked to create the final 3D image.

As [Steven] points out, the resultant images are pretty impressive considering his rig is completely portable and that it only uses an HVGA projector with a VGA camera. He says that someone using higher resolution equipment would certainly be able to generate fantastically detailed 3D images with ease.

Be sure to check out his page for more details on the project, as well as links to the code he uses to put these images together.

mot-salvaging

Tutorial Series Shows You Everything You Need To Salvage Transformers From Microwaves

Transformers certainly have a tendency to increase the cost of any project, especially if you need a large transformer to get the job done. Microwave ovens are great sources of free transformers, though they are not always in the shape required for your next build.

[Matt] put together three great tutorial videos covering the basics of salvaging Microwave Oven Transformers (MOTs), that anyone new to the process should watch before giving it a go. The first video covers MOT removal and disassembly, which is a time consuming yet easy process providing you follow [Matt’s] pointers.

The second video delves into transformer theory, and discusses how to achieve optimal performance when rebuilding an MOT or hand wrapping coils to fit your project specs. The third video in the series follows [Matt] as he rebuilds one of the salvaged transformers, documenting his pitfalls and successes along the way.

If you haven’t given much thought to salvaging MOTs, we definitely recommend taking a bit of time to watch the video series in full – it’s definitely worth it.

You can see the first video in the series after the jump – the rest can be found via the YouTube link above.

Continue reading “Tutorial Series Shows You Everything You Need To Salvage Transformers From Microwaves”

Snake-the-Planet Makes A Game Board Out Of Your Surroundings

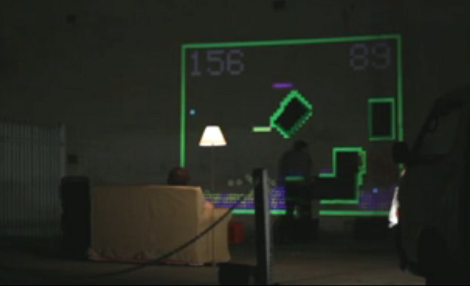
It’s Friday night and these guys are driving around town looking for a good spot to play a head-to-head game of Snake. It’s not that they need somewhere to sit (they travel with a couch and floor lamp for that purpose) it’s that they’re using a projector and camera to make a game out of their surroundings.

A white Mystery-Machine-style van has room for everything they need to make the traveling arcade happen. A mobile power supply provides juice to the camera and projector. To get started, the system takes a high-contrast black and white photo of the surface in front of it. Everything that appears below the white threshold becomes a wall on the game board, everything else is a playable area. Obstacles are formed by windows, doorways, pipes, signs, pieces of foam board the guys hang on a wall, and even your body if you stand in the way during scanning. From there the guys each grab a joystick and play the hacker-favorite game of snake.

After the break you can watch a description of how the system works. Continue reading “Snake-the-Planet Makes A Game Board Out Of Your Surroundings”

Using The Parallel Port As A Logic Sniffer

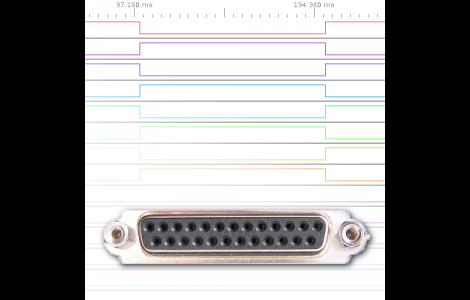
[Fernando] wrote in to share his take on building a logic analyzer. He’s using the parallel port to capture data and feed it to the display software of your choice.

The method depends on a custom kernel which alters the way the parallel port works. The kernel he compiled includes a method of intercepting the signals coming in from the hardware, passing that data to the /dev/parport* as it should, but also sending a copy to /dev/parportsnif*. It also creates a log file which is in the OpenBench Logic Sniffer format for easy use with various display software.

Of course this is easiest to use with a Linux system, but can also be run as a virtual machine under Windows. We’d plan on using a virtual machine within Linux as well since this is a custom kernel and will probably only see occasional use.

Simple Hardware And Python Drive This Splunk LED Meter

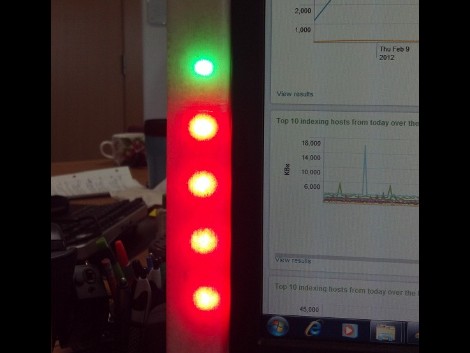
Want to monitor the company system without continually loading up the Splunk dashboard? It turns out that they’ve got their own Python package which makes pulling down data a snap. All [Rick] needed to do was hook up an LED meter as an external display.

It used to be that this would take a lot of wire and bit of soldering (or some special Christmas lights), but the advent of affordable LED strips has really taken the guess-work out of it. He’s using an RGB version acquired from Adafruit Industries. These strips are driven using SPI and multiple-colors mean you can display multi-dimensional data using one column. He chose to use a Teensy microcontroller, grabbing some plastic packaging for welding rods as the enclosure. These strips are extremely bright and to help soften the impact he added wax paper to the inside of the enclosure to act as a diffuser.

Looking for more projects that use strips like this one? They make fantastic addressable accent lighting for your home.

R2R Ladder Connects Multiple Buttons To One ADC Pin

If you’ve run out of I/O pins on a project and need a way to add user input you can find a slew of port expanders that work with various communications protocols like I2C and 1-Wire. But if you just want to add in some buttons without reaching for an extra IC you’ll love this hack. [John Boxall] shows how to add four buttons using one ADC pin.

The concept is nothing new. The buttons make up an R2R resistive ladder. When one of them is pressed, it completes the circuit for a voltage divider. The results are measured by the analog-to-digital converter of an IC to tell which button was pressed. The difficult part is calculating the resistor values. [John] is using eight resistors made up of just two different values. Every button and every combination of buttons has a unique voltage result which can be discerned by the chip. He even made a truth table so you don’t have to.

The example circuit seen in the video after the break uses an Arduino. But this concept is directly applicable to any microcontroller. And it should be quite easy to use an ADC interrupt to drive all of the button-read events. Continue reading “R2R Ladder Connects Multiple Buttons To One ADC Pin”