DIY Inkjet Printer Begs To Be Hacked

diy_inkjet

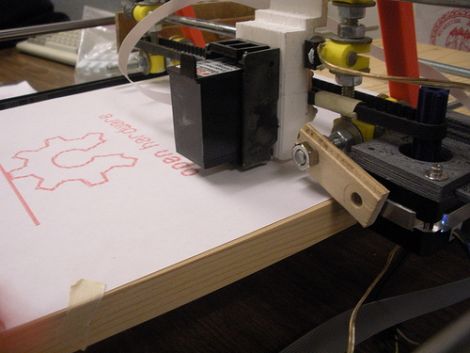
[Nicholas C Lewis, Patrick Hannan, Jared Knutzen, and Joy Markham], students from the University of Washington, have recently taken the wraps off a project which they have been collaborating on, a DIY inkjet printer. The group set out to construct a low cost, open source inkjet printer for personal use that utilizes standard inkjet technology. Their working prototype, pictured above, satisfies all of those requirements, making it an ideal device for the at-home hobbyist.

The printer was constructed from easy to obtain components such as steel rods and stepper motors, along with other parts that can be printed using a RepRap or similar machine. An Arduino Mega manages the steppers and repurposed print head, recreating whatever Processing-generated image it has been given.

The printer is quite a hit so far, and people are already talking about adapting the design to print on spherical objects (think EggBot), to create direct etch resist PCBs, and more. We think it would make a great direct to garment printer with just a few small tweaks.

Check out the short video embedded below to see the printer in action.

[via Make]
Continue reading “DIY Inkjet Printer Begs To Be Hacked”

Update: Laser-powered Auto Focus Assist Version 2

We don’t know if our feature from a couple of days gave [Adrian] a kick in the pants, or if he was just on target to finish is writeup this week, but he’s posted about version 2 of his laser auto focus assist project.

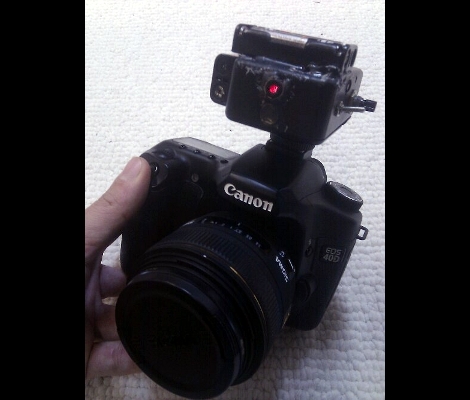
The original idea was to use an unfocused laser pointer dot to give his DSLR auto focus feature a kick in the pants since the built-in light doesn’t come back on when photographing moving subjects. The original version worked, but he had to operate the laser manually and the hardware was kind of spread out all over the camera.

The latest version (2.0) can be seen above, housed in a project box that mounts to the hot shoe and keeps everything together in one package. The laser operation is now automatic, coming on when the shutter trigger is depressed half way, or when the auto focus enable button is depressed. The controls on the project box include an on/off switch as well as a potentiometer which varies the intensity of the laser.

It looks like this won’t be the last version of the hardware that we see. [Adrian] covers a few outstanding problems in his post. Most notably, the laser light is still a bit too strong. At a recent live event, another photographer took issue with the fact that his images included the red splotch from [Adrian’s] diy hardware.

Fan Throttling For PS3 Temperature Control

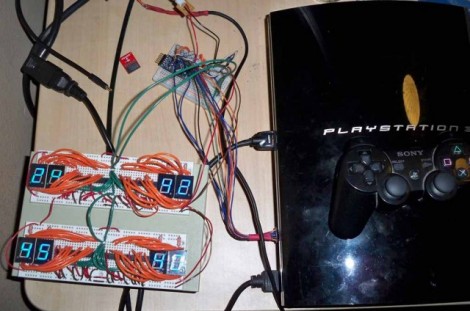
This setup will let you monitor Play Station 3 temperatures and throttle the cooling fan accordingly. [Killerbug666] based the project around an Arduino board, and the majority of the details about his setup are shared as comments in the sketch that he embedded in his post. He installed four thermistors in his PS3 on the CPU heatsink, the GPU heatsink, the Northbridge or Emotion Engine, and one in front of the air intake grate to measure ambient room temperature.

Above you can see the setup he used to display temperatures for each sensor on a set of 7-segment displays. The project also includes the ability to push this data over a serial connection for use with a computer or a standalone system.

The project is still in a prototyping stage. It works, but he likens the fan throttling to the sound of a car engine constantly revving. Future plans include smoothing out the fan speed corrections and scaling down the size of the hardware used in the system. We’d suggest doing away with three of the displays and adding a button that lets you select which set of sensor data you’d like to display.

[Thanks User]

Cube Solving Robot Shatters The World Record

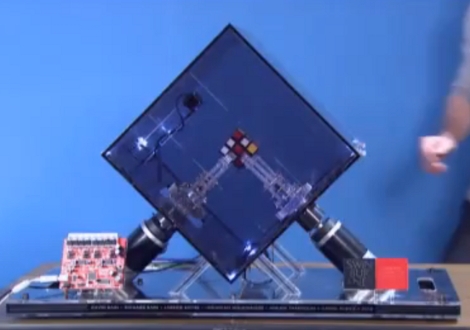
This cube-shaped bot just shattered the robotic Rubik’s Cube solving record by about 8 seconds. It did it in a blazing 10.69 seconds to best the old record of 18.2 seconds. There was immediate confusion here at Hackaday as some of us thought the record was actually around six seconds. And it is, for humans. That’s right, the human record holder completed a cube in 6.24 seconds… faster than a robot by almost four seconds. It’s surprising that we can still beat mechanized devices at some repetitive mechanical operations.

Take a look at the speed run shown in the video after the break. What strikes us is that the motions are incredibly efficient, and the bot is very quite. Compare that efficiency to CuBear, a solver that uses a different motor for each side of the cube. That one doesn’t need to grip the cube making us think it could beat this version if the firmware were quite a bit faster.

Continue reading “Cube Solving Robot Shatters The World Record”

EDWARD The Vehicle Of The Future

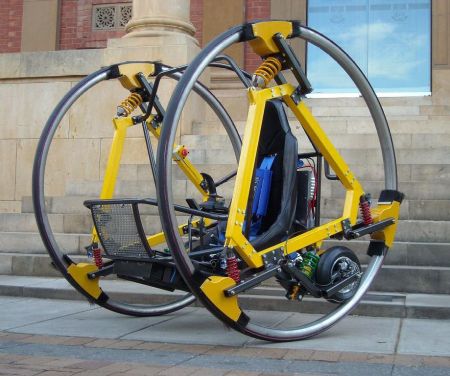
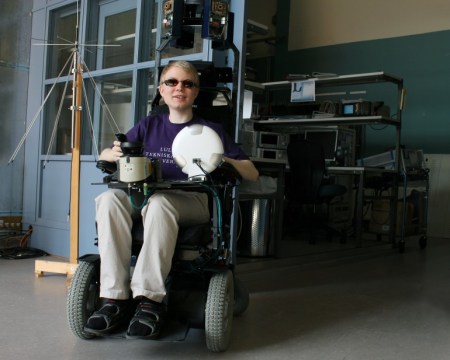
If there was a competition for coolest transportation device for the future, the diwheel would be at the top of the list with hover cars and teleportation. Over the past 3 years students at Adelaide University have been working on an Electric Diwheel With Active Rotation Damping or EDWARD.

EDWARD is an entirely electric diwheel, the operator is strapped into the bucket seat between the two large wheels with a 5 point harness and can control the machine with a gaming joystick. Full dynamic stability and slosh control allow the operator to maneuver the vehicle at up to 40km/hr, inversion control even allows you to drive upside down (if you are that way inclined). The next question is just where can we get one? Check out the video after the break for a demonstration of EDWARD in action.

Continue reading “EDWARD The Vehicle Of The Future”

Simple VGA Interface For Tiny FPGA Boards

fpga_vga_adapter

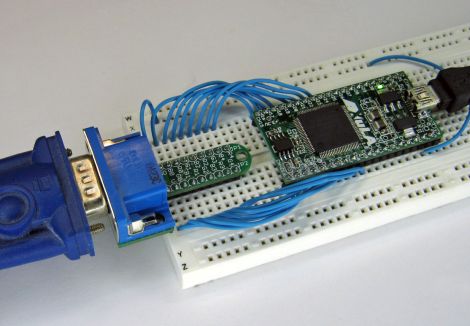
[devb] has been playing around with XESS FPGA boards for ages, and as long as he can remember, they have had built-in VGA interfaces. His newest acquisition, a XuLA FPGA board, doesn’t have any external parts or ports aside from a USB connector. He needed to get video output from the board, so he decided to build a VGA interface himself.

He prototyped a 512-color VGA interface board which worked just fine, but he thought it would be way too cumbersome to use for each and every project. To keep life simple, he designed a small PCB that integrates a VGA connector and all of the resistors he needed to get the signal from the FPGA. His boards plug directly into a breadboard, so only a handful of wires is needed to connect the FPGA to a monitor.

As you can see on his site, the adapter works quite well, allowing the FPGA to put out a crisp 800×600 image with little fuss. [devb] has also posted all of his design files on his site in Eagle format for anyone interested in replicating his work.