Keypad Input Scanning By A 555 Timer

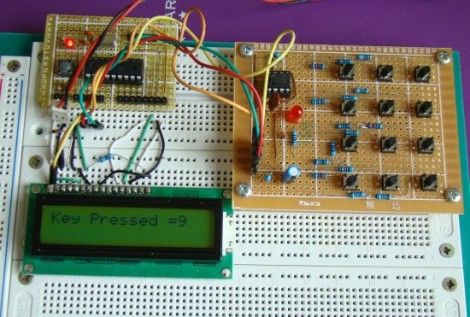
[R-B] designed a 555 timer circuit to scan a keypad. Keypads are common interfaces for small projects and require row and column scanning by a microcontroller. [R-B’s] setup allows you to reduce the number of pins used on the microcontroller to just two. One is an interrupt that is triggered when any of the buttons are pushed, the other reads the frequency from the 555 chip. Each button has its own resistance which alters the frequency of the 555. The microcontroller reads the frequency for 100ms using a timer. The number of timer overflows that occur during that period directly correspond to the button press (five overflows for the numeral 5, zero overflows for the numeral zero).

We usually debounce our button presses for 40 ms, this is more than twice that amount of time but still not a staggering difference. It does make us wonder if you will miss quick button presses? The only really way to know is to try this out yourself. Check out the video after the break and don’t forget to leave a comment with your own experiences in working with the circuit.
Continue reading “Keypad Input Scanning By A 555 Timer”

Cutting Out Your Own Breakout Boards

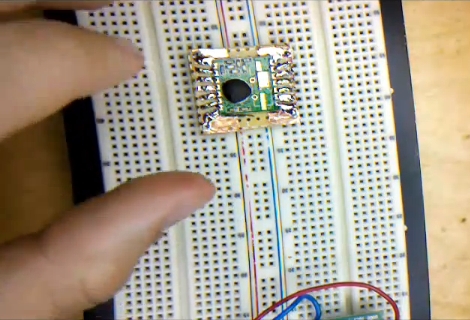
[Caleb] needed to use some surface mount components when prototyping. Instead of buy a breakout board he made one himself without doing any etching. The process he shows off in the video after the break uses copper tape to layout the traces for the board. It’s quite an interesting method which requires a sharp knife and a steady hand.

He used regular protoboard as a substrate and applied a layer of copper tape on the side without copper pads. From there he poked holes for the DIP pin headers. Now it’s time to do some cutting. [Caleb] removed the band of copper that would fall in between the pins of the surface mount device. He then tacked it in place with one dot of solder and drew the traces from the part to the pin headers. After removing the part he cut out the waste in between each line he drew with marker. What he’s left with is a set of thin traces that connect each pin of the surface mount component to the corresponding through-hole pin header.

This is very time-consuming, but then again so is soldering jumper wires to small-pitch components.

Continue reading “Cutting Out Your Own Breakout Boards”

DIY Ring Light Takes Its Cues From Fiber Optic Toys

the_ram_ring_light

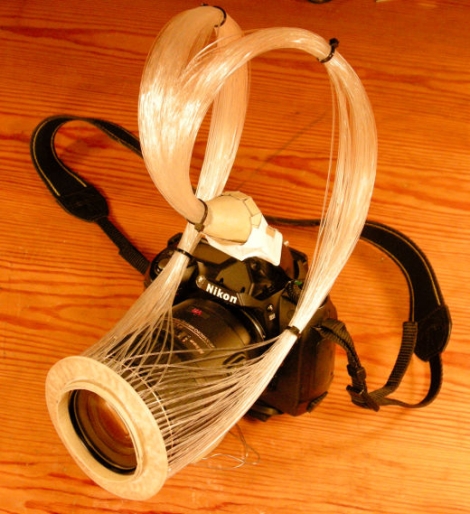
DIY ring light setups for DSLR cameras are nothing new around here. While most of them rely on an array of LEDs or a mirror-based light tube, [Wolf] had a different idea. He figured that since optical fibers are made specifically for transmitting light from one place to another, they would make a perfect medium for constructing a ring light.

Since he was using the camera’s built-in flash to power the ring light, he was able to provide a function that few other DIY ring lights do: proper flash compensation. Typically, a self-made ring light flashes at one set brightness, regardless of how much light is actually required to compose the image.

The construction was relatively simple, albeit time consuming. He procured a set of fiber optic cables that had been melted together into 150 small bundles, which he then glued to an acrylic ring that he fabricated. The end result isn’t the most aesthetically pleasing ring light we’ve ever seen, but it’s the pictures that matter at the end of the day. As you can see on his site, they speak for themselves.

Looking to build your own ring light? Check out a couple of other projects we have featured in the past.

Nintendo 3DS Teardown

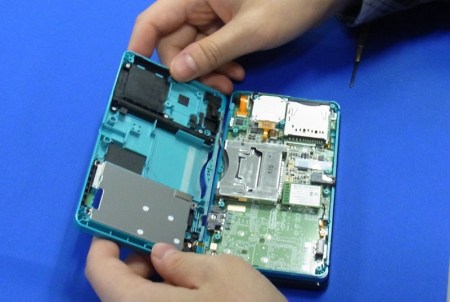
The Nintendo 3DS has been out for a couple days now (in japan) and the folks over at [tech on] were nice enough to do a teardown. Besides all the regular teardown goodies you can also get a good look at the 3DS’ 3D screen with a microscope. Turns out its a parallax barrier display which means that there are slits on top of the LED array to create a 3D effect without the use of special glasses. The rest of the hardware seems pretty standard, running an ARM based processor with some DRAM and NAND flash. Apparently the 3DS didn’t get much of an upgrade (downgrade?) as far as DRM is concerned because there are already examples of the 3DS running pirated games using a R4 card on youtube.

[via engaget]

Continue reading “Nintendo 3DS Teardown”

Xbox 360 Controller Mod For A Friend In Need

xbox_controller_external_button_mod

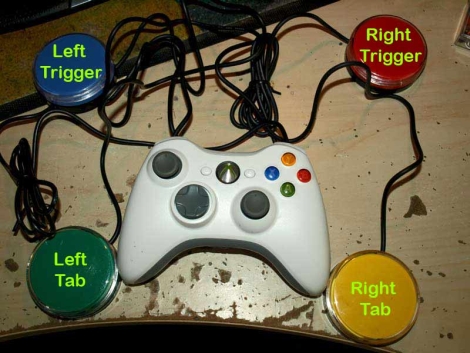
[Adrian] has a friend that, due to an accident, can no longer play Xbox games in the standard fashion. His friend is unfortunately unable to hold the game pad properly, and no longer has the manual dexterity to reach the shoulder buttons and triggers on the top side of his Xbox 360 controller. Being the good guy that he is, he set out to see what he could do in order to bring the joy of playing Xbox back into his friend’s life.

Inspired by the many different gaming mods he has seen [Ben Heck] construct, he pulled apart an Xbox 360 wireless controller and began to investigate how the four top buttons were activated. In no time, he had four large buttons wired to the PCB where the triggers and shoulder buttons once connected.

[Adrian] mentions that his modification isn’t quite complete, as he is going to mount the buttons into a board which can easily be laid on his friend’s lap or a table. The only thing we are left wondering is whether or not he was able to replicate the analog functionality of the triggers, or if they are treated as simple on/off switches. Either way, we are sure his friend will be thrilled!

Self-balancing Robot Keeps Things On The Straight And Narrow

self_balancing_robot

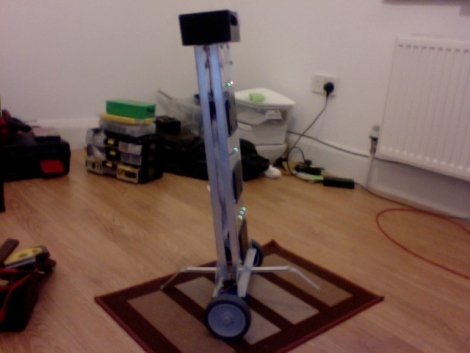
[James] designed a digital controller in MatLab, but he really wanted to see if it would work in a real-world application. To test out his linear quadratic regulator design, he decided to build a self-balancing robot. His goal was to built a robot that can keep its balance even when external forces are applied, all while staying in the same place.

Balancing on a pair of wheels is not all that simple, so his LQR controller allows him to weight the bot’s priorities towards keeping balance, focusing on returning to its starting position once equilibrium has been achieved. The results are pretty impressive as you can see in the videos below.  The robot is easily able to attain its balance once powered on, and it has no problem remaining stable even when pushed or when objects are placed on top of it.

[James] has plans for several enhancements in the near future, including remote control via Xbee modules as well as autonomous navigation utilizing sonar or possibly a camera. We’d totally love to see it sporting a Kinect sensor in a future revision, but that’s just us!

Keep reading for a couple of demo videos he put together.

[Thanks, Nicholas]

Continue reading “Self-balancing Robot Keeps Things On The Straight And Narrow”

LED Artwork Disappears Right Before Your Eyes

take_a_picture_demo

If you walked into an art gallery and saw nothing but blank canvases lining the wall, you might be compelled to demand your money back, or assume that you had discovered the world’s laziest artist. If this gallery happened to be displaying work by [Brad Blucher and Kyle Clements] however, you would be mistaken.

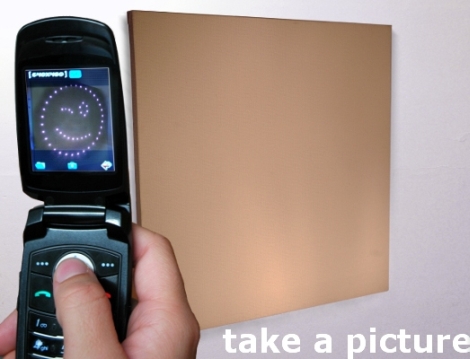
These two artists have collaborated to create a series of works titled, “Take a Picture“. Each picture they have built is constructed to look like an empty canvas when viewed with the naked eye. If you were to take a picture of the canvas with your cell phone or digital camera however, a whole new world would open up in front of your eyes. Their artwork is constructed using infrared LEDs, which cannot be seen with the naked eye, but are visible to nearly any CMOS or CCD sensor on the market. The images range from simple smiley faces and objects to abstract geometric shapes.

It’s a very simple, yet novel approach, and we happen to think it’s pretty cool. The artists have not said what they have planned for this project in the future, but we’d love to see it expanded using larger LED arrays to display higher-resolution images, or even short movies.

Keep reading to see how they went about creating these works of art as well as a promo video demonstrating the effect.

Continue reading “LED Artwork Disappears Right Before Your Eyes”