Keep Your Kids In Line With A Time Clock

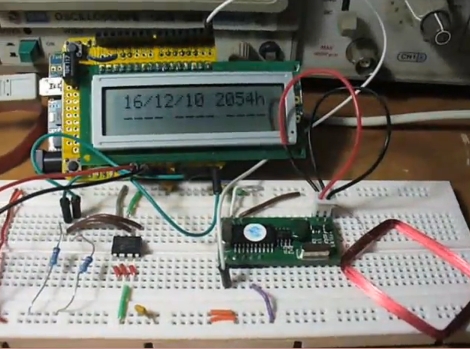
When the cat’s away the mice will play, but a least you’ll know when they came home if you use this time clock. It’s called the Kid-e-log and [John Boxall] developed it to help a friend who wanted to keep track of their teenage children’s after school activities while they were still at work. He figured having them punch a time clock would at least let you know if they came straight home as they were supposed to. An RFID tag was issued to each (no, they didn’t implant the tags) and used to record the time. To keep fraud to a minimum the hardware has a battery back-up for its real-time clock, and the tag read events are stored to EEPROM for retention between power cycles. This doesn’t prevent common tricks like taking the reader with you, or sending your tag with a sibling, but it’s a start. See it in action after the break.

Continue reading “Keep Your Kids In Line With A Time Clock” →

Lifehacker’s Top Ten Of 2010

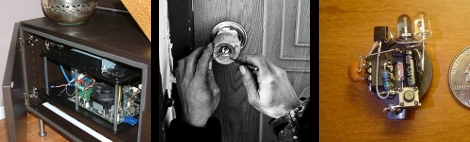
The end is near and Lifehacker is looking back on their favorite how-to articles from 2010. We found at least half of these interesting, including the hidden HTPC, lockpicking, and micro-TV-b-gone showcased in the image above. But you can also find tips on using your WRT54G router, stacking malted beverages, and making things glow through chemistry. If your heart goes out to our plague carrying house-mates there’s a no-kill mouse trap. They’ve even included a hack to add a USB port to your car… an article which we covered back in 2009. Enjoy!

Santa-pede Challenge: The Conclusion

At the end of October we announced the Buy, Break, Build series kick off with “The Santa-pede Challenge“.  The goal was to get your hands on one of those annoying dancing santas, tear it apart, then use its parts to build something that walks. We got our hands on some cool prizes and even got [Phillip Torrone] to be a guest judge. Join us after the break to see just what we came up with and maybe have a few laughs.

Continue reading “Santa-pede Challenge: The Conclusion” →

Making MSATA Work With Mini PCI Express

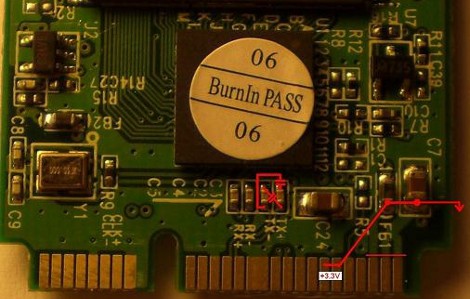
[Trucki] wanted to upgrade the internal storage on his JooJoo. There’s an mSATA connector inside but devices that use that protocol are hard to come by and when you do they’ll cost you and arm and a leg. He knew he could get solid state drives cheaply that use the mini PCI Express standard, which is mechanically compatible with mSATA. So he set out to alter a mini PCI Express device to work with the mSATA protocol. This entails swapping the transmission lines and rearranging the voltage traces on the connector. To handle the TX- and TX+ lines he desoldered their decoupling capacitors and realigned them to trade their signals. For the 3.3V lines he had to cut the feed and solder jumper wire to the correct pads.

This is some nice work which let him add a 32 GB drive for just sixty Euros. Since the device only comes with a 4 GB SSD an upgrade is almost mandatory if you’re planning to install an alternate OS on the Joojoo.

If You’re Photographing And You Know It Clap Your Hands

If you’ve ever tried to take pictures of yourself you’ll know that it can be a pain. It’s especially hard to get that perfect shot of your godly features when you’re out of breath from sprinting across the room. OK, yes, they have remote controls for that. But what if you lost your remote or you just don’t want to have to carry it? [LucidScience] put together a sweet, um, “hands free” alternative.

Essentially this hack emulates the IR signals sent by a Nikon remote, either to take a picture right away or to take time lapse photographs at regular intervals. We’ve seen a similar time lapse remote using an arduino before and a really thorough one using an AVR, but they don’t take the same approach as [LucidScience]’s design in terms of monitoring a microphone input for triggering. The project includes several status LEDs and adjustments for ambient noise and triggering, and it can be mounted to the camera body. We wonder how many of the Nikon’s features could be controlled using clap encoding, and how detailed your timing would need to be to have a kind of hand-made (get it?) pulsetrain syntax.  You’d probably need to have world record clap skills.

Check out the demo vid after the break.

Continue reading “If You’re Photographing And You Know It Clap Your Hands” →

Domino Clock Uses An Electromechanical Display

This clock concept uses big dominos with changing faces to display the time. As far as we can tell they haven’t made it through to a finished product yet, but we loved the explaination of the engineering that went into the prototype. After the break you can watch [Eric] explain how he accomplished the design requirements of a slowly changing digit that uses no power to keep its state, which also uses low-power when changing state. To accomplish this he designed a flipping circle that stays put in both the white and black positions once set. When it’s time to change the digits, a coil is energized to push against a magnet in what he calls a single poled motor. Whatever the name, we want to build one ourselves!

Continue reading “Domino Clock Uses An Electromechanical Display” →

Inkjet Print Head Made With A 3D Printer

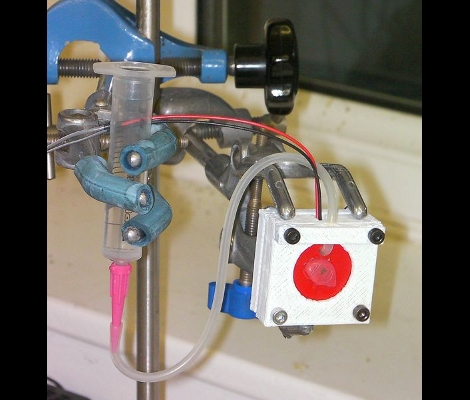
This is an inkjet print head made using a RepRap. The manufacturing process is both simple and ingenious. It uses a vibrating piezo buzzer to pump printing liquid through a tiny nozzle. The red disc seen above is exactly the same diameter as the piezo that resides behind it. There is a hole offset from the center to feed ink in between the two discs. Take a look at the test footage after the break.

To make the nozzle a hole was cut in the plastic disc, then a pin inserted and the whole thing was covered with hot glue. The next step was to remove the pin and shave down the glue until the narrow aperture is open. [Adrian Bowyer] is still in the testing phase for this assembly, but once he gets the bugs worked out he plans to test it with a heating element so that it can print using wax and other materials that are liquid when hot.

[Vik] tipped us off about this one after seeing the printable transistors from the other day.

Continue reading “Inkjet Print Head Made With A 3D Printer” →