Light Bulb Form-factor Computer

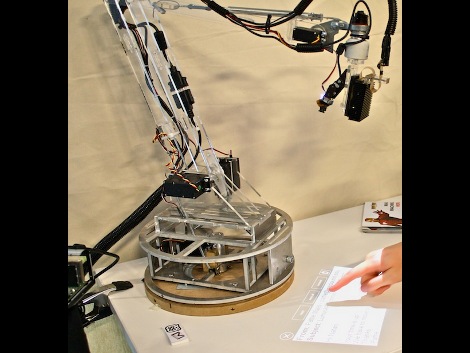
This computer can be mounted in any standard light bulb socket. It uses a pico projector combined with a camera to generate a touch display wherever you shine it. The photo above and the video after the break show the bulb in a motorized lamp arm but that’s just smoke and mirrors, the bulb itself is the core concept. We think there’s real potential for home-built versions. We’ve seen touch displays similar to this that mount on the side of a laptop, but why have the computer around at all? Ditch the USB connection for wireless and have it connect to your home server for processing power. It becomes a perfect solution for places that aren’t traditionally computer friendly. For instance, that kitchen computer you don’t want to touch with dough-encrusted hands becomes washable when the display is projected on a cutting board. Continue reading “Light Bulb Form-factor Computer” →
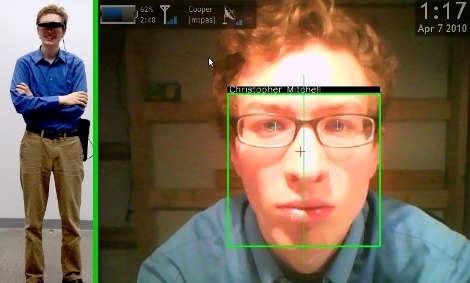
Head-up Uses Facial Recognition And Augmented Reality

Scouter is a facial recognition system and head-up display that [Christopher Mitchell] developed for his Master’s Thesis. The wearable device combines the computing power of an eeePC 901 with a Vuzix VR920 wearable display and a Logitech Quickcam 9000. The camera is mounted face-forward on the wearable display like a third eye and the live feed is patched through to the wearer. [Christopher’s] software scans, identifies, and displays information about the people in the camera frame at six frames per second.

We can’t help but think of the Gargoyles in Snow Crash. This rendition isn’t quite that good yet, there’s several false positives in the test footage after the break. But there are more correct identifications than false ones. The fact that he’s using inexpensive off-the-shelf hardware is promising. This shouldn’t been too hard to distill down to an inexpensive dedicated system.

Continue reading “Head-up Uses Facial Recognition And Augmented Reality” →

Android Development 101- Part 4:Advanced Database/GUI Code And DDMS

In this tutorial we are going to cover some advanced database code as well as tie in to some more advanced GUI techniques. We left off on the last tutorial showing you how to insert and select data to/from the database as well as make a table. What we need now is to be able to delete data if it is not needed and update it if we entered it incorrectly. We will tie these abilities in with some more advanced functionality utilizing a long press on the screen for delete and for updating we will just press the data we want to edit.

Continue reading “Android Development 101- Part 4:Advanced Database/GUI Code And DDMS” →

Hardware Hack 3D, Software Still Needed

[youtube http://www.youtube.com/watch?v=_k7Vc10YsDk&feature=player_embedded%5D

If you’re on the fence about 3D TV and related technologies [Anton B.] might be able to help you decide. No, he’s not going to shove pamphlets in your face and explain why its the wave of the future. Rather, by showing the hack-ability (its a word) of 3D shutter glasses. A simple bridge of wire across specific contacts can ‘trick’ the glasses into only displaying only the left or right picture.

Wouldn’t that make it just a regular 2D TV again? Yes, that’s the beauty of it. Person A could be watching a completely separate movie pr0n than person B, but all on the same TV. Or two people could be playing a video game, without dividing the screen in half. The only problem is the current lack of software that can interlace movies/games, who’s up for writing some C++ this weekend?

Jailbreak Your Apple Products

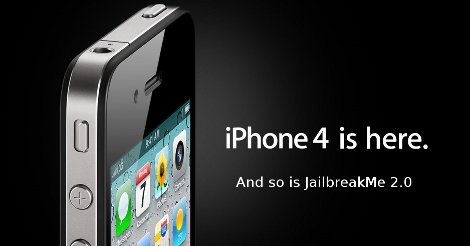
It’s finally here, after being declared completely legal to jailbreak your iPhone, JailbreakMe 2.0 is released.

Now, any and all iDevices can be jailbroken by simply visiting the URL above; however, before you start your devious adventure in the land of apps not approved by big brother Apple, there are a few issues.

The webpage is being slammed at the moment so you’ll have to wait. There is a chance the jailbreak will not work, and you could brick your phone. MMS and Facetime are having complications after jailbreaking. And finally, carrier unlock still needs to be done with ultrasn0w.

But beyond those small stepping stones, jailbreaking is just a touch away.

Doorbell Combo Lock Can Open Your Garage Door

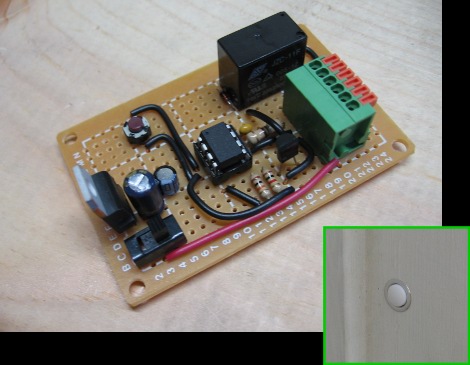
Sometimes I get enough away from writing about other people’s accomplishments long enough to actually do my own hacks. Most recently I developed a combination lock that opens the garage door. The idea isn’t original, it is based on [Alan Parekh’s] button code project, but I did develop my own hardware and software. A four digit code is entered by pressing the button a number of times for the first digit, and waiting for a flash of an LED inside before moving on to the next digit. If the correct code is entered the door opens.

My version centers around an ATtiny13. I originally downloaded [Alan’s] code in hopes that I could port the PIC firmware over pretty easily. Unfortunately it was written in BASIC so I just took what I knew about the interface and wrote my own program. I developed on an ATmega168 so that I would have no trouble running out of programming space, and was able to optimize my code down to 964 bytes to fit on the tiny13.

The hardware is quite simple. I purchased a lighted doorbell from Home Depot and swapped out the light bulb for an LED. I choose this because the doorbell mounts in a 5/8″ hole in the trim of the garage door and is easily overlooked. I’m quite happy with the results, and if you want to play around with the idea, you can easily build the circuit on a breadboard and use another LED for the load rather than including a relay. Hit the link at the top of this post for the schematic, code, and build images.

Update: Custom Cellphone Induction Charging

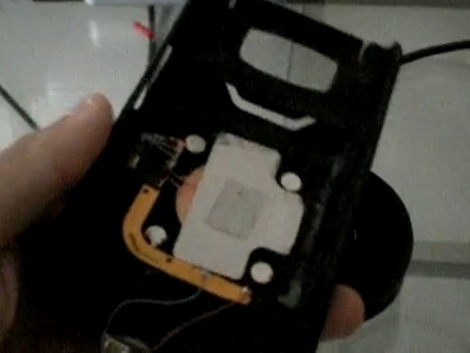
This is a custom back plate with induction charging circuitry that [Derek Hughes] build for his HTC HD2 cellphone. When we checked in with him last week he showed us how to add an inductive charger without voiding the warranty but it wasn’t very pretty because the stock back plate blocked the inductive field and couldn’t be used. The solution he came up with will work with any device if you want to put some time into the build.

He took two different aftermarket cases; one fits his cellphone and the other is a BlackBerry case meant for housing a credit card. After cutting a hole in the back of the cellphone case he epoxied the credit card holder in place, smoothed the seam with Bondo, and repainted. Not only does the charger fit in the credit card case, but there’s still room for a credit card. [Derek] also measured the magnetic fields around the circuitry and found they will not damage the magnetic strip on that American Express Black you’ve been keeping on you. In the video after the break he mentions the last step in finishing this case will be to locate a 90-degree USB plug as the current connector is a bit of an eyesore.

[youtube=http://www.youtube.com/watch?v=DgNOqJBSKmQ]