More On Wave Overhangs For 3D Printing

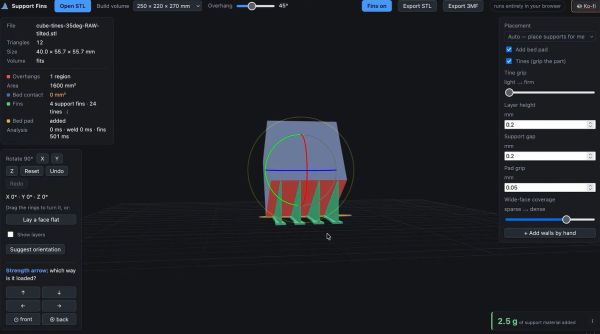
We’ve heard of wave overhangs before. It is a new technique for printing horizontal overhangs with no supports. Building on some other techniques like arc overhangs. The idea is to teach the slicer not to try to draw overhangs in the middle of free space. Instead, when the slicer realizes there is a horizontal overhang, it tries to “grow” the overhang from the main part. You can see an overview in the video below.

For example, imagine printing a letter ‘T’ vertically. The stem of the T is no problem, but when you try to print the arms it will normally need support. But if you could just print the arms starting at the stem with slight overlapping, the arms could grow as they hang onto either the stem or the last overhang line.

That makes sense, but it only works for very simple cases. Arc overhangs can fill more complex cases, but suffer from little dimples at the center of each arc. The realization for wave overhangs is to replace the arcs with waves as you would see in a pond. The waves diffract around holes and corners.

Perfect? Not quite. They are still experimenting with settings, but there seems to be some increase in warping. If you want to experiment, you can download a fork of Orca and contribute your results to the community.

We looked at this technique earlier, but we haven’t seen much about it in practice yet. Let us know in the comments if you’ve tried it and how it worked for you. There are more details in the paper on the subject, or you can jump right to the software.

Continue reading “More On Wave Overhangs For 3D Printing”

Laser Layers For (Almost) Isotropicly Strong Prints

If there’s one defining factor about 3D printing you have to account for when you’re making a design, it’s probably layer adhesion. Sure, there are a lot of factors to consider, but having the z-axis of your part dramatically weaker than x- and y- is a pretty big deal in a whole lot of applications. [I Changed a thing] changed a thing to fix that — namely, he changed his 3D printer by strapping a couple of lasers to it. That’s the kind of hack we like to see!

What the lasers are doing is a very simple idea: they’re pre-melting the last-laid-down-layer just under the nozzle so that molten plastic is meeting molten plastic to create a much stronger joint than you get when you extrude onto an already-cold layer. The second layer keeps the hotspot warmer longer, which also helps the bond. The resulting parts are not purely isotropic, but he’s getting breaking strain along the z-axis of ABS that’s up to 94% of what he’s measuring in the x direction, while PLA still rates at 77.9%. That’s compared to 60% and 41%, for un-lasered samples, respectively. If you watch the video, you’ll get all the details for the printing process and can see more test data.

These lasers look like a game-changer, but their mass might slow down the fast coreXY printers that are so popular these days. If you don’t want to slow down, remember that changing your layer patterns can boost a print’s strength on its own.

Thanks to [Josh Pensel] for the tip!

Continue reading “Laser Layers For (Almost) Isotropicly Strong Prints”

Getting Back Into Resin Printing: First Results

When we last left off, I had just set up a new SLA resin printer and was on the verge of doing the initial round of printing to see just how resin printing in 2026 compares to way back in 2020. Surely SLA printing had to be easier and less fussy than it was in 2020?

During these weeks of printing, setting up printers and taking a gander at the various workflows that certain printers and their manufacturers try to push you into I have both produced a series of not too shabby prints and some delightful spaghetti. I also flipped a few proverbial tables and formed some strong opinions on 3D printing workflows, of which some can considered to be family-friendly.

Without further ado, let’s get into some updates, a bit of ranting, and even some printing results.

Continue reading “Getting Back Into Resin Printing: First Results”

Lighting 3D Printed Parts On Fire For Science

Although lighting 3D prints on fire is rarely the intended outcome, it’s possible that said print will at some point in its future come into contact with either an open flame or a significant source of heat. Once that happens, what will be the result and how worried should one be? This is basically the excuse behind [Maker’s Muse] recent decision to light some 3D prints on fire.

Crispy 3D printed combat robot. (Credit: NHRL)

Materials exposed to an open flame in this experiment included various types of PLA, PETG, ABS, ASA, TPU and PEBA. Since PLA filaments have a significant amount of carbon in them it’s little wonder that these burned quite readily, though an interesting difference was immediately visible between an Elegoo PLA+ test cone and a Prusa Galaxy Black PLA cone. The latter required a blow torch to properly ignite, after which it burned rather hot whilst melting, unlike the dirty yellow flame of the PLA+.

So-called ‘high temperature’ PLA (HTPLA) seems to actively resist burning, self-extinguishing after a blowtorch treatment. Just these few samples of PLA already gave very different results, with very likely the additives being the defining factor since pure PLA is easy to burn as a way to dispose of it somewhat cleanly.

Moving on, black PETG didn’t really want to ignite, while ABS and ASA absolutely love to burn with a sooty yellow flame. HIPS was also tested, burning in a similar sooty manner as well.

Of all the materials tested, TPU was the least flammable with even the blowtorch not able to start ignition and only melting the sample. Foam TPU did however burn the most aggressive, followed by ABS, ASA and HIPS. Overall PETG and regular TPU seem to be your best bet if you do not want your 3D print to turn into a happily burning candle and potentially a general fire hazard.

Continue reading “Lighting 3D Printed Parts On Fire For Science”

Is Manual Filament Tuning Still Worth It?

In this era of consumer-grade FDM printers that have automatic bed levelling, automatic pressure advance tuning, automatic temperature regulation and so on buttoned away behind bullet-proof presets and automation, something as archaic as manual filament tuning does seem a bit out of place. Unless you’re running that hot rod Voron FDM printer, does it make sense to ‘waste time’ with manual tuning your off-the-shelf FDM printer? In a recent video [MandicReally] argues that it still makes sense to unlock more performance.

Up front it’s made clear that these auto-tuned configurations are perfectly fine for the average user, who will be perfectly happy with something like a ‘generic PLA’ preset combined with whatever auto-configuration the printer did. That said, not every filament is the same, nor is each heating element, nozzle and feeding system. In that sense it can be worth it to take a deeper look.

In the video basic aspects like preparing the material, such as properly drying, are looked at, before running through tests for temperature, flow ratio and rate, pressure advance, retraction speeds, material shrinkage etc. before doing a test between such a tuned profile versus a generic preset for ASA filament.

Although the difference isn’t night and day, the tuned profile was faster due to less conservative settings and had better accuracy on the final print due to taking the target FDM printer’s performance into account. Even if not something that the average hobbyist would be interested in, if you’re doing something like production runs with FDM, this might be something you’d want to look at.

Continue reading “Is Manual Filament Tuning Still Worth It?”

Continously Extruding 3D Printed Tubes With Compressed Air

[Jan] of [Roetz 4.0] has a unique approach to multi-material 3D printing: he’s designed an extruder which takes two different materials and extrudes one as a shell around the other. This opens up some interesting possibilities, such as a conductive filament surrounded by an insulating shell; [Jan], however, didn’t have an immediate use for the process, so he moved on to a related technique: extruding plastic tubes with a compressed-air core.

The extruder he used for this was a variation on the dual-material extruder; it takes in two strands of filament, melts them, and extrudes them as a shell around the outlet of a compressed-air line, which was controlled by a high-precision pressure regulator. During testing with PLA, it seemed capable of extruding airtight tubes of filament, though it had a tendency to blow bubbles and form tubes with inconsistent diameters. The low thermal conductivity of the stainless steel extruder also proved problematic; coupled with the cooling effect of the compressed air, filament sometimes solidified inside the extruder.

[Jan] found it almost impossible to get consistent results using only pressure-based control; as the layer of molten plastic around the air gets thinner, it provides less resistance to further ballooning, leading to continuous expansion until the bubble bursts. Controlling the volume of air extruded provided much more consistent results, and in a second video, he built a peristaltic pump to do just that. He also switched to using TPU filament, which greatly improved layer adhesion. When inflated with compressed air, the finished TPU structures expanded slightly, though there were still air leaks. The results look promising, and TU Darmstadt has already carried out some research in this area.

In a separate research project, we’ve seen a similar multi-material co-extrusion approach used to print pneumatic channels. For more on the history of [Jan]’s multi-filament extruder, check out his Minuteman printer. Continue reading “Continously Extruding 3D Printed Tubes With Compressed Air”

A man's hands are shown holding a broken 3D-printed hook. The hook has a loop and hook, in a number 9-shape. The hook portion has broken, exposing carbon fibers.

Strengthening 3D Prints With A Carbon-Fiber Epidermis

As strong and light as carbon fiber-epoxy composites are, the same can’t always be said of carbon-fiber reinforced 3D printer filaments. Of those that do improve over stock filament, the best performance comes from long, continuous strands, but the printers that can embed these are quite expensive. [MagicLAG], looking for a cheaper method, made something even stronger: prints reinforced with subsurface carbon-fiber cloth.

They tried a few other methods first, including pausing the print and manually embedding carbon fiber strands, ironing strands into the finished part, and ironing carbon fiber cloth into the bottom layer. For the main method, though, he printed the test part in three pieces: a core part, and two outer shell layers. Between the core and the shell is a small gap, into which carbon-fiber cloth can be epoxied. Under good conditions (not using quick-setting epoxy), this mostly preserves the outer surface and dimensional accuracy.

To test the various strengthening methods, [MagicLAG] printed hooks and tensioned them on a load cell until failure. None of the methods using single-stranded fiber showed any improvement; the fiber simply bent and let the surrounding plastic break. As a control for the epidermal cloth parts, they printed shells and cores and epoxied them together. These controls performed better than the standard parts, but not nearly as well as the carbon-fiber cloth composites. With only a few layers of cloth, these more than tripled the yield strength of the basic hook.

If you’d rather use a carbon-fiber filament, the type of plastic matters; carbon fiber makes PLA, at least, weaker. Regardless of form, some caution is called for whenever handling carbon fiber, since it seems to show some asbestos-like effects.