Voicebox FX Is A Blueprint For CircuitPython I2S Audio

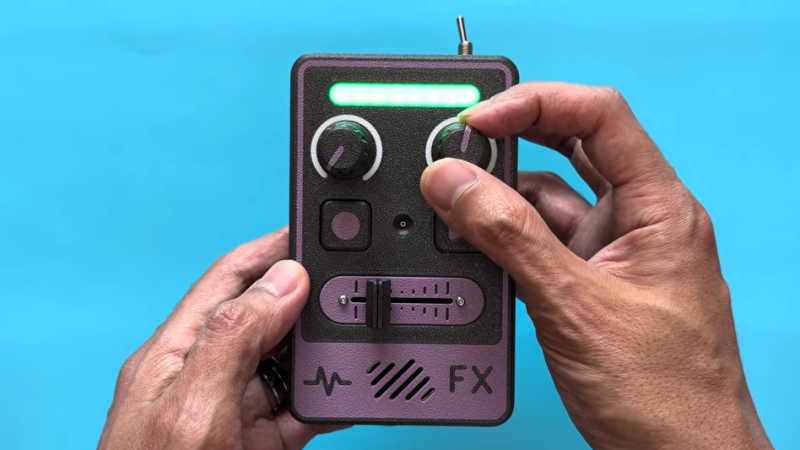
[Adafruit]’s Voicebox FX gadget is a fun, well-documented project that serves another useful purpose: being a fantastic reference design for audio on CircuitPython, with I2S audio components. Be sure to check it out if you have a project that involves any of that and could use a few pointers, or if you just want to jog a few ideas loose.

I2S (Inter-IC Sound) is a protocol aimed squarely at moving audio data between components as digital signals. Our own [Jenny List] can tell you everything you need to know about I2S. It’s a relatively simple interface that is not at all fussy about actually being used for audio, and that has led to it being put to some unusual uses.

The Voicebox FX uses an I2S microphone, an I2S amplifier, and an RP2350 microcontroller to record and play sound as well as offer a variety of effects controlled by physical inputs. It’s all wrapped up in a slick 3D printed case, and while it’s a fantastic reference design, it looks like a fun toy in its own right.

Continue reading Voicebox FX Is A Blueprint For CircuitPython I2S Audio”

Take Tool Photo, Generate Custom Gridfinity Bin

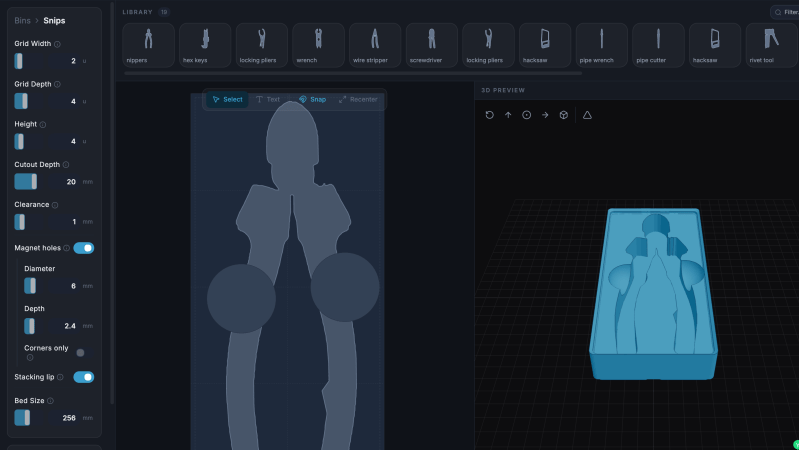
What if the organization and storage benefits of tool shadowing could be had and improved with a modular, semi-automated process? Tracefinity attempts that by generating custom Gridfinity bins from photos of tools, and has quite a few nifty features that are worth a look.

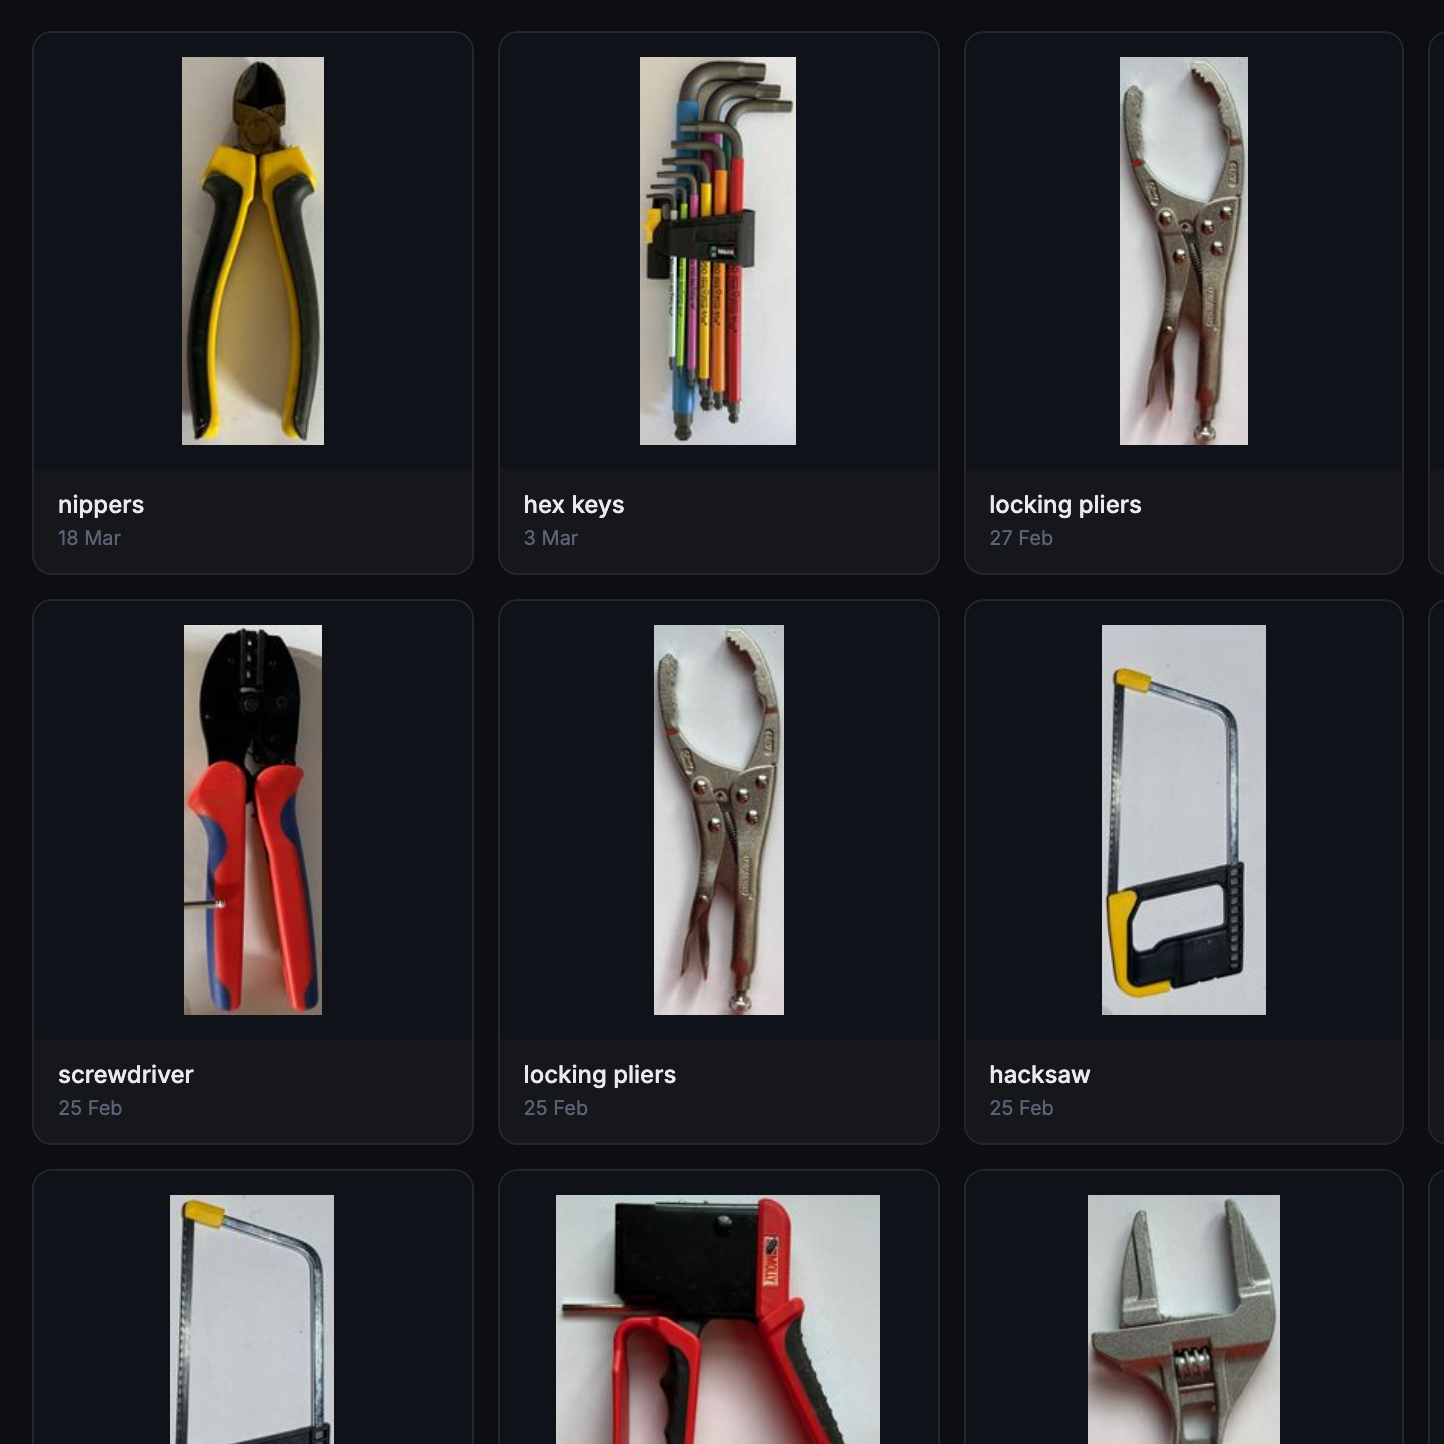
Maintaining a library of tools makes it easy to create project-based custom layouts.

The basic workflow is this: place one or more tools on a sheet of paper, take a photo, then upload the photo and have the system trace and save the outline and add it to a private tool library. When one is ready to create some bins, use the library of saved tool outlines to generate custom Gridfinity layouts.

If you’re unfamiliar, Gridfinity is a modular system of standardized bins and baseplates designed with 3D printing in mind, making it an ideal match for highly-customized organization tasks and a particularly natural fit for a tool-tracing system like this one.

The idea of taking a photo of a tool and generating a custom bin is a compelling one, and a couple years ago we covered a project that did just that. Tracefinity seems like a natural evolution of the idea, and includes handy features like easy design adjustments, optional magnet holes, and we really like the concept of a tool library from which individual tools are scanned once then later selected to create specific, project-based layouts.

Tracefinity takes advantage of new software capabilities like machine learning to improve and streamline the tracing process, but that doesn’t mean it relies on any external services. It can be entirely self-hosted and by default uses a local, CPU-friendly object detection model for tool tracing. There is an option to provide a API key to use Google Gemini instead, but it’s not required. It can come in handy for especially complex tool outlines or dealing with non-ideal source photos, however.

Straight Talk On 3D Printing Footwear At Home

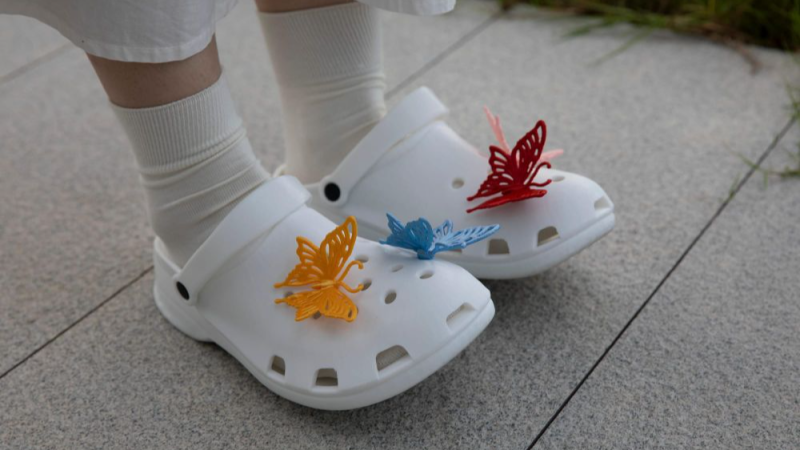
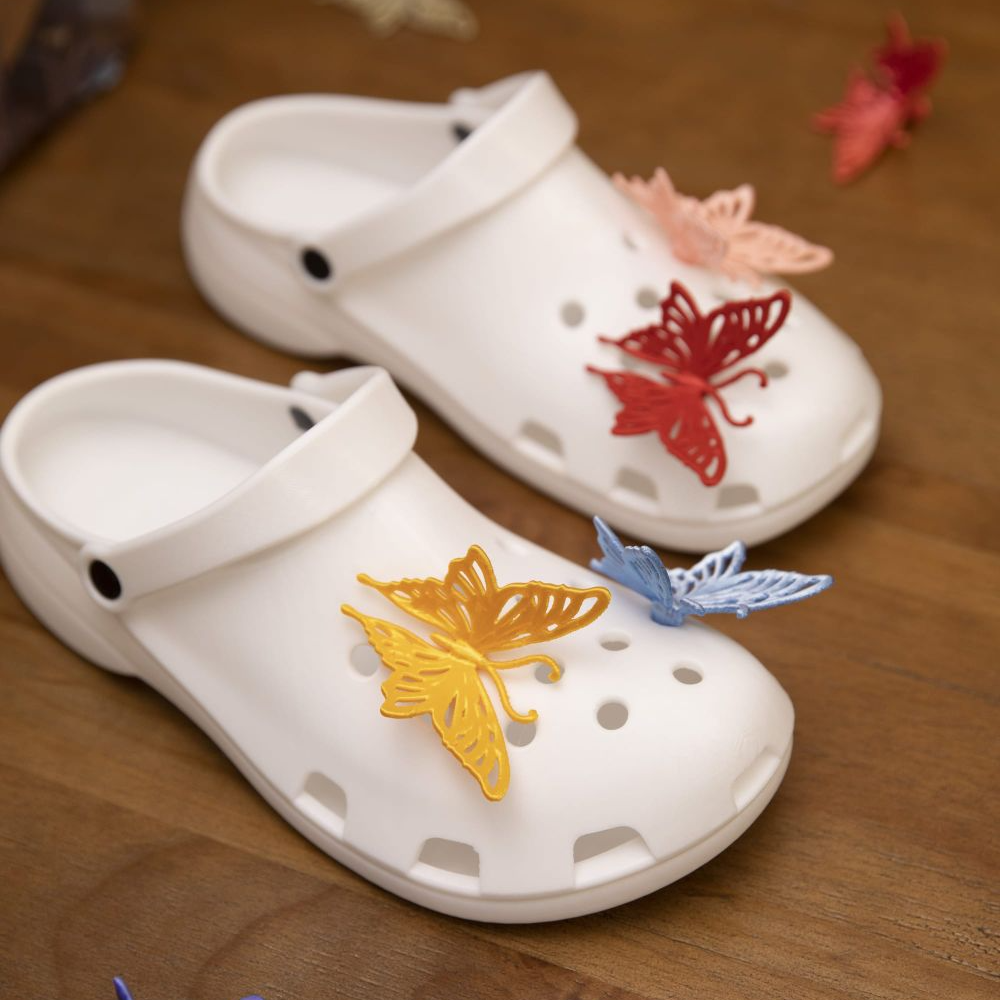
Printed footwear is an intriguing idea, but as far as projects go it is somewhat more complex than it first appears. This guide to 3D printing your own clogs not only provides a solid process, but also acts as a list of the challenges and pitfalls involved. After all, a piece of footwear is actually a fairly large object. Failed prints can be costly and time-consuming, so a guide like this is a valuable resource.

First of all, a 3D printer that can handle multi-material printing is called for. The footwear itself will be printed in TPU 90A as a sweet spot for hardness, but the print will require supports and those supports will need to peel away cleanly. The solution is a shoe printed in TPU with a rigid support structure of PLA. Using two different materials in the same print with anything remotely resembling efficiency calls for either a dual-nozzle print head, or a multi-toolhead printer.

3D printing one’s own clogs can be rewarding, if not necessarily cost-effective.

Here we want to take a moment and say that while the guide itself suggests PETG is also a suitable support structure, we suspect this might only be true for the exact filament formulations used in the guide. The safer approach is to use PLA. Why? As we’ve seen in other tests, PETG has been observed to stick extremely well to flex filaments in general, whereas PLA doesn’t really want to stick to anything other than PLA. The exact formulations of TPU and PETG used in the guide might be compatible with one another, but in general we recommend sticking to PLA as a rigid support for flexible filament.

Assuming a capable printer and suitable materials are nailed down, one also needs to worry about keeping the TPU dry. It is very sensitive to moisture, which directly affects print quality. You’ll also need to dial in the settings — a gyroid-patterned infill of 15% provides the right amount of “squish”, which is most effectively fine-tuned by changing the infill pattern rather than the density.

Is it worth the time and effort and filament cost to print one’s own pair of slip-ons versus simply buying a pair of Crocs®? Maybe not, but it can still be rewarding and this guide will help minimize any failed prints in the process. And if you do get a nice print but the TPU is sticking a little too well to the build plate, reach for the isopropyl alcohol.

Track Bird Visitors With A Raspberry Pi And A USB Mic

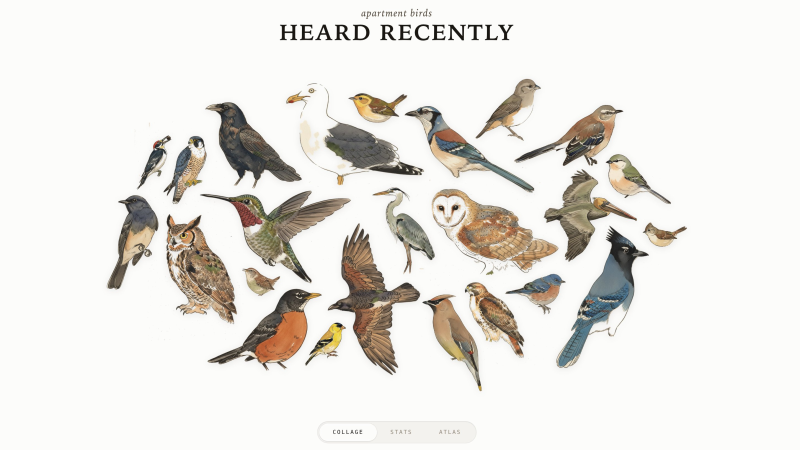
Avian Visitors is a lovely project by [Teddy Warner] that uses a Raspberry Pi and microphone to keep track of which birds have been visiting your home, and creates a colorful illustration of recent visitors on top of it all.

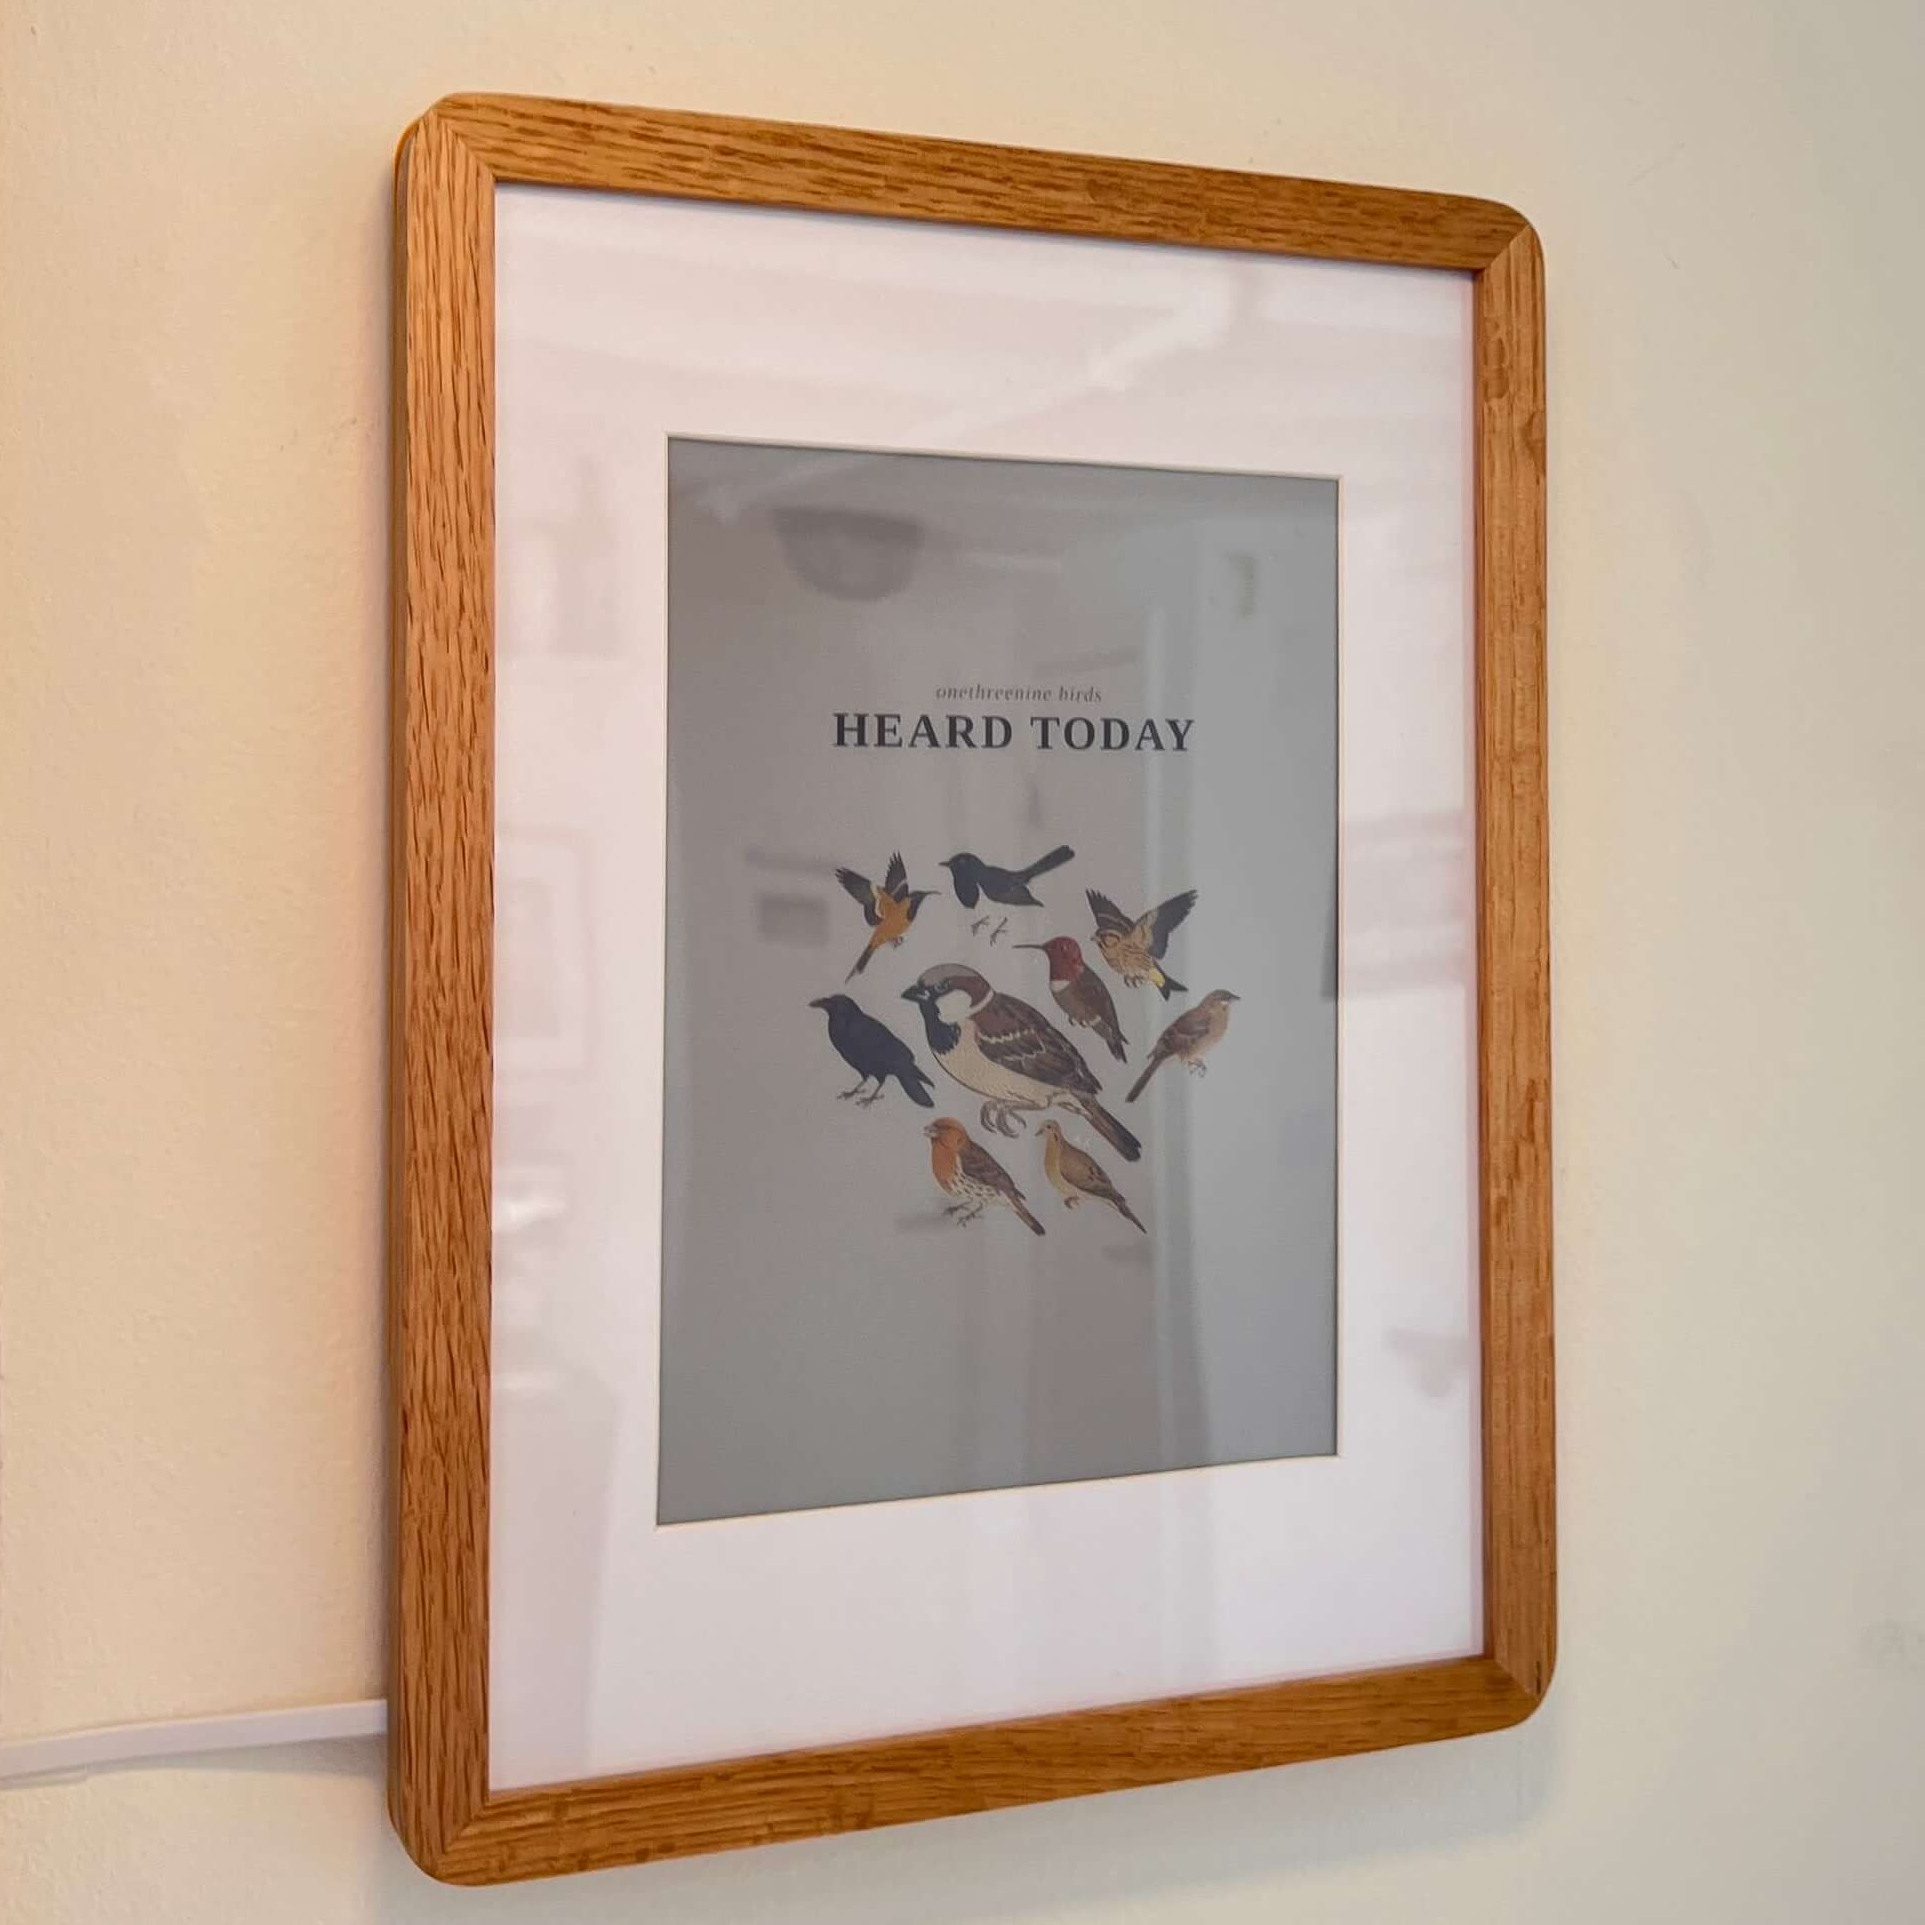
It reports on a web interface of its own making, but what really takes things to a new level is an optional, stylish E-Ink panel that shows the last 24 hours’ worth of visitors at a glance in a collage.

The key to identification is BirdNET (GitHub here), a deep learning classifier from Cornell that can reliably identify and classify more than 11,000 species worldwide based on sound alone.

Based on that information, the system pulls bird images from a reference set for the region and creates a collage representing the breadth and frequency of visitors in a single image. The larger the image of a bird, the more frequently it was heard.

That’s a cool project, but [Teddy] took things one step further by setting up a color E-Ink display to show a running summary of all the avian visitors the system identifies. [Teddy] has a knack for leveraging projects into wall-mounted art, as we saw with his generative art wall plotter. Continue reading “Track Bird Visitors With A Raspberry Pi And A USB Mic”

Wrist Welcomes Wii Nunchuk As Gloriously Ergonomic Macropad

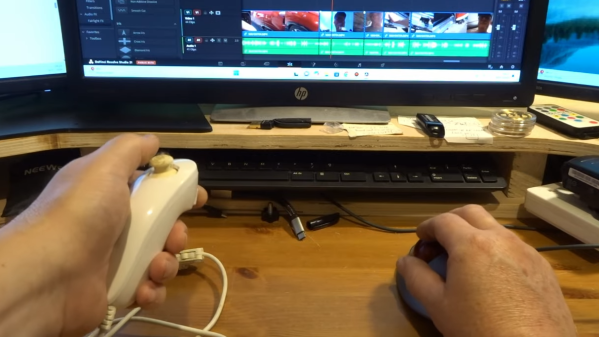
[John Dingley] spends a lot of time editing videos, and as many of us know, when it comes to repetitive tasks the more ergonomic the better.

Keyboard shortcuts exist for common video editing functions, but [John] found that the vast majority of his work needed only three or four of them. Feeling he could do better than a three-key macropad, he turned to what’s perhaps one of the most ergonomic devices ever designed — the Wii Nunchuk.

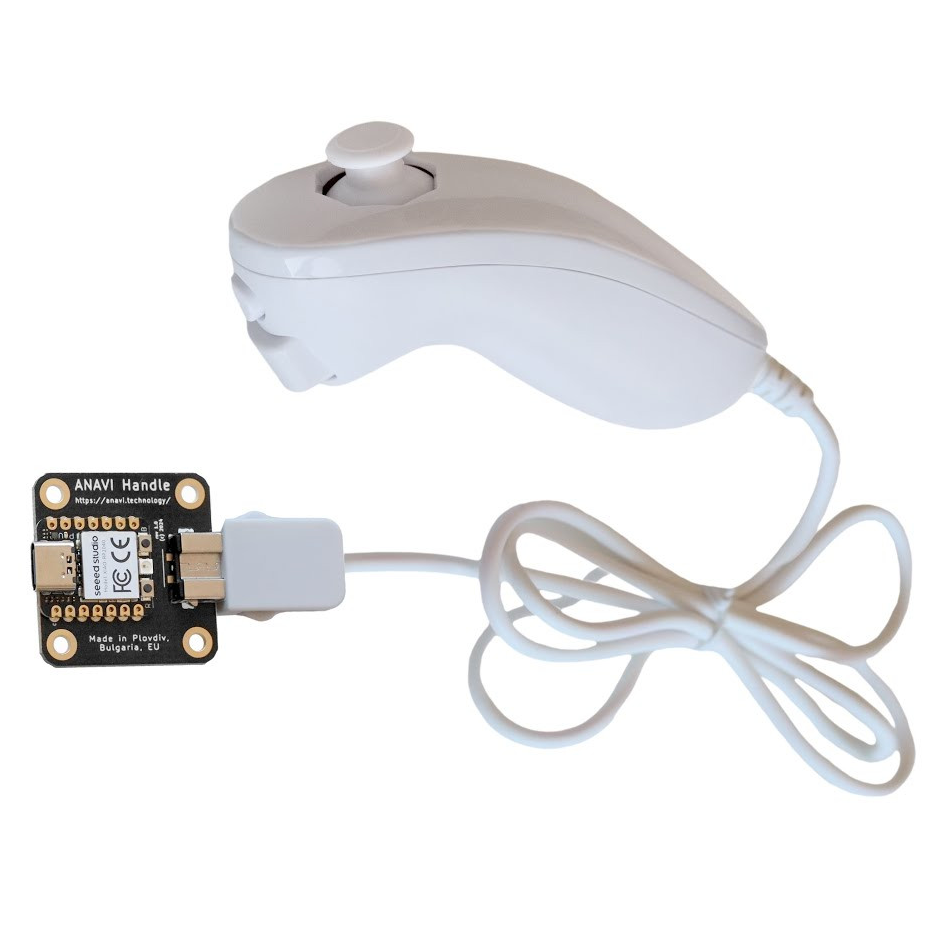
A Wii Nunchuk is an I2C device, so there needs to be some intermediary device involved if you want to plug it into a computer. [John] solves that with the ANAVI Handle, an open source adapter to make a Nunchuk act like a USB Human Interface Device (HID). That addresses the connectivity problem, but the default firmware on the adapter only treats the Nunchuk as a mouse or joystick, so a few more changes are required before it can be pressed into service as an ultra-comfortable macropad.

The ANAVI Handle runs CircuitPython code on an RP2040, and modifying its behavior is as simple as plugging it in via USB and editing the code right on the device. One has to define some keyboard events, configure the device to act as a keyboard, and send the right events when the buttons or joystick get pushed. [John] provides the code, and walks through the changes on video so even those without any coding experience can get it done.

The Nunchuk design is still being sold and used today, and it’s shown up in all kinds of places. We’ve seen a Bluetooth-enabled one and even seen a Raspberry Pi Zero shoehorned into one, complete with HDMI output.

Continue reading “Wrist Welcomes Wii Nunchuk As Gloriously Ergonomic Macropad”

Using Video Glasses As A Camera Viewfinder Is Harder Than It Looks

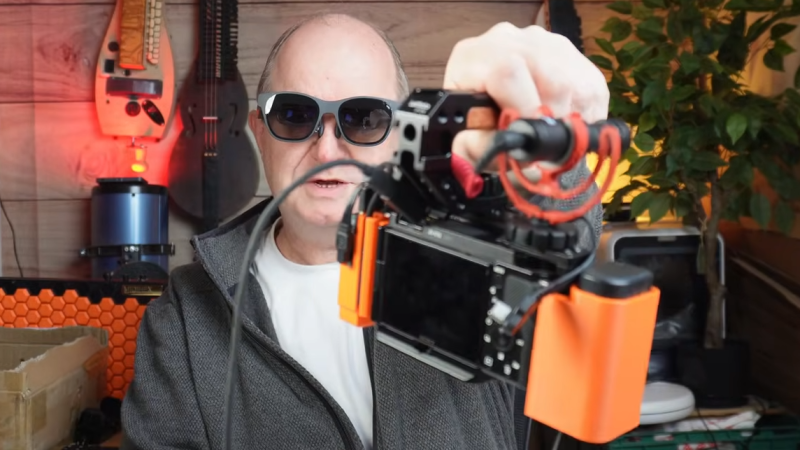
[John Dingley] has a Sony ZV-E10 camera that is excellent, but the design lacks a built-in electronic viewfinder. This means it relies entirely on its rear-mounted touchscreen for framing shots. This is troublesome because [John] often films in bright sunlight, and sometimes from a perspective other than normal eye level. His solution? Use a pair of XREAL video glasses as a handsfree viewfinder.

Cable management can be a real challenge, even if a project’s technical elements are solved.

The XREAL glasses look a bit unusual, but they can be worn and used like regular sunglasses. They accept external video and importantly, allow the wearer to see the video feed while still having awareness of their surroundings. Seems like a perfect match for the camera, but as [John] discovered, there are quite a few implementation hurdles involved.

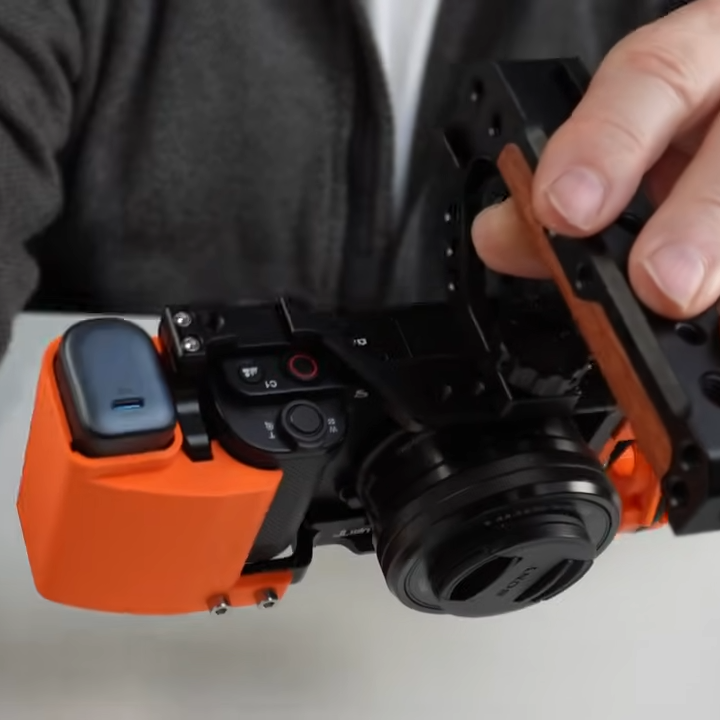
For starters, the camera and glasses do not speak the same format. The camera outputs HDMI via a distressingly fragile micro-HDMI connector, but the glasses accept video over USB-C (aka DisplayPort altmode). Connectors and cables and a converter will be involved, as well as a power bank because the glasses and converter will require a power supply. As any hacker knows, wires and connectors can eat up space very quickly.

To solve all this, [John] carefully selected off-the-shelf components chosen to minimize bulk and designed a custom camera cage to hold things cleanly without obstructing the camera’s microphone port. The end result is very tidy package that presents a single USB-C connection point between the glasses and the camera, requires no hardware modifications or soldering, and even takes the strain off the fragile connector on the ZV-E10.

The finishing touch is putting a neck strap on the XREAL glasses, allowing them to be easily donned and doffed as needed while filming. Check it out the video, embedded just below the page break.

When it comes to filming vehicles it often makes sense to film from a low perspective. The camera has a handle for this purpose, but the process is much better now that the glasses can act as a viewfinder. [John] has a soft spot for vehicles, including self-balancing unicycles or monotracks of his own design.

Continue reading “Using Video Glasses As A Camera Viewfinder Is Harder Than It Looks”

Full Body VR Tracking Is Just Some Recycled Hardware Away

Full body tracking in VR applications involves attaching sensors to one’s body, and [Jaki] has a DIY method to do it on the cheap: the Vive Tracker Lite project repurposes Vive controllers as lighthouse-based trackers, no hardware modifications required.

A common method of doing body tracking is to strap on some Vive trackers. Those are extremely hacker-friendly pieces of hardware, but [Jaki] observed that older Vive VR controllers can be had for cheap, and already contain everything a tracker needs. Some new firmware and a custom mount is all it takes to turn them into perfectly usable body trackers.

But what about a wireless receiver? [Jaki] has that covered as well with the $5 Viva Dongle, which uses a Pro Micro NRF52840 to act as a cheap DIY alternative to the official dongle hardware.

We appreciate the effort put into making this project accessible to everyone, even novices. [Jaki]’s put effort into a Python program with a full GUI to make the flashing of firmware as easy as possible for both projects. Experimenting with body tracking in VRChat or games with mods is just some recycled hardware away.

Granted, a Vive controller is not the slimmest piece of hardware, but all it takes is a firmware change and a 3D-printed fixture to make a perfectly serviceable tracker. That being said, we’re sure an enterprising hardware hacker may crack a controller open and embark on a serious rebuild, or even interface to some of the inputs in a clever way. If you’ve done that or know of someone who has, drop us a note on our tips line because we’d love to see it.