Worried About Running Out Of Filament Mid-Print? Join It!

If you’ve ever cringed over throwing away any printer filament you know wouldn’t cover your next small part — let alone an overnight print — you may appreciate [starlino]’s method for joining two spools of filament together.

While there are other methods to track how much filament you’re using, this method removes some of the guesswork. First, snip the ends of the filament on a diagonal — as close to the same angle as possible. Cover both ends with shrink wrap tubing — 2mm tubing for 1.75mm filament for example — ensuring that the two ends overlap inside the wrap. Tape the filament to a heat resistant mat with Kapton tape, leaving exposed the joint between the two filaments. A temperature sensor may help you to find your filament’s melting point, or you can experiment as necessary to get a feel for it.

Melt the filament inside the tubing with a hot air soldering station or heat gun and cool it down promptly with a few blasts from an air duster. All that’s left is to cut the filament free of the tape and shrink wrap, scraping away any excess so as to prevent printer jams. Done! Now, back to printing! Check out the tutorial video after the break.nning

Continue reading “Worried About Running Out Of Filament Mid-Print? Join It!”

3D Printed Gearbox Lifts An Anvil With Ease

How strong can you make a 3D-printed gearbox. Would you believe strong enough to lift an anvil? [Gear Down For What?] likes testing the limits of 3D printed gearboxes. Honestly, we’re amazed.

3D printing has revolutionized DIY fabrication. But one problem normally associated with 3D printed parts is they can be quite weak unless designed and printed carefully.

Using a whole roll of filament, minus a few grams, [Gear Down For What?] printed out a big planetary gear box with a ratio of 160:1 and added some ball bearings and using a drill as a crank. Setting it up on a hoist, he started testing what it could lift. First it lifted a 70 lb truck tire and then another without any issues. It then went on to lift a 120 lb anvil. So then the truck tires were added back on, lifting a combined weight of 260 lb without the gearbox breaking a sweat.

This is pretty amazing! There have been things like functional 3D-printed car jacks made in the past, however 3D-printed gear teeth are notoriously easily broken unless designed properly. We wonder what it would take to bring this gearbox to the breaking point. If you have a spare roll of filament and some ball bearings, why not give it go yourself? STL files can be found here on Thingiverse.

Continue reading “3D Printed Gearbox Lifts An Anvil With Ease”

Make A Bit Of Cloth With This 3D Printable Loom

When the hackspace where this is being written created their textile room, a member who had previously been known only for her other work unexpectedly revealed herself to be a weaver, and offered the loan of a table-top loom. When set up, it provided an introduction to the art of weaving for the members of all different interests and backgrounds, and many of them have been found laying down a few lines of weft. It’s a simple yet compelling piece of making which  captivates even people who might never have considered themselves interested in textiles.

If you are not lucky enough to have a friendly hackspace member with a spare loom when you wish to try your hand at weaving, you may be interested in this Thingiverse project, a 3D printable rigid heddle loom. It’s not the most complex of looms, the heddle is the part that lifts the warp threads up and down, and it being the rigid variety means that this loom can’t do some of the really fancy tricks you’ll see on other types of loom. But it’s a functional loom that will allow you to try your hand at weaving for the expenditure of not a lot of money, some 3D printer filament, and some PVC pipe. If your hackspace or bench has an area devoted to textiles, it may find a place.

We’ve shown you a few looms on these pages over the years, but mostly of the more mechanised variety. A Raspberry Pi automated loom for example, or a CNC Jacquard loom.

Thanks to our Shenzhen contributor-at-large, [Naomi Wu] for the tip.

Beautiful DIY Spot Welder Reminds Us We Love 3D Printing

[Jim Conner]’s DIY tab spot welder is the sweetest spot welder we’ve ever seen. And we’re not ashamed to admit that we’ve said that before.

The essence of a spot welder is nothing more than a microwave oven transformer rewound to produce low voltage and high current instead of vice-versa. Some people control the pulse-length during the weld with nothing more than their bare hands, while others feel that it’s better implemented with a 555 timer circuit. [Jim]’s version uses a NodeMCU board, which is desperately overkill, but it was on his desk at the time. His comments in GitHub about coding in Lua are all too familiar — how do arrays work again?

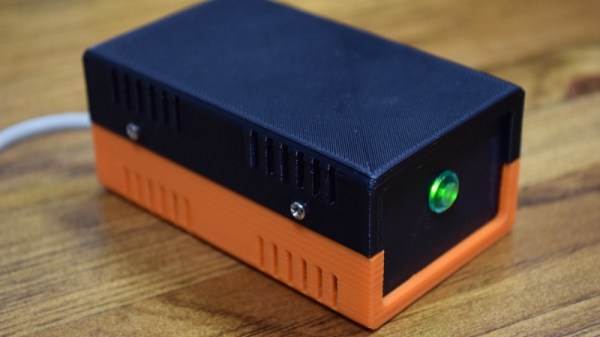
Using the fancier microcontroller means that he can do fancy things, like double-pulse welding and so on. He’s not even touching the WiFi features, but whatever. The OLED and rotary encoder system are sweet, but the star of the show here is the 3D printed case, complete with soft parts where [Jim]’s hand rests when he’s using the welder. It looks like he could have bought this thing.
Continue reading “Beautiful DIY Spot Welder Reminds Us We Love 3D Printing”

3D Printed Math Grenade

Calculator hacks are fun and educational and an awesome way to show-off how 1337 your skills are. [Marcus Wu] is a maker who likes 3D printing and his Jumbo Curta Mechanical Calculator is a project from a different era. For those who are unfamiliar with the Curta, it is a mechanical calculator that was the brainchild of Curt Herzstark of Austria from the 1930s. The most interesting things about the design were the compactness and the complexity which baffled its first owners.

The contraption has setting sliders for input digits on the side of the main cylindrical body. A crank at the top of the device allows for operations such as addition and subtraction with multiplication and division requiring a series of additional carriage shift operations. The result appears at the top of the device after each crank rotation that performs the desired mathematical operation. And though all this may seem cumbersome, the original device fit comfortably in one hand which consequently gave it the nick name ‘Math Grenade’.

[Marcus Wu] has shared all the 3D printable parts on Thingiverse for you to make your own and you should really take a look at the video below for a quick demo of the final device. There is also a detailed set of images (82 or so) here that present all the parts to be printed. This project will test your patience but the result is sure to impress your friends. For those looking to dip your toes in big printed machines, check out these Big Slew Bearings for some inspiration.

Using 3D Printing To Speed Up Conventional Manufacturing

3D printers, is there anything they can’t do? Of course, and to many across the world, they’re little more than glorified keychain factories. Despite this, there’s yet another great application for 3D printers – they can be used to add speed and flexibility to traditional manufacturing operations.

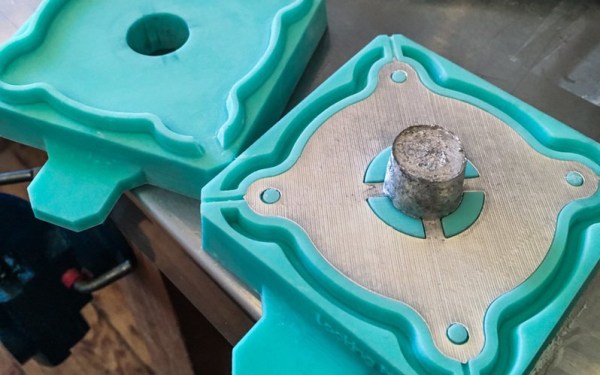
A key feature of many manufacturing processes is the use of fixtures and jigs to hold parts during machining and assembly operations. These must be developed before manufacturing begins and must be custom made to suit the given application. Many manufacturers outsource the development of such fixturing, even in large operations – even major automakers will often outsource development of fixtures and new process lines to outside firms. This can have major ramifications when changes need to be made, introducing costly delays. However, 3D printers can be used to rapidly iterate fixturing designs to suit new parts, greatly reducing development time. As stated in the article, Louis Vuitton uses this to great effect – the reduced time of development is incredibly useful when changing manufacturing lines every few months in the fashion industry.

Obviously there are limitations – in a factory producing large steel castings, it’s unlikely a FDM-printed fixture will be much use when it comes to the wear and tear of machining hundreds of castings a day. However, as a development tool, it can prove very useful. What’s more, jigs for light industrial work – think electronics assembly, woodworking glue-ups, or any form of delicate work by hand – need not be as robust. Lightweight, readily produced 3D printed parts may be just the ticket.

Another great benefit of 3D printing is its ability to be used for mockups. You may be designing a product that requires several aluminium parts to fit together, but alas – the parts won’t be ready for weeks. Rather than wait all that time, only to find out something doesn’t fit right, it may be advantageous to print out a plastic version of the parts. Being able to check geometry with actual parts is often very useful, and makes a great tool if you need to present your work to others. It’s much easier to communicate an idea to people if they can hold and touch what you’re talking about!

It’s something worth considering if you’re setting up any sort of small production line – perhaps you’re looking for a way to make populating a run of PCBs faster, or ease the assembly of a series of distributed sensor modules. These techniques may prove particularly useful if you consider yourself a scrappy hacker.

[Hat tip to George!]

Fidget Spinners Put The ‘S’ In STEAM Education

Centrifuges are vital to the study of medicine, chemistry, and biology. They’re vital tools to separate the wheat from the chaff figuratively, and DNA from saliva literally. Now, they’re fidget spinners. [Matlek] designed a fidget spinner that also functions as a simple lab centrifuge.

The centrifuge was designed in Fusion 360, and was apparently as easy as drawing a few circles and hitting copy and paste. Interestingly, this fidget spinner was designed to be completely 3D printable, including the bearings. The bearing is a standard 608 though, so if you want to get some real performance out of this centrispinner, off-the-shelf bearings are always an option. The design of this fidget spinner holds 2 mL and 1.5 mL vials, but if your lab has 500 μL tubes on hand, there are handy 3D printable adapters.

Still think using a toy to do Real Science™ is dumb? Contain your rage, because a few months ago a few folks at Stanford devised a way to build a centrifuge out of paper. This paperfuge can — at least theoretically — save lives where real commercial centrifuges or even electricity aren’t available. Fidget spinners save humanity once again.