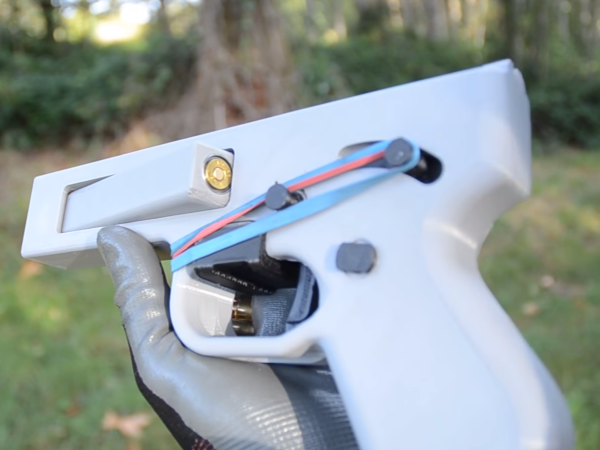
[Guy in a garage] has made a 3D printed gun that not only appears to fire in the direction pointed, it can also do it multiple times. Which, by the standard of 3D printed guns, is an astounding feat. He started with .22 rifle cartridges but has since upgraded and tested the gun with .357 rounds. The link above is a playlist which starts of with an in-depth explanation of the .22 version and moves through design iterations
This gun prints on a standard FDM printer. Other 3D printable guns such as the infamous Liberator or the 3D printed metal gun need more exotic or precise 3D printing to work effectively. The secret to this gun’s ability is the barrel, which can be printed in nylon for .22 cartridges, or in ABS plus a barrel liner for .22 and .357 caliber.
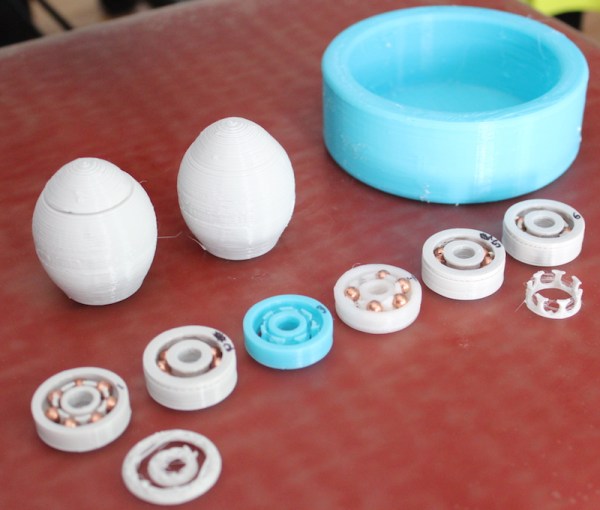
A barrel liner is one way to repair a gun that has aged and is no longer shooting properly. Simply put, it is a long hardened metal tube with rifling on the inside. Some guns come out of the factory with one, and a gunsmith simply has to remove the old one and replace it. Other guns need to be bored out before a liner can be installed.
The metal liner surrounded by plastic offers enough mechanical strength for repeat firings without anyone losing a hand or an eye; though we’re not sure if we recommend firing any 3D printed gun as it’s still risky business. It’s basically like old stories of wrapping a cracked cannon in twine. The metal tries to expand out under the force of firing, but the twine, which would seem like a terrible material for cannon making, is good in tension and when wrapped tightly offers more than enough strength to hold it all together.
This is also how he got the .357 version to work. The barrel slots into the gun frame and locates itself with a rounded end. However, with the higher energy from a .357 round, this rounded end would act as a wedge and split the 3D printed frame. The fix for this was simple. Glue it back together with ABS glue, and then wrap the end of the assembly with a cable tie.
This is the first 3D printed gun we’ve seen that doesn’t look like a fantastic way to instantly lose your hand. It’s a clever trick that took some knowledge of guns and gunsmithing to put together. Despite the inevitable ethical, moral, and political debate that will ensue as this sort of thing becomes more prevalent, it is a pretty solid hack and a sign that 3D printing is starting to work with more formidable engineering challenges.