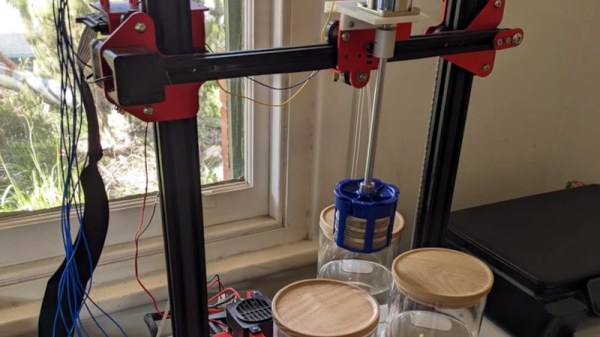
The many delicate parts in a mechanical wristwatch present a tricky cleaning problem, one that for professionals there is a variety of machines to tackle. As you might expect, such specialty equipment doesn’t come cheap, so [daveburkeaus] came up with his own solution, automated using an older 3D printer.
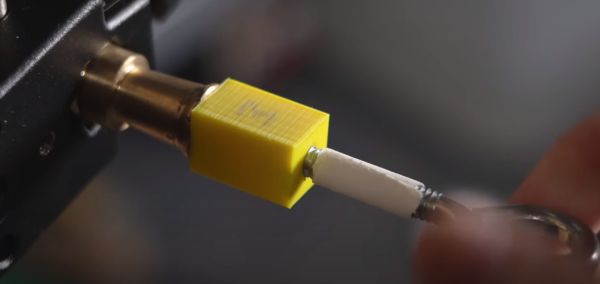
The premise is straightforward enough: it’s a machine with a succession of stations for cleaning, rinsing, and drying, through which the watch is moved on a set cycle. The hot end and extruder is replaced with a motor and shaft, on the end of which is a basket in which the watch sits. The basket is a commercial part for simplicity of construction, though one could certainly fabricate their own if need be. The printer gets a controller upgrade and of course a motor controller, and with a software stack built upwards from the Klipper firmware seems ready to go. There is the small matter of the heater used for drying not keeping the firmware happy as a substitute for the heated bed it thinks it’s driving, but that is fixed by controlling it directly.
We’ve remarked before that superseded 3D printers are present in large numbers in our community, and particularly now a few years since that article was written we’re reaching the point at which many very capable machines are sitting idle. It’s thus particularly good to see a project that brings one of them out of retirement for a useful purpose.