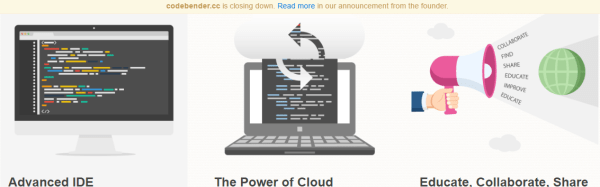
A Pi Robot Without A Hat

Daughter boards for microcontroller systems, whether they are shields, hats, feathers, capes, or whatever, are a convenient way to add sensors and controllers. Well, most of the time they are until challenges arise trying to stack multiple boards. Then you find the board you want to be mid-stack doesn’t have stackable headers, the top LCD board blocks the RF from a lower board, and extra headers are needed to provide clearance for the cabling to the servos, motors, and inputs. Then you find some boards try to use the pins for different purposes. Software gets into the act when support libraries want to use the same timer or other resources for different purposes. It can become a mess.

The alternative is to unstack the stack and use external boards. I took this approach in 2013 for a robotics competition. The computer on the robots was an ITX system which precluded using daughter boards, and USB ports were my interface of choice. I used a servo controller and two motor controllers from Pololu. They are still available and I’m using them on a rebuild, this time using the Raspberry Pi as the brain. USB isn’t the only option, though. A quick search found boards at Adafruit, Robotshop, and Sparkfun that use I2C.

Continue reading “A Pi Robot Without A Hat”

Venduino Serves Snacks, Shows Vending Is Tricky Business

Seems like just about every hackerspace eventually ends up with an old vending machine that gets hacked and modded to serve up parts, tools, and consumables. But why don’t more hackerspaces build their own vending machines from scratch? Because as [Ryan Bates] found out, building a DIY vending machine isn’t as easy as it looks.

[Ryan]’s “Venduino” has a lot of hackerspace standard components – laser-cut birch plywood case, Parallax continuous rotation servos, an LCD screen from an old Nokia phone, and of course an Arduino. The design is simple, but the devil is in the details. The machine makes no attempt to validate the coins going into it, the product augurs are not quite optimized to dispense reliably, and the whole machine can be cleaned out of product with a few quick shakes. Granted, [Ryan] isn’t trying to build a reliable money-making machine, but his travails only underscore the quality engineering behind modern vending machines. It might not seem like it when your Cheetos are dangling from the end of an auger, but think about how many successful transactions the real things process in an environment with a lot of variables.

Of course, every failure mode is just something to improve in the next version, but as it is this is still a neat project with some great ideas. If you’re more interested in the workings of commercial machines, check out our posts on listening in on vending machine comms or a Tweeting vending machine.

Continue reading “Venduino Serves Snacks, Shows Vending Is Tricky Business”

Raspberry Pi Gets Turned On

The Raspberry Pi and other similar Linux-based single board computers simplify many projects. However, one issue with Linux is that it doesn’t like being turned off abruptly. Things have gotten better, and you can certainly configure things to minimize the risk, but–in general–shutting a Linux system down while it is running will eventually lead to file system corruption.

If your project has an interface, you can always provide a shutdown option, but that doesn’t help if your application is headless. You can provide a shutdown button, but that leaves the problem of turning the device back on.

[Ivan] solved this problem with–what else–an Arduino (see the video below). Simplistically, the Arduino reads a button and uses a FET to turn off the power to the Pi. The reason for the Arduino, is that the tiny processor (which draws less than a Pi and doesn’t mind being shut down abruptly) can log into the Pi and properly shut it down. The real advantage, though, is that you could use other Arduino inputs to determine when to turn the Pi on and off.

Continue reading “Raspberry Pi Gets Turned On”

Hackaday Prize Entry: MyComm Handheld Satellite Messenger

We live in a connected world, but that world ends not far beyond the outermost cell phone tower. [John Grant] wants to be connected everywhere, even in regions where no mobile network is available, so he is building a solar powered, handheld satellite messenger: The MyComm – his entry for the Hackaday Prize.

The MyComm is a handheld touch-screen device, much like a smartphone, that connects to the Iridium satellite network to send and receive text messages. At the heart of his build, [John] uses a RockBLOCK Mk2 Iridium SatComm Module hooked up to a Teensy 3.1. The firmware is built upon a FreeRTOS port for proper task management. Project contributor [Jack] crafted an intuitive GUI that includes an on-screen keyboard to write, send and receive messages. A micro SD card stores all messages and contact list entries. Eventually, the system will be equipped with a solar cell, charging regulator and LiPo battery for worldwide, unconditional connectivity.

2016 will be an interesting year for the Iridium network since the first satellites for the improved (and backward-compatible) “Iridium NEXT” network are expected to launch soon. At times the 66 Iridium satellites currently covering the entire globe were considered a $5B heap of space junk due to deficiencies in reliability and security. Yet, it’s still there, with maker-friendly modems being available at $250 and pay-per-use rates of about 7 ct/kB (free downstream for SDR-Hackers). Enjoy the video of [Jack] explaining the MyComm user interface:

Continue reading “Hackaday Prize Entry: MyComm Handheld Satellite Messenger”

Ghostbuster Proton Pack Made From Everything

[John Fin] put a lot of work into his Ghostbuster’s proton pack prop with full-featured user control and effects. What appealed to us well beyond the exquisite build is the extra effort taken to write down the whole process in a PDF for anyone wishing to imitate him.

Mr. Fusion is just a Krups Coffee Grinder. Also, Santa isn't real.
Mr. Fusion is just a Krups Coffee Grinder. Also, Santa isn’t real.

We all know that a lot of famous props are creatively rearranged household items. The famous Mr. Fusion from Back to The Future is actually a Krups coffee grinder with some logos adhered.

[John]’s prop is no different. The cyclotron is a five gallon bucket. A garlic powder container fills another function. As you look at it more and more items can be picked out. Is that a spark plug wire? The handles on that are suspiciously similar to a power tool case’s. It all comes together, and while it’s not screen accurate you’d have to be an extreme prop fanatic to tell.

Naturally, the core of [John]’s prop is an Arduino. It stores the sound files on a SD Card shield. It controls all the lights sounds and motors on the prop. This isn’t quite a point and shoot. You must toggle on the power, generator, and arming mechanisms before actually firing. If you do it out of order, the electronics will issue an alarm as warning, and each step in the process has its own unique audio and animated lighting.

Since the Proton Pack went so well, he also built a PKE meter and Ghost Trap to go along with his backpack. He’s ready to take on Vigo at anytime. You can see a video of his prop in action after the break.

Continue reading “Ghostbuster Proton Pack Made From Everything”

This Arduino Console Has 64 Bit Graphics

Numbers are wonderful things when applied to technical specifications. Take [Bobricius]’ handheld Arduino-based game console. With an 8×8 LED matrix for a display it’s not going to win any prizes, but while he’s pushing the boundaries of dubious specification claims he’s not strictly telling any lies with his tongue-in-cheek statement that the graphics are 64-bit.

Jokes aside, it’s a neatly done build using a DIP version of the Arduino MCU and all through-hole components on a custom PCB. Power comes from a CR2032 cell, and it includes three buttons and a small piezoelectric speaker. He’s implemented a whole slew of games, including clones of Pong, Breakout, and Tetris, and judging by the video below it’s surprisingly playable.

Now you might look at this console and wonder what the big deal is. After all, there are plenty of similar designs to be found, and it’s nothing new. Of course, it’s a neat project for any hacker or maker, but we can see that this would make a great starter project for the younger person in your life who wants to try their hands at building something electronic. All through-hole construction for easy soldering, and a neat game at the end of it all.

He’s posted a full write-up of the design process as well as the hackaday.io page linked above, so if you fancy building one yourself there’s nothing to stop you too squeezing 64 bits of graphical goodness from an Arduino.

Continue reading “This Arduino Console Has 64 Bit Graphics”

Taming Robot Arm Jump With Accelerometers

Last fall, I grabbed a robot arm from Robot Geeks when they were on sale at Thanksgiving. The arm uses servos to rotate the base and move the joints and gripper. These work well enough but I found one aspect of the arm frustrating. When you apply power, the software commands the servos to move to home position. The movement is sufficiently violent it can cause the entire arm to jump.

This jump occurs because there is no position feedback to the Arduino controller leaving it unable to know the positions of the arm’s servos and move them slowly to home. I pondered how to add this feedback using sensors, imposing the limitation that they couldn’t be large or require replacing existing parts. I decided to try adding accelerometers on each arm section.

Accelerometers, being affected by gravity when on a planet, provide an absolute reference because they always report the direction of down. With an accelerometer I can calculate the angle of an arm section with respect to the direction of gravitational acceleration.

Before discussing the accelerometers, take a look at the picture of the arm. An accelerometer would be added to each section of the arm between the controlling servos.

arm flat extended with text Continue reading “Taming Robot Arm Jump With Accelerometers”