The Infrared Theremin

The traditional theremin is more or less an audio oscillator with two metal rods. Using proximity sensing, one rod controls the pitch of the oscillator and the other controls the volume. [Teodor Costachiou] apparently asked himself the excellent question: Why does the proximity sensor have to use capacitance? The result is an Arduino-based theremin that uses IR sensors to determine hand position.

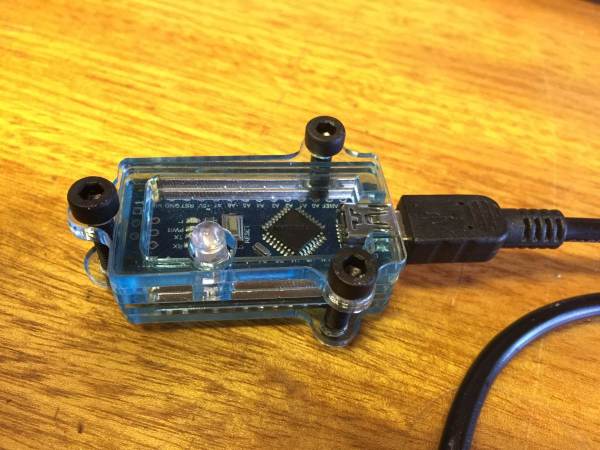
[Teodor] used a particular type of Arduino–the Flip and Click–because he wanted to use Click boards for the IR sensors and also to generate sound via an MP3 board based around a VS1053. The trick is that the VS1053 has a realtime MIDI mode, and that’s how this Theremin makes it tones.

Continue reading “The Infrared Theremin”

R2-D2 Keeps This University Bathroom Smelling Fresh

For a fun university project, [Cengizhan Can] and friends decided to make an automated air freshener for one of their bathrooms at the Utrecht University in the Netherlands. Happening to have an old R2-D2 plastic candy jar, they decided to try to see if they could make it Star Wars themed.

They loaded up the R2-D2 shell with an Arduino, a ton of sensors (don’t worry, nothing for spying) and an actuator for triggering the air freshener. During normal operation the LCD will display ambient temperature information and the approximate number of air freshener shots remaining in the canister. An external door sensor checks to see if the stall is open, and coupled with a light sensor, only sprays freshener after use, and when no one is in the stall anymore.
Continue reading “R2-D2 Keeps This University Bathroom Smelling Fresh”

Third Person Driving IRL

It’s a dream come true: remote control of a real car. Besides being a lot of fun, a life-size RC vehicle has some practical applications, like performing rescue operations or delivering supplies to dangerous areas. For [Carter], [Dave], [Ryan], and [Sean], the dream became reality in the span of 24 caffeine-and-chicken-finger-fueled hours during an Ohio State University hackathon. They dubbed the system MagiKarpet because it sits in place of the floor mat and runs on pixies.

The plan was to control the throttle, brake, and steering of a Chevy Cobalt using a PlayStation controller. For added fun, a camera mounted high above the back bumper would provide a third-person view, and this feed would be displayed on a monitor in the backseat. Everything is controlled by an Arduino Mega. A beefy linear actuator works the brake and is attached temporarily with a band of Shapelock that slips around the pedal. The throttle is pushed by a lever attached to a car window motor. Another motor connects to the steering wheel with cables that can turn it 90° left and right. Although the build was successful, they ran into a couple of issues. But what’s a hackathon experience without a few problems?

The linear actuator was jammed for about an hour after some early testing, but they got it unstuck. The PS controller was borked, so they had to roll their own joysticks. The school wouldn’t let them actually drive it around because of safety (killjoys but we get it), so they put it up on a jack to demonstrate it for the judges. They took second place, though we can’t imagine what would have beat this. Check out the complete build video after the break.

You might remember these guys from last year around this time. They took first place at the same hackathon with Robottermilk Puncakes, a app-controlled pancake machine. Now that you’re hungry for pancakes, feast your eyes on this endless one.

Continue reading “Third Person Driving IRL”

Testing DRAM, One Byte At A Time

A few weekends ago, [Chris] was in the mood for some retrogaming. That meant digging out the old Apple IIgs equipped with a monstrous RAM card with a whole three megabytes of RAM. This particular Apple IIgs had intermittent issues for a long time, and [Chris] was beginning to suspect the RAM was the culprit. Testing this required testing a few dozen individual RAM chips, so why not build something with an Arduino to make [Chris]’ life easier?

The chips found in [Chris]’ Apple are standard 1 M x 1 DRAM chips, the standard for late-80s computers. To test these chips on an Arduino, he picked up a beautiful ZIF socket, wired up the chip to an Arduino shield, and began the joyous process of figuring out how to interface DRAM to an Arduino.

Unlike static memories, DRAM needs to be refreshed periodically to recharge the capacitors. While this refresh cycle was the bane of designers and engineers throughout time, [Chris] actually doesn’t need to care about refreshing the DRAM. He’s just writing 1024 rows to the memory and reading it straight out – no need to refresh the memory. The trick comes from the multiplexed address bus. For his project, [Chris] needs to write 10 bits of the address, latch it, then write the other half of the address bits.

The DRAM tester was a success, and [Chris] put all the code and schematics up on GitHub. Solving the mystery of the broken Apple IIgs wasn’t as simple, as [Chris] thinks the problem might be in one of the support chips on the gigantic RAM card or the IIgs motherboard. Still, it’s a neat, quick build to test out a few DRAM chips.

Presenting The Internet Of Trash Cans !

This was gonna happen – sooner or later. [matthewhallberg] built a “Smart” trash can that is connected to the Internet and can be controlled by its own Android App. We’re not sure if the world needs it, but he wanted one and so built it. He started it out on a serious note, but quickly realized the fun part of this build – check out his funny Infomercial style video after the break.

trash_can_02The build itself is uncomplicated and can be replicated with ease. A servo motor helps flip the lid open and close. This is triggered by an ultrasonic ping sensor, which responds when someone waves a hand in front of the trash can. A second ping sensor helps inform the user when it is full and needs to be emptied. A Leonardo with the Idunio Yun shield helps connect the trash can to the internet. An mp3 shield connected to a set of powered computer speakers adds voice capability to the trash can, allowing it to play back pre-recorded sound clips. Finally, a Bluetooth module lets him connect it to an Android phone and the companion app controls the trash can remotely.

For the IoT side of things, [matthewhallberg] uses a Temboo account to send an email to the user when the trash can is full. The Arduino sketch, a header file to configure the Temboo account, and the Android application can all be downloaded from his blog. If this project inspires you, try building this awesome Robotic trash can which catches anything that you throw near it  or read the barcodes off the trash being thrown out and update the grocery list.

Continue reading “Presenting The Internet Of Trash Cans !”

Fingerprint Garage Door Won’t Open Every Time A Neighbor Microwaves A Burrito

With three kids, including himself, [Dave] faced the very real likelihood of someone absent-mindedly leaving the garage door open and being robbed blind. Rather than installing some plebeian solution, he compiled a feature list. And what a feature list it is!

The garage door needed to notify him of its status with strategically placed LEDs around the house, and give him full control on his devices. He wanted to open and close it using his existing key-code entry system. Lastly, it would be extra-cool if he could add some biometrics to it; in this case, a fingerprint sensor.

The core hardware is the staple Arduino augmented with a fingerprint module, a touch screen, some vitamins, and a WiFi break-out. He also worked up some casings in tinkercad: one for the indoor hardware, another with a flip cover for the outdoor fingerprint scanner.

We think [Dave] has accomplished what he set out to. We can just picture the would-be-thief staring at the finger print scanner and moving their operation one house over where the world is simpler. Video after the break.

Continue reading “Fingerprint Garage Door Won’t Open Every Time A Neighbor Microwaves A Burrito”

SDRAM Logic Analyzer Uses An AVR And A Dirty Trick

We often see “logic analyzer” projects which are little more than microcontrollers reading data as fast as they can, sending it to a PC, and then plotting the results. Depending on how fast the microcontroller is, these projects range from adequate to not very useful.

At first glance, [esot.eric’s] logic analyzer project has an AVR in it, so it ought to be on the low end of the scale. Then you look at the specs: 32 channels at 30 megasamples per second. How does that work with an AVR in it?

The answer lies in the selection of components. The analyzer uses a 128MB SDRAM DIMM (like an older PC might use for main memory). That makes sense; the Arduino can’t store much data internally. However, it isn’t the storage capacity that makes this choice critical. It seems [esot.eric] has a way to make the RAM “free run”.

The idea is to use the Arduino (or other host microcontroller) to set up the memory. Some of the memory’s output bits feedback to the address and data lines. Then the microcontroller steps aside and the SDRAM clocks samples into its memory by itself at the prevailing clock rate for the memory.

Continue reading “SDRAM Logic Analyzer Uses An AVR And A Dirty Trick”