A DIY MIDI Wind Controller

MIDI is more than just keyboards and a matrix of buttons that plays samples; there are MIDI controllers for virtually every instrument that has ever existed, from guitars to harps and even woodwinds. [J.M.] didn’t like the features found in existing wind MIDI controllers, so he’s building his own with features that put it far beyond any commercial offering.

Woodwind MIDI controllers are relatively simple; put a pressure sensor in the mouthpiece and turn that data into note on and note off commands. A few buttons, or in [J.M.]’s case, resistive touch sensors, are easily mapped to different fingerings and notes for the instrument. An Arduino Nano takes care of all this hardware, and a 2.4 GHz radio module to communicate wirelessly to a base station.

Once at the base station, the MIDI data can be output to any number of synths and computers, but [J.M.] added a MIDI codec chip right in the device to play with only a set of headphones. It doesn’t sound great – about the same as an old Sound Blaster card – but with the mod and expression control a wind controller offers, it’s more than passable as a real woodwind.

Videos below.

Continue reading “A DIY MIDI Wind Controller”

A Proof Of Concept Project For The ESP8266

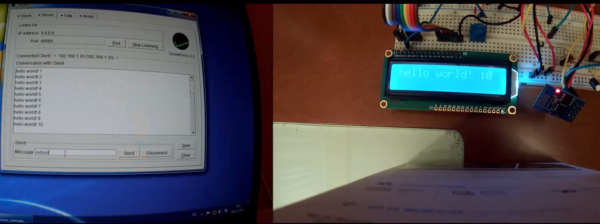
It’s hardly been a month since we first heard of the impossibly cheap WiFi adapter for micros, the ESP8266. Since then orders have slowly been flowing out of ports in China and onto the workbenches of tinkerers around the world. Finally, we have a working project using this module. It might only be a display to show the current weather conditions, but it’s a start, and only a hint of what this module can do.

Since the ESP8266 found its way into the storefronts of the usual distributors, a lot of effort has gone into translating the datasheets both on hackaday.io and the nurdspace wiki. The module does respond to simple AT commands, and with the right bit of code it’s possible to pull a few bits of data off of the Internet.

The code requests data from openweathermap.org and displays the current temperature, pressure, and humidity on a small TFT display. The entire thing is powered by just an Arduino, so for anyone wanting a cheap way to put an Arduino project on the Internet, there ‘ya go.

Subway radar

LEDs Turn This Paper Map Into A Tram Tracker

Public transit can be a wonderful thing. It can also be annoying if the trains are running behind schedule. These days, many public transit systems are connected to the Internet. This means you can check if your train will be on time at any moment using a computer or smart phone. [Christoph] wanted to take this concept one step further for the Devlol hackerspace is Linz, Austria, so he built himself an electronic tracking system (Google translate).

[Christoph] started with a printed paper map of the train system. This was placed inside what began as an ordinary picture frame. Then, [Christoph] strung together a series of BulletPixel2 LEDs in parallel. The BulletPixel2 LEDs are 8mm tri-color LEDs that also contain a small controller chip. This allows them to be controlled serially using just one wire. It’s similar to having an RGB LED strip, minus the actual strip. [Christoph] used 50 LEDs when all was said and done. The LEDs were mounted into the photo frame along the three main train lines; red, green, and blue. The color of the LED obviously corresponds to the color of the train line.

The train location data is pulled from the Internet using a Raspberry Pi. The information must be pulled constantly in order to keep the map accurate and up to date. The Raspberry Pi then communicates with an Arduino Uno, which is used to actually control the string of LEDs. The electronics can all be hidden behind the photo frame, out of sight. The final product is a slick “radar” for the local train system.

City Lights Telling Stories

If you’re walking around town and you see a light suddenly start to switch on and off seemingly at random, don’t discount it as a loose wire so quickly. [René] has been hard at work on a project to use city lights of all shapes and sizes for Morse messages, and a way for anyone to easily decode these messages if they happen upon one while out and about.

The lights can tell any story that is programmed into them. The code on the site is written for an Arduino-style microcontroller but it could be easily exported to any device that can switch power to turn a light on and off. Any light can work, there’s even video of a single headlight on a van blinking out some dots and dashes.

The other part of this project is a smartphone app that can decode the messages using the camera, although any Morse code interpreter can translate the messages, or if you’re a ham radio enthusiast you might recognize the messages without any tools whatsoever!

The great thing about this project is that it uses everyday objects to hide messages in plain sight, but where only some will be able to find them. This is indeed true hacker fashion! If you’re interested in making your own Morse code light, the code is available on the project site.

The Walking Dead Survival Box For The Zombie Apocalypse 

When the world comes to an end and zombies run through the streets like a blood thirsty disease, it will be absolutely necessary to store a weapon (or five) away just in case an undead creature tries to get inside. In addition, stopping crooks from ransacking back up supplies will also be a primary concern as well as savage, brain-eating beasts take over the cities. Keeping objects safe with a lock box like this one would deter both undead creatures and mischievous thieves. Or at least that is what was going on in [Mattt Reamer’s] head when he took on this build.

[Matt] is a UX designer who drew inspiration from the wildly popular television series The Walking Dead. He even 3D printed the Walking Dead’s logo on the front of the blood stained box attributing the idea to the show.

The setup here uses an Arduino Uno which is powered by a 9-Volt battery. The fingerprint scanner unlocks the box by verifying the print against a reverence copy stored in the code. When the program authorizes the scan, a servo opens up the latch allowing the contents within to be retrieved. Video of the full system can be seen after the break.

Now all that comes next would be to protect those fingers.

Continue reading “The Walking Dead Survival Box For The Zombie Apocalypse “

Mood Lighting With LEDs And An Arduino

Regular candles can be awfully boring at times. They can only produce one color and the flicker is so… predictable. They can’t even be controlled by an infrared remote control, not to mention the obvious fire hazard. Now, however, [Jose] has come up with an LED candle that solves all of these problems. (Original link to the project in Spanish.)

The heart of the project is an Arduino Pro Mini, which is especially suited for this project because of its size. [Jose] put the small form-factor microcontroller in the base of a homemade wax enclosure and wired it to a Neopixel WS2812b LED strip. The strip can produce any color, and has some programmed patterns including flicker, fade, rainbow, and fire.

The artificial candle is controlled with an infrared remote control, and all of the code for the project is available on the project site if you want to build your own. [Jose] has been featured here before for his innovative Arduino-driven RGB lighting projects, and this is another great project which builds on that theme!


kegerator

End Table Kegerator Hides The Tap When You’re Not Looking

What’s better than an ordinary end table? How about an end table that can serve you beer? [Sam] had this exact idea and used his skills to make it a reality. The first step of the build was to acquire an end table that was big enough to hold all of the components for a functional kegerator. This proved to be a bit tricky, but [Sam] got lucky and scored a proper end table from a garage sale for only $5.00.

Next, [Sam] used bathroom sealant to seal up all of the cracks in the end table. This step is important to keep the inside cold. Good insulation will keep the beer colder, while using less electricity. Next, a hole was cut into the top of the table for the draft tower.

The draft tower is mounted to a couple of drawer slides. This allows the tower to raise up and down, keeping it out of sight when you don’t want it. The tower raises and lowers using a simple pulley system. A thin, high strength rope is attached to the tower. The other end is attached to a spool and a small motor. The motor can wind or unwind the spool in order to raise and lower the tower.

The table houses an Arduino, which controls the motor via a homemade H bridge. The Arduino is hooked up to a temperature sensor and a small LCD screen. This way, the users can see how cold their beer will be before they drink it.

To actually keep the beer cold, [Sam] ripped apart a mini fridge. He moved the compressor and condenser coils to the new table. He had to bend the coils to fit, taking care not to kink them. Finally he threw in the small keg, co2 tank and regulator. The final product is a livingroom gem that provides beer on demand.

Demo video (which is going the wrong way) can be found after the break.

Continue reading “End Table Kegerator Hides The Tap When You’re Not Looking”