Old Pachinko Game Tweaked To Add A Reward System

restored_gumball_vending_pachinko_machine

[Tim Higgins] picked up an old pachinko game at a garage sale for his wife, but it ended up sitting unused in the garage for a few years. When he finally dusted it off, he decided that he wanted to restore and build a nice cabinet for it, though he thought the idea was a bit lame.

He says he likes to use some sort of CPU in his projects, and even though it was overkill, he made it his goal to add some sort of microprocessor to the game. He didn’t want to ruin the original aesthetics of the machine, so he decided that he could use an Arduino to drive a rewards system for skilled pachinko players.

Using some PVC pipe, he built a treat hopper which is controlled by the Arduino. When the player wins, the microcontroller triggers a small hobby servo, which dispenses gumballs/candy/etc.

[Tim] says that his wife loved the gift, and he was quite pleased with how it came out as well. Hit up his blog for additional build details and be sure to check out the photo slideshow of the restoration that we have embedded below.

Continue reading “Old Pachinko Game Tweaked To Add A Reward System”

Dead-bug Arduino Is Still Breadboard Ready

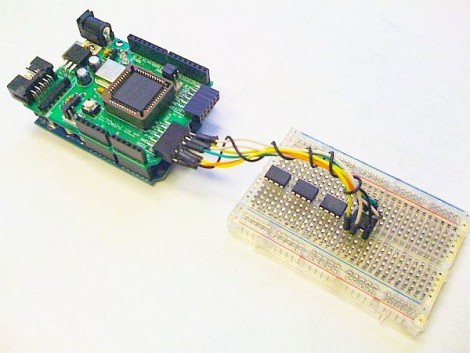
Here’s a no-PCB Arduino that doesn’t obscure the DIP footprint of the AVR chip. It’s built on an ATmega88 chip, and includes a programming header, reset button, a couple of filtering caps, and an LED. This is modeled after the Lilypad hardware, and fits nicely on top of the plastic case of the microcontroller, allowing it to be used in a breadboard or DIP socket. You can see a walk through of the components in the clip after the break.

We don’t really need most of the components on top of the chip (especially the status LED on the SCK line), but there are several things that we like about this. First off, the programming header is extremely nice. We could see this coming in handy for prototyping where you don’t want to add a header to your final design. Just use a chip socket, and this chip while you’re developing firmware. Once everything is dialed in, program a naked chip and swap the two. The same goes for the reset button, which is nice when working on firmware but may not be necessary in your final design.

This is quite an old project, and we’ve actually seen a successor to it. This is Rev. 2 and we looked in on Rev. 7 back in March. That one is a full Arduino, but the circuit board has no substrate.

Continue reading “Dead-bug Arduino Is Still Breadboard Ready”

Using An LED Cube As An Audio Visualizer

[Isaac] sent in his mashup build of a LED cube combined with a graphic EQ meter. The build is fairly simple and from the video we can tell that his build would be a great installation in a dubstep venue. While it’s not the 9x9x9 cube possible with some judicious coding we think it’s a very fitting display for the intended purpose.

Continue reading “Using An LED Cube As An Audio Visualizer”

Would You Like To Play A Game?

[Itay] dropped a link in our inbox about creating a simple video game system using Arduino. Yes we all know where that is going … the TV out library for Arduino. However this tutorial should still be mentioned because it pretty much covers everything someone new would need to quickly and easily hook one of these things up, along with wii Nunchuck usage, library basics and creating your first game.

Lots of large pictures, diagrams, and explanation of software is included. Yes we know we feature this little setup a lot, that is because its so darn fun. So if you ever wanted to make your own little video game system (without going crazy bit banging VGA out of a little micro in ASM) this guide will help you get started making that next arcade masterpiece.

An Arduino Board For Your Tiniest Of Projects

1inch_by_1inch_mini_arduino_board

Instructables user [dustinandrews] just took the wraps off his latest creation, a DIY Arduino Pro Mini clone.

Actually, to call it an clone is technically incorrect – while he aimed to produce a tiny Arduino-compatible board, his goal was not to replicate the Mini’s design. Instead, he developed a 1” x 1” board from scratch, covering the construction process in great detail.

When you are working with components this tiny, the only reasonable way to get things done is via solder reflow. He walks through the steps he took to produce the board, which should be enough to guide those doing reflow for the first time through the process without too much trouble.

The end result looks pretty nice, and when he puts it up side by side against the Arduino Pro Mini, his board can definitely hold its own. While his design lacks an on-board power regulator and reset button, he does provide two more analog I/O pins than the Mini, along with several other enhancements.

Air Conditioner Regulation Using A Hobby Servo

automatic_mechanical_ac_control

For anyone that works in a large office building, odds are you know the pains of dealing with a poorly regulated HVAC system. [Robovergne] and his co-workers recently moved to a new location, and found that the air conditioning control was less than effective, leaving the office as hot as a sauna or as cold as a meat locker.

While they manually triggered the A/C on and off every half hour for a while, that grew tiring, so [Robovergne] decided to take things into his own hands. He had never used an Arduino before, and figured that regulating the air would be a great first project. He mounted a small hobby servo onto the front of the A/C remote, and wired a DS18B21 temperature probe to the Arduino. A small pot is used to adjust the temperature setpoints, which are displayed on the attached LCD screen. Now, when the temperature starts to rise, the Arduino triggers the servo to turn the air conditioning on without human interaction.

[Robovergne] says that while his solution is ugly, it works quite well. It definitely gets the job done, we can’t argue with that!

Continue reading to see a video of his automatic A/C controller in action.

Continue reading “Air Conditioner Regulation Using A Hobby Servo”

Come See What’s Cooking In The Arduino Kitchen

arduino_labs

The crew that brought you the Arduino is always hard at work trying to bring the community closer together and to foster collaborative development. They recently rolled out a new feature on their site that is sure to be of interest to Arduino veterans and neophytes alike.

Arduino Labs is a platform which the team plans on using as an incubator of sorts, for projects that are underway, but not fully baked. Currently, they have highlighted two in-progress initiatives, including the Arduino Mega ADK, as well as a GSM/GPRS shield that the team has been developing in collaboration with Telefonica I+D.

As of right now, the site looks to be a one-way information outlet for the Arduino team to the community, but they stress that their aim is to create a more open development process within the Arduino project. While there is no official statement on the matter, we hope that the site will eventually allow members of the community to offer both their feedback and lend manpower to forthcoming projects.

[via Adafruit blog]