Arduino-compatible, Quad-core ARM Dev Board

The Advent of the Raspberry Pi has seen an explosion in the market for ARM dev boards, sometimes even with pinouts for Arduino shields. The UDOO, though, takes those boards and ramps up the processing power for some very, very interesting builds.

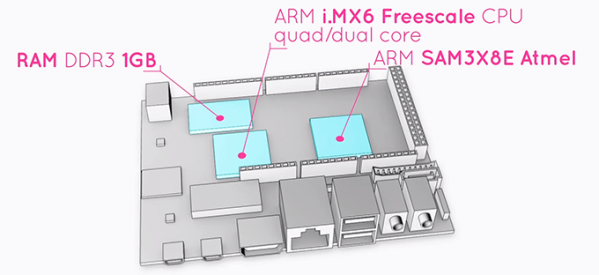
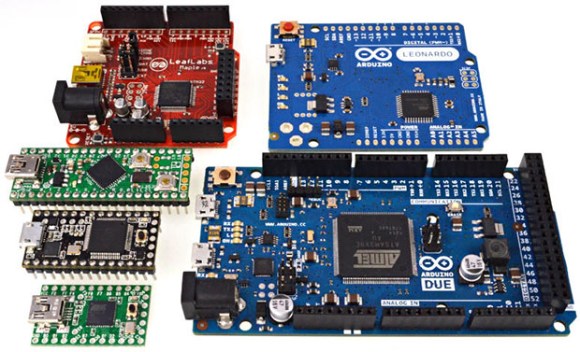
The UDOO comes equipped with a dual or quad-core ARM CPU running at 1GHz with 1 GB of RAM. Also on board is the Atmel SAM3X8E – the same chip in the new Arduino DUE – and has pinouts for all those Arduino shields you have lying around.

In addition to serving your next project as a souped-up Raspberry Pi, UDOO also includes 78 (!) GPIO pins, Gigabit Ethernet, a camera connector, one SATA port (on the quad-core version), and an LVDS header for attaching LCD monitors. Basically, the UDOO is the motherboard of an ARM-powered laptop with the pinouts to handle Arduino shields. It’s just like [Bunnie]’s laptop, only this time you can actually buy it.

The UDOO doesn’t come cheap, though: on the UDOO Kickstarter, the dual-core version is going for $150 while the quad-core is priced at $170. Still, if you need the power to run a pair of Kinects or want to build an awesome torrent box, you’d be hard pressed to find a more powerful board.

Programming A Through-hole ARM Microcontroller

NXP

The age of ARM microcontrollers for the electronics hobbyist is upon us, and luckily there are a few breadboard-friendly microcontrollers available in a DIP package. One of these chips is NXP’s LPC810M021FN8 – a tiny little 8-pin DIP with 4 kB of Flash, 1 kB of SRAM, and has a clock fast enough for some really cool stuff. [Joao] needed a way to program one of these microcontrollers and came up with an easy method using only a USB/UART adapter.

The key to this build is the fact the LPC810 doesn’t need any additional components to operate; the internal oscillator means the chip will run at 30 MHz with only a power and ground attached. To program the chip, [Joao] attached the Tx and Rx lines of the chip to a USB/UART adapter (at 3.3 V, of course), and uploaded some code with Flashmagic.

We’ve seen these DIP-sized ARM chips before, but [Joao]’s method of using off-the-shelf tools to write a blinking LED program means it’s a piece of cake to start working with these very cool and very powerful microcontrollers.

Update: Live Video Played On LED Strip Display

update-live-video-on-led-strip-display

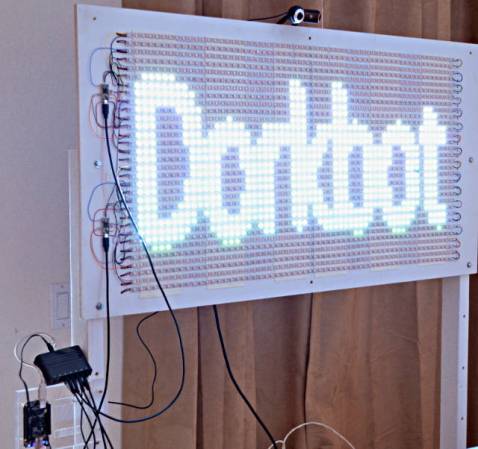
[Paul] took this LED display along with him to Maker Faire. To give it some interactivity he figured out a way to make it play live video. It is also activated using some stomp actuators built from piezo speaker elements and rubber floor mats.

This moves his original project in new directions. Back in February he was showing off the RGB LED strip display. He had it playing video but that was all dependent on using previously processed files. This upgrade uses a BeagleBone Black (the newest rendition of the ARM-based development board). [Paul] had tried using a Raspberry Pi board but had trouble with the webcam (mounted above the LED display) dropping frames. With the new board he is able to use the Video4Linux API to capture 30 frames per second and push them out to the display.

So far he’s had five out of the 1920 LEDs die on him. This shows off a couple of good things about using strips like this. A dead pixel doesn’t affect its neighbors. And replacement is as easy as cutting the ribbon on either side of the bad component, then soldering a new segment in place.


Video Player Built From Stellaris Launchpad

stellaris-launchpad-playing-video

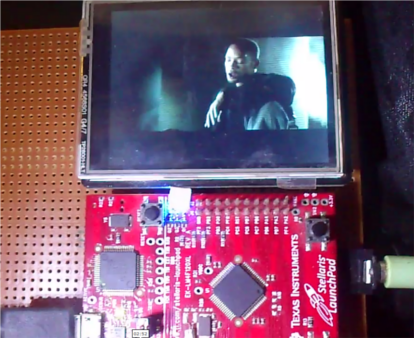
We think it’s pretty impressive to see a Stellaris Launchpad playing back Video and Audio at the same time with a respectable frame rate. It must be a popular time of year for these projects because we just saw another video playback hack yesterday. But for this project [Vinod] had a lot less horsepower to work with.

He’s using a 320×240 display which we ourselves have tried out with this board. It’s plenty fast enough to push image data in parallel, but if you’re looking for full motion video and audio we would have told you tough luck. [Vinod’s] math shows that it is possible with a bit of file hacking. First off, since the source file is widescreen he gets away with only writing to a 320×140 set of pixels at 25 fps. The audio is pushed at 22,400 bytes per second. This leaves him very few cycles to actually do anything between frames. So he encoded the clip as a raw file, interlacing the video and audio information so that the file can be read as a single stream. From the demo after the break it looks and sounds fantastic!

Continue reading “Video Player Built From Stellaris Launchpad”

VFD Tube Clock Built Using Protoboard And Free-formed PSU

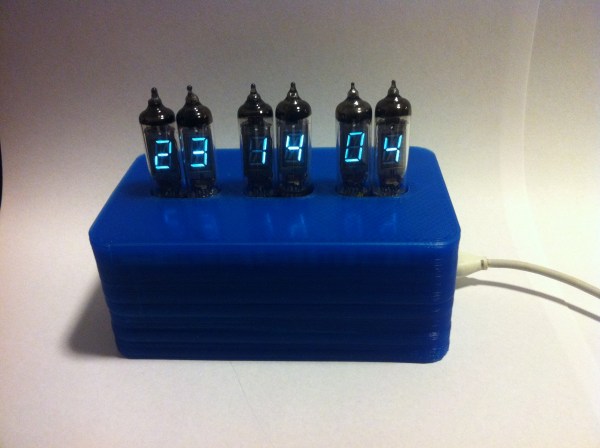
[James Glanville] wrote in to show of his latest tube project. It’s a clock using six IV-3 VFD tubes. In addition to the tube displays the project prominently features a blue 3D printed case which hides away all the guts of the build including the Stellaris Launchpad which drives the clock.

Speaking of guts, you’ll want to look through a few of [James’] other posts on the project. His first write-up on this clock shows off the protoboard and point-to-point soldering that makes the tubes work. To help simplify things he went with a MAX6921 VFD driver chip. He mounted it dead-bug style on its own piece of protoboard and then soldered all of the necessary connections to the larger hunk hosting the tubes. There’s also an interesting post that details the switch mode power supply which ramps the USB 5V power all the way up to the 50V used to drive the displays.

If you like this you should check out the first VFD clock he built. We featured it a while back in a links post.

Ubuntu With A GUI On A Beagleboard

beagle

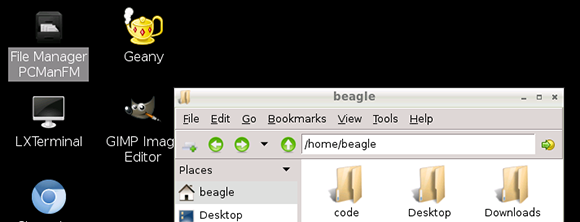
The Raspberry Pi is great if you’re looking for a cheap yet powerful computer running Linux, but let’s not forget all the other ARM dev boards out there. [Adam] spent some time this weekend putting together an Ubuntu distro for his Beagleboard XM to give it the convenience of a GUI and a whole bunch of drivers to get a lot of stuff done.

The Beagleboard XM is another high power ARM dev board that is a little more capable than the Raspberry Pi. With an integrated USB hub, LVDS LCD displays, and a camera board, the Beagleboard already has a lot of peripherals that are now only promised for the Raspberry Pi. The only problem with the Beagleboard XM is the state of drivers and software; a problem [Adam] resolved by bringing Ubuntu to the Beagleboard.

[Adam]’s distro comes with all the goodies a relatively high-powered ARM dev board should have: Python, scipy, numpy, and a few cool extras such as GIMP and Chromium. He says it’s a bit faster than the stock Raspbian distro on the Raspberry Pi, so if you’re looking for the best ARM/Linux dev board for your next project, you may want to give [Adam]’s distro a try.

A Bitcoin Mining Example For The BeagleBone With An FPGA Shield

beaglebone-fpga-bitcoin-mining

If you’ve got a BeagleBone and an FPGA board you should give this Bitcoin mining rig a try. The hardware uses brute-force to solve hashes, looking for the rare sets that can be used as digital currency. This particular example is designed for the LOGi-bone which is an FPGA shield for the BeagleBone. But we don’t see anything that would make this difficult to use with other FPGA hardware.

We’ve seen FPGA hardware bitcoin mining in the past. It doesn’t offer as much horsepower as an array of GPUs would, but the ARM/FPGA combo can be used in a cluster in order to speed up the process. This sounds like a fun group project to take on at the local Hackerspace.