PWM On The Stellaris Launchpad

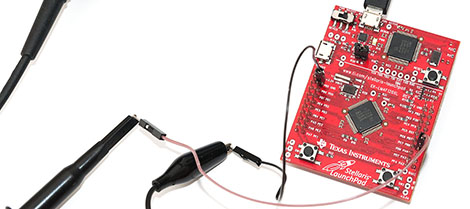
[Joonas] has been following TI’s ‘getting started’ tutorials for their new Stellaris Launchpad. Everything had been going swimmingly until [Joonas] reached the fourth tutorial on interrupts. To the ire of LEDs the world over, implementing PWM on the new Stellaris Launchpad is a somewhat difficult task. After banging his head against the documentation for hours, [Joonas] finally cracked his PWM problem and decided to share his discoveries with the world.

The Stellaris has a PWM mode for its six hardware timers, but unfortunately there are no PWM units on the chip. Solving this problem required making two 16-bit timers out of a single 32-bit one. This allowed [Joonas] to specify a ‘load’ and ‘match’ value.

After coding this up, [Joonas] discovered the PWM timer only works on two of the Launchpad’s pins. Hours of Googling later, he had real PWM on his Stellaris Launchpad.

Given the amount of time [Joonas] spent on this problem, we’re glad to help all the other frustrated Stellaris tinkerers out there by sharing this.
Guide To Developing With The Stellaris Launchpad On A Linux Box

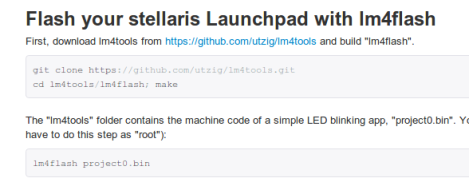
So you picked up your very own Stellaris Launchpad, a TI ARM dev board which can be in your hands for just five bones. They do distribute several free IDEs which are not size-limited but perhaps you’re more of a text editor and command line sort of person. Well you’re in luck. There’s now a guide to show you how to code for and program the Stellaris Launchpad from a Linux box with using one of the IDEs.

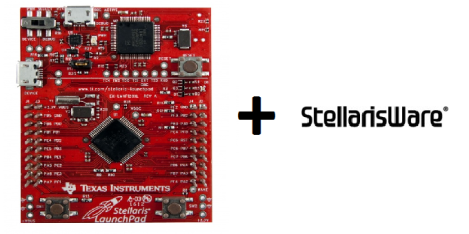
There are two main things that are needed to accomplish this. The first is a cross-compiling toolchain for the ARM architecture; something that has been readily available for quite some time. The second is a way to talk to the in-built Stellaris programmer from a Linux machine. The hardware uses the ICDI protocol, and as we reported last week the lm4tools project can be used for this purpose. The guide also covers building the StellarisWare package. It’s not a requirement, but it makes using the peripherals much easier and provides names for the I/O pins, etc.

Our favorite for debugging microcontroller projects is OpenOCD. From this thread post it looks like there is now ICDI support in the development branch of the software if you don’t mind compiling from source.

.NET For The STM32 F4 Discovery Board

Here’s a technique that will let you use the .NET framework on an STM32 Discovery board. [Singular Engineer] was happy to learn that the .NET Micro Framework had been ported for STM32 chips. It’s doesn’t look like the port has hit a stable version yet, but these instructions will be enough to get you up and running. This lets you use managed code in the C# language to program an embedded device: the STM32 F4 Discovery board.

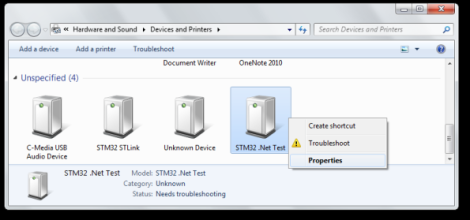
After flashing a new bootloader to the board a driver needs to be added for Windows to communicate with it. Above you can see that the board will enumerate as ‘STM32 .Net Test’. Once the driver is installed the rest of the firmware can be loaded on the board using a GUI supplied with the NETMF for STM32 package. That takes care of prepping the hardware, the rest is a painless process of configuring Visual Studio to use the board as a target. The ‘Hello World’ application then uses C# to blink an LED.

Debugging The Stellaris With OpenOCD

It looks as though Texas Instruments are really reaching out to the hacker community with their new ARM-powered Stellaris dev board. On the Stellarisiti forums, a member asked about the debugging options for the Stellaris board. The Stellaris already features an In-Circuit Debug Interface (ICDI), but unfortunately it’s a little hard to get working in Linux-ey environments.

One of the devs for the Open On-Chip Debugger was already talking with TI to get the ICDI spec released for the Stellaris board. TI released the info, and after quite a bit of work, everything is open for all to see.

Right now, OpenOCD support for the Stellaris is still incomplete, but there is an project up on the Gits that allows for multi-platform development for TI’s new board.

Needless to say, getting everything up and running is still a chore. That’s not really a concern, though; the Stellaris has only been around for a few months and it takes devs time to put all the required tools into nice, neat packages. We’re just glad TI is being so forthcoming with the relevant documentation, lest development becomes a million times harder.

The Arduino Due Is Finally Here

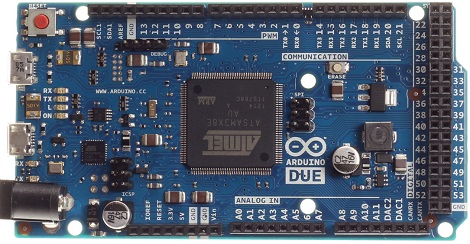
After a years-long wait, an ARM powered Arduino is finally due. The Arduino Due will finally be released this coming Monday.

On board the Arduino Due is an Atmel-sourced ARM Cortex M3 microcontroller running at 84 MHz. The Due has an impressive list of features including a USB 2.0 host, compatibility with the Android ADK (lest you still need an IOIO), 12 analog inputs with 12-bit resolution, 2 analog outputs running at 12 bits, a CAN interface, and more input pins than you can shake a stick at.

For a full list of features, you can grab this PDF we picked up when we saw the Due at Maker Faire NYC

This hardware update to the Arduino platform makes a lot of very cool builds very possible for even the beginner hardware hacker. Of course the Due will be used for controlling drones and UAVs, laser cutters and 3D printers, and playing WAV files from the analog outputs. The much improved hardware opens up a lot of other possible builds including making your own guitar pedals – DSP is a wonderful thing – and reading the telemetry from your car in real-time via the CAN bus.

Although it’s not available right now, you will be able to buy an Arduino Due for $49 USD this coming Monday at your favorite electronics retailers. 

LiPo Powered Stellaris Launchpad

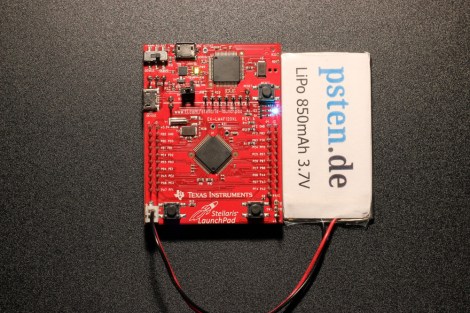
Want mobile power for your Stellaris Launchpad development board? [Philipp] was looking to add some lithium power for the Launchpad. He used an off the shelf single cell LiPo battery and connected it to the 5V rail of the Launchpad board. It didn’t work.

So [Philipp] started looking through the schematics and noticed that the regulator was working fine, but the Stellaris wasn’t starting up. He tracked down a voltage supervisor connected to the Stellaris reset pin. After some investigation, it was clear that this supervisor was holding the device in reset.

The solution is a quick and dirty hack: cut the trace that connects the reset line to the voltage line. With this modification, the device starts up from the LiPo without any issues. [Philipp] does note that you should be careful about battery under-voltage and over-voltage. This hack doesn’t handle charging the LiPo battery, but we’ve discussed that in the past.

Using StellarisWare With The Launchpad

In our last Stellaris how-to we got the board working and set some registers to turn on the LED. This time we’ll start using StellarisWare Driverlib, which provides drivers for the microcontroller’s peripherals including GPIOs, UARTs, ADCs, and so on. These libraries make it easier to control the peripherals. We’ll build the Driverlib project, create a project from scratch to use the library, and run a simple LED blinking example.

Continue reading “Using StellarisWare With The Launchpad” →