The Fridge Hacking Guide By BrewPi

brewpi-fridge-conversion-51

The team behind BrewPi are at it again! This time they have created an online guide showing how to convert a min-fridge into a Raspberry Pi & Arduino controlled fermentation chamber. In it, they describe 3 possible options:

  • Option 1: Make a simple switched power cord, without hacking into the fridge electronics.
  • Option 2: Make a switched power cord, but also override or remove the thermostat.
  • Option 3: Rip out the thermostat and fully integrate the SSRs into your fridge (which is what [Koen] and [Elco] did).

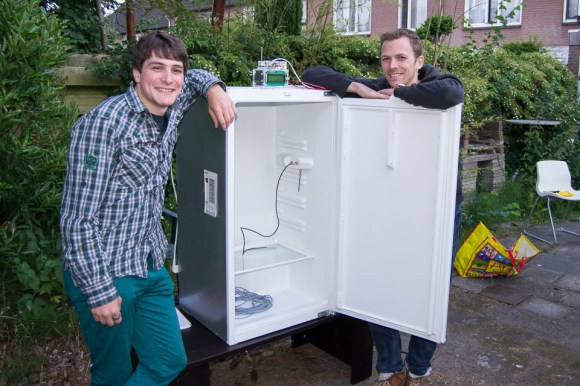
First things first though. They had to clean the fridge. And depending on where they got it or how long it has been unplugged for, the inside might have been pretty rank and disgusting from mold growing out of every corner. This took a good hour or so to clean properly lest the brewing process get infected with external grossness. This is all worth it because a well-controlled fermentation chamber results in a superior batch of beer.

They put their laser cut case on top of the fridge, holding an LCD, Raspberry Pi, Arduino and the BrewPi Arduino shield. The Arduino reads the temperature sensors inside the fridge, the beer and the ambient temperature. Then it controls the SSRs they added to switch the compressor and a heater. Then, the cables were routed through the fridge and take control of the compressor.

Continue reading “The Fridge Hacking Guide By BrewPi”

Temperature Controller Gets Open Source Firmware Upgrade

stc1000

Beer lovers rejoice! [Mats] has reverse engineered a temperature controller and written new open source firmware for it. This effectively gives all us homebrewers a low cost, open source software driven controller. The STC-1000 is a cheap (under $20 USD) temperature controller mass-produced in the far east. The controllers do work, but have several limitations. The programming options are somewhat limited to basic set points for heat and cool. The controller also is only programmed for temperature display in Celsius, which is a bit of an annoyance for those of us who think in Fahrenheit. Under the hood, the STC-1000 utilizes a Microchip PIC16F1828 microcontroller. Unfortunately the PIC’s protection bits were set, so the original code would have been extremely difficult to extract. Not a problem, as [Mats] reverse engineered the hardware and wrote his own firmware. A 10k NTC thermister acts as the temperature probe. The probe is read by the PIC’s ADC. These probes are not very linear, so a look up table is used to convert from volts to degrees Celsius or Fahrenheit.

[Mats] new firmware allows for up to 6 profiles. Each profile has up to 10 set points and a time duration to hold each of the set points. Hysteresis and temperature offset values are also programmable via the front panel. PIC software is often written in C using Microchip’s MPLAB tool chain, and programmed with the PICkit 3 In Circuit Serial Programming (ICSP) tool. [Mats] decided to buck the system and wrote his C code using Small Device C Compiler. To keep things simple for homebrewers who may not have Microchip tools, [Mats] used an Arduino Uno for flashing duties. Thankfully the unholy matrimony of a PIC and an AVR has not yet caused a rift in time and space. The firmware is still very much in the beta stage, so if you want to help out, join the discussion on the homebrew talk forum. If you see [Mats] tell him we owe him a Haduino which he can use to almost open his beer.

[Thanks for the tip Parker!]

Smart Kegerator Bills Based On Beer Consumption

Kegerator ownership is awesome, but it has its downsides. It’s hard to keep track of who drank what without cans or bottles to count. [Phil] was looking for a good solution to this problem when it came to sharing beer with his roommates and friends and has just completed the first iteration of his smart kegerator.
He has devised a system based on a Raspberry Pi.  His software recognizes the face of the person pulling a beer and adds a charge to their tab based on the price of the keg and the volume of the pour. The system also keeps track of current and historic temperature and humidity values inside the kegerator, and everything is displayed on a Mimo 720S touch screen.

[Phil] has a flow meter on each keg to detect and monitor pouring. This triggers the Pi camera module to run the facial recognition. The walk-through found after the jump might be a bit confusing; at the time it was recorded, the unit was only capable of facial detection. [Phil] wrote the UI in QT and C++ and used Python scripts for the flow interrupts. His plans for future iterations include weight sensors underneath the kegs, liquid probe thermometers for more accurate beer temperature readings, a NoIR Pi camera module for low light conditions, and a really snazzy UI that you’ll see on his build page.

If you don’t have a Pi, here’s an Arduino-fied kegerator that reports temperature and controls beer cooling.

Continue reading “Smart Kegerator Bills Based On Beer Consumption”

Fetching Etchings For Stainless Steel

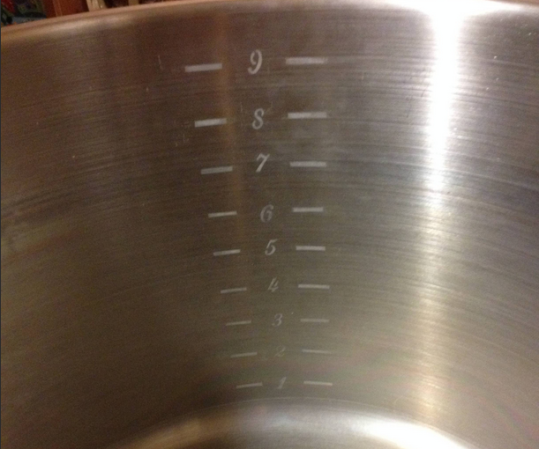
What do you do when you have a 10-gallon brew kettle (or any other stainless steel or aluminium thing) with no volume markings (or Hack a Day logos)? If you’re [Itsgus], you use science to etch some markings with a few household items and a 9V and you call it a day.
[Itsgus] used 1/4c vinegar and 1/4tsp of salt to form an electro-etchant and applied it with a Q-tip connected to the negative terminal of a 9V. He used tape to connect a wire between the positive terminal and the kettle. The vinegar dissolves the salt, creating negatively charged ions. Connected correctly to a 9V, the process removes metal where the current flows. If you were to connect it in reverse,  you would add a small amount of metal.

The process only takes a few seconds. When the etchant starts to sizzle and bubble, Bob’s your uncle. Even though the stainless steel’s natural coat re-oxidizes over the etches, you should probably wash that thing before you brew. If you prefer adding metal to removing it, try electroplating copper on the cheap.

Advanced Beer Carrier, Or How To Get Beer Onto A Plane

beer-import-case

[Badmonky] was facing a life crisis. How could he enjoy the hard-to-find German beers from his homeland while living in Princeton, New Jersey? Sure, you can find many good imports if you try, but that may come at a hefty price. Plus, the lesser known beers are completely unavailable in the States. Of course the solution is to import them himself after each trip home. He just needed a way to get as much beer on a plane as he possibly could.

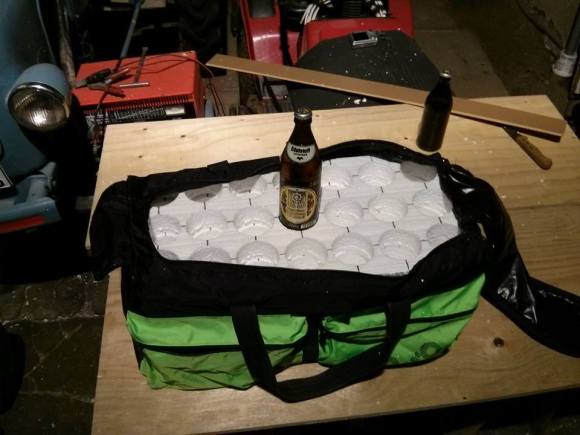
We’d have no problem walking down the aisle with a couple of cases of cold ones, but let’s be honest here. Security won’t even let you on the plane with a bottle of water these days much less a case of tallboys. [Badmonky] hacked together this custom carrier so that it could be checked as luggage while protecting the frothy goodness. Two limiting factors to consider are size and weight. He started with the latter, calculating that 24 bottles would remain under his 50 pound limit. From there he selected a sports bag and picked up sheets of foam which were perforated using a hole saw. Alas the size constraint forced him to leave three of the (now empty?) vessels behind.

The bottles ride upside down and made the international voyage without incident. In retrospect he would have picked a roller-bag as this thing is hard on your shoulder after a trip through the airport and the public transit ride home.

The real question in our mind: why didn’t he check a keg?

An Elegant Kegerator For Less Than $100

keg

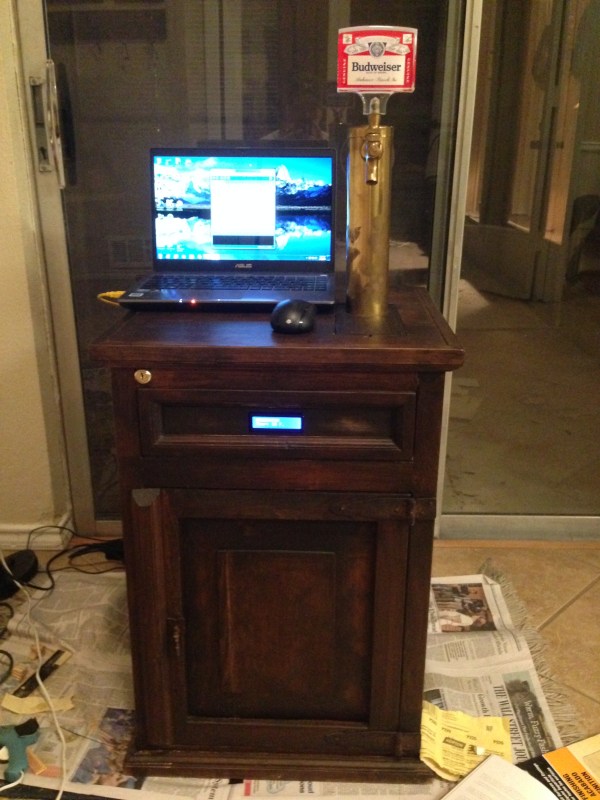
Looking for a fun weekend project? How about making your very own kegerator for about $100? Well, minus the keg of course.

First you’ll need a run of the mill mini-bar fridge. These can be had for free if you prowl student neighborhoods at the end of a semester; it’s amazing what you can find being thrown out. Next you’ll have to modify it a bit: remove the shelving and pop a hole in the top. The trickiest part is building the top out of wood, although [jypuckett] shows us that it’s really not that difficult, and wood stain is your friend!

The most expensive part of the build is probably going to be the fittings, hoses, and tap, but that’s a small price to pay for your very own kegerator.

While it’s not quite as fancy as this over-engineered kegerator, the six-tap freezer chest kegerator, or as vintage as this 1950’s General Electric fridge kegerator, it is a great example of making one for cheap, that works, and looks good.

It also raises the question: if it’s this easy to make, why haven’t you made one yet?!

Peristaltic Pump Moves Fluids Uphill Both Ways

Here’s a skill we should all probably have for after the apocalypse—the ability to build a cheap peristaltic pump that can transport highly viscous fluids, chunky fluids, or just plain water from point A to point B with no priming necessary. That’s exactly what [Jack Ruby] has done with some fairly common items.

He started with a springform cake pan from a thrift store, the kind where the bottom drops out like that centripetal force ride at the carnival. He’s using 2″ casters from Harbor Freight mounted to a block of wood. The casters go round and squeeze fluid through the hose, which is a nice length of heat-resistant silicone from a local homebrew shop. He’s currently using a drill to run the pump, but intends to attach a motor in the future.

[Jack]’s write-up is very thorough and amusing. Stick around to see the pump in action as well as a complete tour. You can also pump colored goo if you’re out of beer materials.

Continue reading “Peristaltic Pump Moves Fluids Uphill Both Ways”