Make Your Own Integrated Circuits At Home

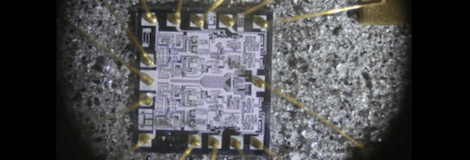
The Nyan Cat you see above is only 600 micrometers from head to tail. To put that into perspective, that’s about 10 times the diameter of a human hair. Also, that Nyan is etched into 200 nanometer thick copper foil and is the work of the HomeCMOS team, who is developing a hobbyist-friendly process to make integrated circuits and MEMS devices at home.

The project is far from complete; HomeCMOS has yet to produce a working IC but a few experiments – getting wet etching down pat and even building an almost working quantum qbit – are remarkable given the small amount of equipment and tools involved.

The HomeCMOS team has yet to actually make an integrated circuit or MEMS device, [Jeri Ellsworth] has shown this is possible by making transistors and integrated circuits at home. While there won’t be chips with millions of transistors coming out of the HomeCMOS lab anytime soon, it’s more than possible to see a few small-scale integration-level tech such as a few logic gates or a regulator.

More DIY Solder Flux

[GuShH] wrote a guide for making your own rosin-based solder flux. According to [Stephen] — who sent in the tip and tried this method himself — is works well, it’s cheap, but you will need to clean up a bit after using it on a PCB.

Only two ingredients are necessary to make your own liquid or paste flux: rosin and a solvent. The rosin being weighed in the image above, can be found from several sources. We looked in on the same method quite recently where flux was sourced from a music store. But [GuShH] suggests that if you can find some from a hardware store it is better because the music store variety tends to be ‘molten’ and doesn’t work quite as well.

Proportions are listed on his guide for light, medium, and heavy concoctions. He recommends isopropyl alcohol as the solvent, and has stored the flux in a clear dropper bottle. We’re fans of needle bottles and asked about sourcing them in a previous post (linked in the paragraph above) so check that comments section if you don’t know where to get one.

Homemade Silicon Carbide LED

Here’s an LED indicator which was made at home out of a Silicon Carbide (SiC) crystal (Internet Archive Mirror). The concept is simple, but a bit of trial and error goes into getting that tiny amber spot to light up.

The guesswork comes in finding the right piece of crystal. First [KOS] broke it into tiny pieces, then he started poking the chunks with electrified probes to see if he could get some light out of them. Once an active area was found he needed a base for the crystal. The image above shows the two nails which he used. This provides a large mounting area that also acts as a heat sink to make sure the LED won’t burn itself out. There’s a solder blob which he kept molten with his iron until the crystal could be pushed into place. That holds it securely as the pin which serves as the cathode is positioned.

The whole setup is soldered to some protoboard and is ready to use. This is the second time we remember seeing this technique used to fabricate LEDS. The first time was an accident.

How Anodization Is Used To Make Pretty IPod Colors

What do those colorful iPod Nano cases have in common with sapphires? In both substances the color is not on the surface, but integrated in the structure of the material. As usually, [Bill Hammack] unveils the interesting concepts behind coloring metal through anodization in his latest Engineer Guy episode.

We’re not strangers to the anodization process. In fact we’ve seen it used at home to change the color of titanium camping utensils. [Bill] explains what is actually going on with the electrochemical process; touching on facts we already knew; like that the voltage range will affect the color of the annodized surface. But he goes on to explain why these surfaces are different colors and then outlines how anodized metals can be dyed. That’s right, those iPod cases are colored with dye that will not wash or scratch off.

Pores are opened when the aluminum goes through anodization. Those pores are filled with dye, then the metal is boiled in water which closes them, sealing in the color. Pretty neat!

Continue reading “How Anodization Is Used To Make Pretty IPod Colors”

Conductive Ink Circuit Experiments

This glowing LED is proof that the experiments [Nvermeer] is doing with conductive ink are working. We’re filing this one as a chemistry hack because  you need to hit the lab ahead of time in order to get the conductivity necessary for success. He reports that this technique uses a copper powder suspended in an epoxy intended for spray painting. Before mixing the two he etched the powder in ammonium persulfate, then washed it in deionized water which made it a much better conductor.

We gather that the ink was applied with the brush seen in the photo. But since this uses that spray paint friendly solution to host the copper powder we wonder about stenciling with something like masking tape in order to spray the circuit paths onto the substrate.

There’s not too much info up yet, but [Nvermeer] does link to one of our other favorite conductive ink projects.

DIY Science – Acid/Base Natural Indicators

natural-indicators

Nearly everything at [HAD] is at least based on science in some way or another. If, however, you would like to do some actual scientific experiments with stuff around the house, [Observationsblog] might be for you.

The particular posts that [Ken] wrote in to tell us about were all about acids, bases, and natural indicators. In his first post he goes over some definitions of acids, bases, and what pH exactly means. A good refresher for those that have forgotten some of their high school (or college) chemistry classes.

The other two posts have to do with making your own natural acid/base indicators. The first is called Anthocyanin, and can be extracted from Red Cabbage.  Quite specific directions can be found here. Similar directions can be found to turn the Indian spice of [Turmeric] into an indicator as well. Although these concepts probably won’t help build your next robot, they could easily be copied inspire young minds for a great science fair project!

What The Flux: Buy It Or Brew It Yourself

Flux generally makes our lives easier. It’s the best bet when trying to prevent solder bridges with fine-pitch components like you see here. But it is also indispensable when it comes to desoldering components from a board (we’re talking just one component without disturbing all of the others). But have you ever looked at what it costs to pick up a syringe of liquid flux from an online retailer? In addition to the cost of the product itself there’s usually a hazardous material handling fee that is rolled into the shipping cost. So we were happy that [Christopher] sent in a link to the DIY flux page over at Dangerous Prototypes.

The concept is simple enough. Mix some rosin with some solvent. Turns out these items are really easy to source. The solvent can be acetone (which you may have on hand for removing toner transfer from freshly etched PCBs) or plain old rubbing alcohol. And an easy source for rosin is your local music store. They sell it to use on bow hair for String players. Grind it up, throw it in a bottle and you’re good to go. Now does anyone know where we can source needle-tipped bottles locally?

For those that still just want to buy flux we highly recommend watching part one and part two of [Ian’s] flux review series.