Hacking The IPod Nano Display: Beautiful!

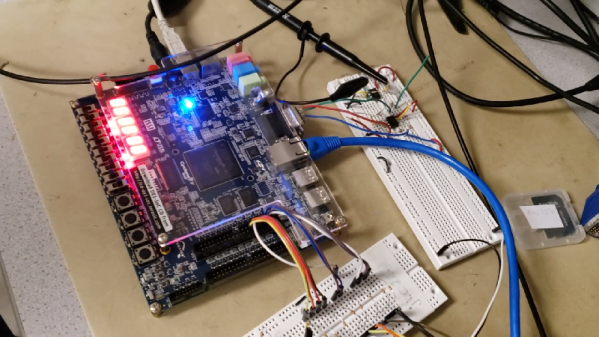
The 6th Generation iPod Nano was something of a revelation on launch. Packing a color screen, audio hardware, and a rechargable battery into a package no bigger than a large postage stamp remains impressive to this day. They’re now being used in various maker projects for their displays, but if you’re doing so, you might want to think about how you’re going to build a graphical interface. Not to worry – just grab an ESP32 and the right GUI library, and you’re on your way.

The Nano screen uses a MIPI DSI interface, which isn’t the easiest thing to use directly with the ESP32. Instead, a SSD2805 interface chip converts parallel input data to MIPI DSI signals to drive the display. Driving the display is only part of the game, however – you need something to display on it. Combining the LittlevGL GUI library with the screen’s touchpad makes creating a full graphical interface easy.

Hacked screens are something we don’t see as much these days, with the proliferation of display products aimed directly at the maker market. However, it’s always awesome to see a successful hack pulled off well. We’ve seen the display reverse engineered, too – and it certainly wasn’t easy.


Designing Custom LCDs To Repair Retrocomputers

China, we’re told, can make anything. If you need some PCBs in a few weeks, there are a few factories in China that will do it. If you need a nuclear reactor, yep, there’s probably a factory in China that’ll do it because nuclear reactors are listed as one of the items facing new tariffs when imported into the United States. No, I am not kidding. What about LCDs? What about old-school character LCDs? Is it possible to find a factory in China that will make you the LCD you want? That’s what [Robert Baruch] will find out, because he’s repairing an old computer with new parts.

The object of this repair and restomod is a TRS-80 Pocket Computer (PC-1), otherwise known as the Sharp PC-1211. It looks like a calculator, but no, it’s a legitimate computer you can program in BASIC. [Robert] bought this computer for a bit more than $5 on eBay ‘for repair’, which means the zinc-air battery was dead, and unfortunately, the LCD was shot. The LCD technically works, but it just doesn’t look good. Sometime in the last thirty years, moisture got in between the layers of glass, polarizing film, and liquid crystal. This is not unique to [Robert]’s unit — a lot of these PC-1s have the same problem, many of these broken seals rendering the computers themselves useless.

This is an ancient computer, and replacements for this LCD are impossible to find, but because the Sharp PC-1211 is well documented, it is possible to find the datasheet for the original display. With that, it’s just a question of finding an LCD manufacturer that will do it. So far, the costs look good — $800 USD ($300 for tooling and 10 samples, $500 for another 200 LCDs) is what it’ll take to get a few units. [Robert] already has a few people interested in repairing their own Pocket Computers. You can follow the eevblog thread here, or check out the video below.

Continue reading “Designing Custom LCDs To Repair Retrocomputers”

Paper Cup Mic Is Fun And Functional

Any studio operator worth their Protools subscription will have a wide array of microphones to cover any conceivable situation. SM57s to cover guitar cabs, fancy gilded ribbon mics for vocal takes, and a variety of condensers to round out the selection. That’s all well and good for high-fidelity recording, but what if you want to go the other way? [LeoMakes] has just the thing, with his sub-$10 paper cup mic.

The basic concept is that of a dynamic microphone. A paper cup is attached to a taut string, upon which a magnet is affixed. Sound waves hitting the paper cup cause the string, and thus the magnet, to vibrate. The magnet is located within a coil, created from thin insulated wire wrapped around an old solder spool. This induces a current, creating the audio signal.

Results are as lo-fi as you’d expect, with the exact character of the sound changing depending on the tension of the string and the exact materials used. It’s a fun project that can be tackled with cheap materials, and there’s scope to create all manner of wacky mics by varying the parameters of the build. If you’re doing this more than once, however, you might want some help winding the coils — let this project be an inspiration. Video after the break.

Continue reading “Paper Cup Mic Is Fun And Functional”

This Vintage Op-Amp Opens A Fascinating Window Into Semiconductor History

We have covered enough of the work of [Ken Shirriff] on these pages to know that when he publishes something, it will be a fascinating read and work of the highest quality. And so it is with his latest, a very unusual op-amp on which he performs his usual reverse engineering. Not only does it lead us directly to some of the seminal figures in the early years of the semiconductor industry, it turns out to have been a component manufactured to a NASA specification and of which there is an example on the Moon.

The metal can revealed a hybrid circuit when the lid was removed, one in which individual transistors were wired together with a single block containing a group of thin-film resistors. At the start of the 1960s the height of consumer electronics would have been your domestic TV which would have been an all-tube affair, so while it sounds archaic this would truly have been a space-age piece of technology. The designer is revealed as the legendary [Bob Pease], and the transistors take us back to the semiconductor physicist [Jean Hoerni], inventor of the planar transistor and one of the famous eight defectors from Shockley Semiconductor in the 1950s who kick-started the semiconductor boom.

The op-amp itself is a relatively simple design without the compensation capacitor you might expect in a modern device, but what makes it unusual for its time is the use of [Hoerni]’s planar JFETs at its input. [Ken]’s analysis is as usual extremely thorough, and the bit of Silicon Valley history it gives us is the icing on the cake.

If you have a thirst for ancient op-amps, you might like our look at the first commercially available fully-integrated design, the Fairchild μA702.

The 8-Bit Guy Builds A 16-Bit Computer

One of the better retro historians out there on YouTube is the 8-Bit Guy, and after years of wanting to do something like this, it’s finally happening. The 8-Bit Guy is building his dream computer, heavily inspired by the Commodore 64.

Before we go into what this computer will do and what capabilities it will have, it’s important to note the 8-Bit Guy is actually doing a bit of market and user research before dedicating a year or more to this project. He’s asked other famous retrocomputing YouTubers for their input on what their ‘dream’ retrocomputer should do, and they’ve come up with a basic list of requirements. The Dream Computer will be like working on a 1957 Chevy, in that all the registers are immediately available for peeking and poking. The computer will be completely comprehensible, in so far that one person can completely understand everything, from the individual logic gates inside the CPU to the architecture of the kernel. It’ll run BASIC.

In the age of the Raspberry Pi, one might ask, ‘why not go with a Raspberry Pi?’. To the 8-Bit Guy, the Pi is just a Linux computer. Other retrocomputing projects of a similar scope to this dream computer also fail: The Mega65, a project to resurrect the Commodore 65, will be too expensive. The BASIC Engine fails because it only does composite out, and it runs on an ESP anyway, so you’re shielded from the real hardware. The same problem exists with the Maximite in that the hardware is one layer of abstraction away from the interface. The C256 Foenix is probably the closest to meeting the design goals, but it’s far too expensive, and even without the MIDI ports, SID chips, and other interesting hardware, it would still be above the desired price point.

The ‘requirement’ for this dream computer is to use only modern parts, have VGA or HDMI video out, a real CPU, preferably a 6502, use no FPGA or microcontrollers, and can run Commodore Basic. Also, this computer would cost about $50, with $100 as the absolute, maximum limit (implying a BOM cost of around $15-$25). This is absolutely, completely, astonishingly impossible. I would be deceiving you if I did not mention the impossibility of this project happening with the stated goals. This project will not meet the goal of selling for less than one hundred dollars.

That said, there’s no harm in trying, so The 8-Bit Guy is currently working with a few dev boards, specifically one designed around the 65816 CPU. The 65816 is an interesting chip, in that it is a 6502 until you flip a bit in a register. It has a larger address space than the 6502, and everything from the World of Commodore should be (relatively) easily ported to the 65816. Why was this CPU never used in Commodore hardware? Because a Western Design Center sales guy told a Commodore engineer that Apple was using it in their next computer (the Apple IIgs). The option of Commodore ever using the ‘816 died then and there.

If you’d like to help out on this computer, there is a Facebook group for organizing the build. This Facebook group is a closed group, meaning you need a Facebook account to login. Unfortunate, but we’re looking forward to a year of updates around this dream computer. Building a computer that meets the specs is impossible, but we’re more than eager to see the community try.

Continue reading “The 8-Bit Guy Builds A 16-Bit Computer”

Arduino Revives A Classic 1980s Minitel Terminal

Before there was the Internet, there were a lot of would-be Internets. Compuserve comes to mind, as do Prodigy, GEnie, Delphi, and the innumerable BBS systems that were once gateways to worlds beyond our CRT monitors and 300 baud Hayes Supermodems.

Service providers varied by region, of course. The French postal and telephone service rolled out their service, Médium interactif par numérisation d’information téléphonique, in 1978. Mercifully and memorably shortened to Minitel, the service was originally intended primarily as an online telephone directory, and later expanded to include other services. [Kevin Driscoll] and [Julien Mailland] recently resurrected a Minitel terminal, a Videotex terminal that was the gateway to the service. The terminal they used, a model 1B, is a stylish machine with a monochrome CRT display and compact “AZERTY” keyboard. [Kevin] and [Julien] built a Videotex server for it using an Uno and a logic-level converter to keep the two talking. Using the hardware, they’ve developed a Twitter client, a webcam display, and dumb Linux terminal.

[Julien] and  [Kevin] previously authored a great history of Minitel that’s worth a read. And we’ve seen a few Minitel hacks before, including converting one to USB for use as a Raspberry Pi terminal.

Teach Computing The Old-School Way With A Digi-Comp II

Ubiquitous computing has delivered a world in which there seem to be few devices left that no longer contain a microprocessor of some sort. Thus should a student wish to learn about the inner workings of a computer they can easily do so from a multitude of devices. For an earlier generation though this was not such a straightforward process, in the 1950s or 1960s you could not simply buy a microcomputer and set to work. Instead a range of ingenious teaching aids providing the essentials of computing without a computer were created, and those students saw their first computational logic through the medium of paper, ball bearings, or flashlight bulbs.

The DigiComp II was just such a device, performing logic tasks through ball bearings rolling down trackways. Genuine machines are now particularly rare, so [Mike Gardi] created a modern 3D printed replica that delivers all the fun without the cost. It’s a complicated build with a multitude of parts and wire linkages, and there is an element of fine tuning of its springs required to achieve reliable operation. You’ll neither run a Beowulf cluster of DigiComp IIs nor will you mine any Bitcoin with one, but it’s definitely one of the more unusual computing devices you could have in your collection.

Of course, should you need a truly authentic period computing device, there is always the slide rule.

Via Hacker News.