Miniature 3D Printed Forklift Is Quite Pallet-able

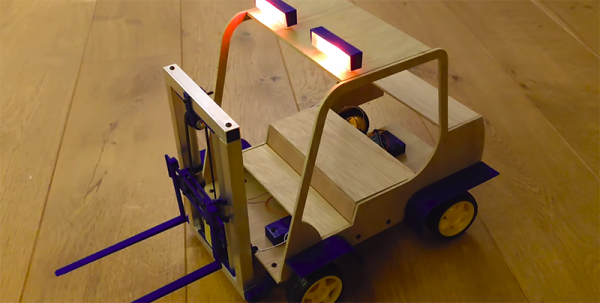
If you have a small logistics problem, we have the solution for you. [Leon] built a tiny little forklift with LED lighting, working forks, and remote control using a combination of 3D printing tech, some CNC work, and fine soldering skills.

The electronics for this build are based around a few servos and a pair of geared DC motors and are driven via an Arduino Mega. Connectivity and remote controllability are what you would expect from an Arduinified project. There’s an HC-05 Bluetooth module on the board and remote control is handled by a custom Android app.

Of note in this project are the forks that actually work, almost like a real forklift. This allows the mini Arduino forklift to pick up mini pallets, drop them somewhere, and have mini DIY enthusiasts come up to build mini-furniture for mini-Etsy, which will be prominently featured in the mini foyer of a mini two-story walkup. No, it’s not mini-gentrification; this mini forklift is helping the mini local economy.

You can check out the entire build video below, filmed in the usual maker demo method of speeding up the entire build process but somehow keeping the no-talking audio. We have a lot to thank [Jimmy DiResta] for, and it’s not just cinematography. All the files for this forklift are up on the Github should you want to build your own.

Continue reading “Miniature 3D Printed Forklift Is Quite Pallet-able”

DIY Reflow Oven Is Heavily Documented

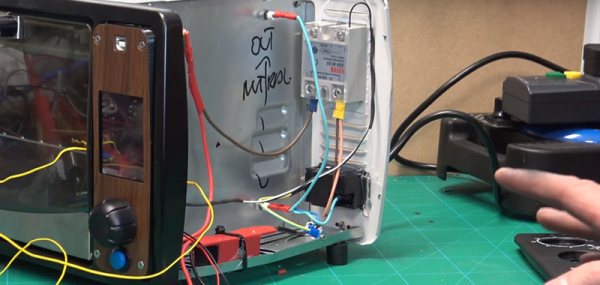
[DJ Legion] decided he wanted a reflow oven so he bought a toaster oven and an assortment of parts including a solid state relay, a Teensy, a display, and a thermocouple. What makes this a different project is the amount of video documentation. The four videos below encompass about 50 minutes of information and he’s promising more to come.

We haven’t found his software — probably because he’s still working on it, but we’re watching his GitHub page expectantly. We really liked the 3D printed faceplate that integrated the controller into the oven. It almost looks like a commercial unit. The use of the woodgrain paper over the 3D printed parts was a nice touch.

[DJ] is not done, though. He wants to increase the heat up time and possibly add convection. He’s also planning on a new video that will show actually making a board and how he has refined the calibration curves.

We are impressed but would have been tempted to just grab a Reflowduino. The work’s already done, and you get wireless control and lots of other goodies. Of course, we also get the urge to do it yourself, so we can’t really throw stones. If you don’t want to mess with an oven, you can always raid the hair salon.

Continue reading “DIY Reflow Oven Is Heavily Documented”

Hackaday Links Column Banner

Hackaday Links: March 10, 2019

Do you like hamburgers? Everyone likes hamburgers. Inspired by a phone you could buy at Spencers in 1991, [Love Hulten] built a Game Burger Advance. The guts are a Raspberry Pi Zero, a standard LCD display and what appears to be a USB control pad. The fabrication is where this one really goes crazy. It’s a significant amount of laser-cut plywood or MDF stacked together into a laminate then sanded and painted to look like a hamburger. Actually, it’s a cheeseburger, but we don’t deal with the prescriptivist view of linguistics and Wendy’s doesn’t sell hamburgers, they sell cheeseburgers without cheese. Hamburgers are not cheeseburgers without cheese but I digress… Just be glad this links post isn’t me going off for two thousand words talking about language and cheeseburgers.

If you have a 2012 MacBook Pro, congratulations, you have one of the last good laptops Apple will ever build. [Docatl] over on Reddit has one of these fine machines, but found it was overheating. This Genius did what anyone would do — drilled some vents in the bottom of the laptop. The results are impressive, with stock temperatures climbing to 80º C when rendering video, and the post-drilled temps cooling down to a balmy 65º.

Here’s a Kickstarter for you. It’s an Arduino Zero in a narrow DIP-16 package, albeit with a USB connector hanging over the outline of a normal DIP-16 footprint. The specs are an ATSAMD21 Cortex-M0+ running at 48 MHz, 256kB of Flash, 32k of RAM, and an integrated bootloader.

Ha ha Tim Cook changed his name to Tim Square because Apple users are squares amirite?

We’re not going to get into a discussion about mental health or anything here, but TheFlightChannel just published a flight sim reenactment of the SeaTac Dash-8 Horizon Air incident from last summer. This video is absolutely fantastic.

The Sipeed K210 is a chip you should know about. It’s a RISC-V microcontroller that’s right up there with the fastest, most powerful STM32 chips, but it’s RISC-V and it costs eight dollars. Also, it has neural networks, because. We first heard about this chip as a preorder on Taobao (?!), but now it’s getting a slightly more official release. Seeed is working on a Raspberry Pi Hat for this chip, and they want your input. Right now we’re looking at two versions, one with WiFi and one without, and both can either work with a Raspberry Pi or as a standalone board. They have the basic layout, but they’d like to know what features the community would want.

From A Dead Laptop To A Portable KVM And PiTop

An essential tool of many sysadmins is a portable terminal ready to plug into an ailing rack-mounted server to administer first aid. At their simplest, they are simply a monitor and keyboard on a trolley, but more often they will be a laptop pre-loaded with tools for the purpose. Sysadmins will hang on tenaciously to now-ancient laptops for this application because they possess a hardware serial port.

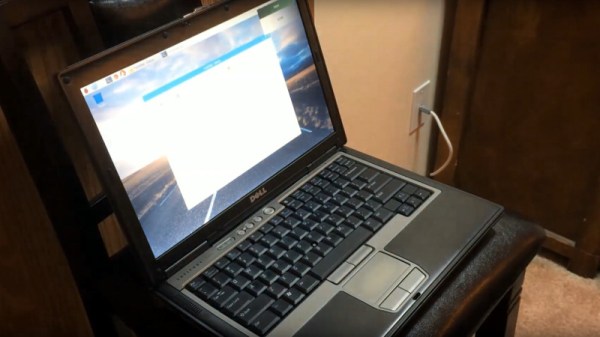
[Frank Adams] has taken a different route with his emergency server crash cart, because while he’s used an old laptop he hasn’t hung onto it for its original hardware. Instead, he’s used a Teensy and an LVDS driver board to replace the motherboards of two old Dell Latitude laptops, one of which is a simple KVM device and the other of which is a laptop in its own right featuring a Raspberry Pi 3. He’s produced a video as well, which we’ve placed below the break.

There was a time when laptop display panels were seen as unhackable, but the advent of cheap driver boards has meant that conversions such as this one have become a relatively well-worn path. The job he’s done here is a particularly well-executed one though, making good use of the generous amount of space to be found in an older business-class laptop. There isn’t a battery because this application doesn’t demand one, however, with the battery compartment intact it does not seem impossible that a suitable charger/monitor board could be included along with a boost converter to provide his 12V supply.

This isn’t the first Pi laptop in a re-used commercial machine’s case we’ve seen, there was also this Sony Vaio.

Continue reading “From A Dead Laptop To A Portable KVM And PiTop”

The Fine Art Of Restoring Matchbox Cars

Did you have anything planned for the next hour or so? No? That’s good because if you’re anything like us, watching even one of the restorations performed on [Marty’s Matchbox Makeovers] is likely to send you down a deep dark rabbit hole that you never knew existed. Even if you can’t tell the difference between Hot Wheels and Matchbox (seriously, that’s a big deal in the community), there’s something absolutely fascinating about seeing all the little tips and tricks used to bring these decades-old toy cars back into like new condition.

Sketching a replacement part to be 3D printed.

You might think that all it takes to restore a Matchbox car is striping the paint off, buffing up the windows, and respraying the thing; and indeed you wouldn’t be too far off the mark in some cases. But you’ve got to remember that these little cars have often been through decades of some of the worst operating conditions imaginable. That is, being the plaything of a human child. While some of the cars that [Marty] rebuilds are in fairly good condition to begin with, many of them look like they’ve just come back from a miniature demolition derby.

The ones which have had the hardest lives are invariably the most interesting. Some of the fixes, like heating up the interior and manually bending the steering wheel back into shape, are fairly simple. But what do you do when a big chunk of the vehicle is simply gone? In those cases, [Marty] will combine cyanoacrylate “super glue” with baking powder to fill in voids; and after filing, sanding, and painting, you’d never know it was ever damaged.

When a car needs more than just paint to finish it off, [Marty] will research the original toy and make new water slide decals to match what it would have looked like originally. If it’s missing accessories, such as the case with trucks which were meant to carry scale cargo, he’ll take careful measurements so he can design and print new parts. With some sanding and a touch of paint, you’d never know they weren’t original.

There’s plenty of arcane knowledge to be gained from folks like [Marty] who have experience with scale models. We don’t often see much of that come our way, but when we do, we’re always impressed at the lengths individuals will go to get that perfect end result. Whether or not you think you’ll find yourself rebuilding a pocket-sized school bus anytime soon, we think there are lessons to be learned from those who might. Continue reading “The Fine Art Of Restoring Matchbox Cars”

Driving A Controllerless LCD With The Humble Arduino Uno

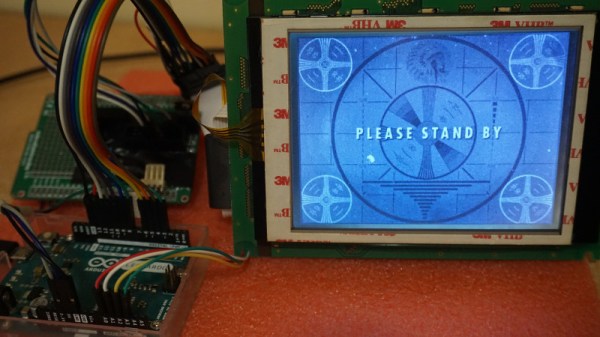
These days, you could be forgiven for thinking driving an LCD from a microcontroller is easy. Cheap displays have proliferated, ready to go on breakout boards with controllers already baked in. Load up the right libraries and you’re up and running in a matter of minutes. However, turn your attention to trying to drive a random LCD you’ve yanked out of a piece of old equipment, and suddenly things get harder. [Ivan Kostoski] was in just such a position and decided to get down to work.

[Ivan]’s LCD was a 320×240 STN device salvaged from an old tape library. The display featured no onboard controller, and the original driver wasn’t easily repurposed. Instead, [Ivan] decided to drive it directly from an Arduino Uno.

This is easier said than done. There are stringent timing requirements that push the limits of the 8-bit platform, let alone the need for a negative voltage to drive the screen and further hardware to drive the backlight. These are all tackled in turn, with [Ivan] sharing his tips to get the most flexibility out of the display. Graphics and text modes are discussed, along with optimizations that could be possible through the varied use of available RAM and flash.

The code is available on Github. If you need inspiration for your own controllerless LCD driver. [Ben Heck] has done similar work too, using FPGA grunt to get the job done.

Component Video For The Commodore 64

Of all the retro systems, the Commodore 64 had the best video system. The VIC-II chip in the C64 was the best example of why Commodore was the best, but in terms of video output, the C64 was still a consumer device: the only output was S-video, or composite video, or something like it. The professional stuff uses YPbPr, an RGB video signal that separates the red, green, and blue colors. On a modern LCD, the difference between composite and YPbPr is noticeable, and if you’re going to run your C64 on the big screen, it would be very helpful to use a professional video standard.

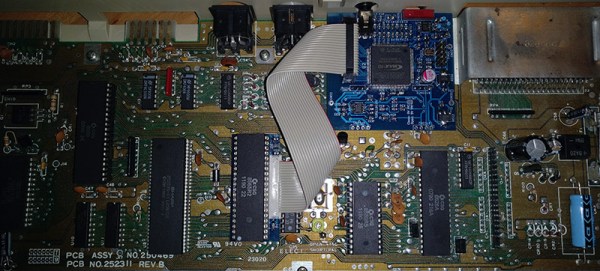
In an effort to bring the C64 into the future, [c0pperdragon] created an FPGA-based modification for the VIC-II chip. The end result is getting YPbPr signals directly from the computer, and outputting it to a TV in glorious 480p.

Inside the Commodore 64, the VIC-II creates the chrominance signal in a way that is impossible to convert it back to any form of RGB. The solution to get RGB out of this information is to listen in to 22 pins of the VIC-II to determine what signals it intends to generate. This is done with a smallish Altera FPGA connected to the VIC-II through a ribbon cable. On the FPGA, the luminescence and all the color information is generated, then converted into true YPbPr. For the complete mod, the RF modulator is removed, and the original A/V jack is still functional. This is effectively a very in-depth mod that rids the C64 of the TV connector and channel selector (that no one uses anymore) and replaces it with a professional-grade video output.

When it comes to C64 mods, we thought we’ve seen it all. We’ve seen C64s resurrected from the dead, and we’ve seen drop-in replacements for the SID that still don’t have working filters oh my god. This is on another level. This is using FPGAs to drag the C64 into the modern era, and if you don’t care about the rusting RF box, it’s a reversible mod.