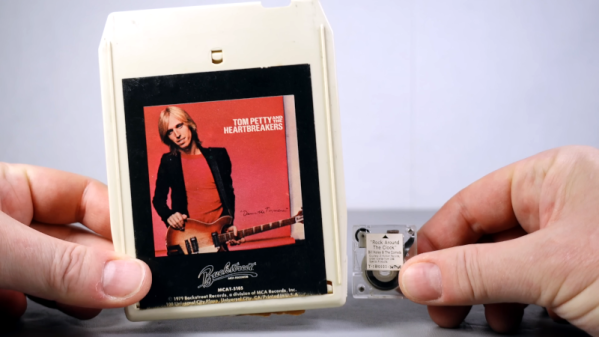
If you want to add sound to something these days, you usually store it digitally. Microcontrollers are cheap and fast, and you can hold a lot of audio on a small flash card or in a ROM. But back “in the day,” storing audio was often done with tape. If you wanted something you could automate, you often turned to an endless loop tape. They had the advantage of not needing rewinding and had a way to sense spots on the tape (usually the start). The 8-track, for example, was an endless loop tape, and radio stations used “carts” (technically Fedelipak cartridges). But what if you wanted to build something tiny? Bandai had the answer, and [Tech Moan] shows the 1986-era tiny carts.
In the US, these appear to be mainly in the realm of novelty items. [Tech Moan] has an Elvis figurine that sings thanks to the tape and a diminutive jukebox. He suspects these must have been used in something else, perhaps in the Japanese market.
When you’ve been a fact-sponge for electronics trivia for over four decades, it’s not often that an entire class of parts escapes your attention. But have you seen the Skiatron? It’s a CRT that looks like a normal mid-20th-century tube, until it’s switched on. Then its secret is revealed; instead of the glowing phosphor trace we’d expect, the paper-white screen displays a daylight-readable and persistent black trace. They’re invariably seen in videos of radar installations, with the 360 degree scans projected onto large table-top screens which show the action like a map. It’s like e-ink, but from the 1940s. What’s going on?
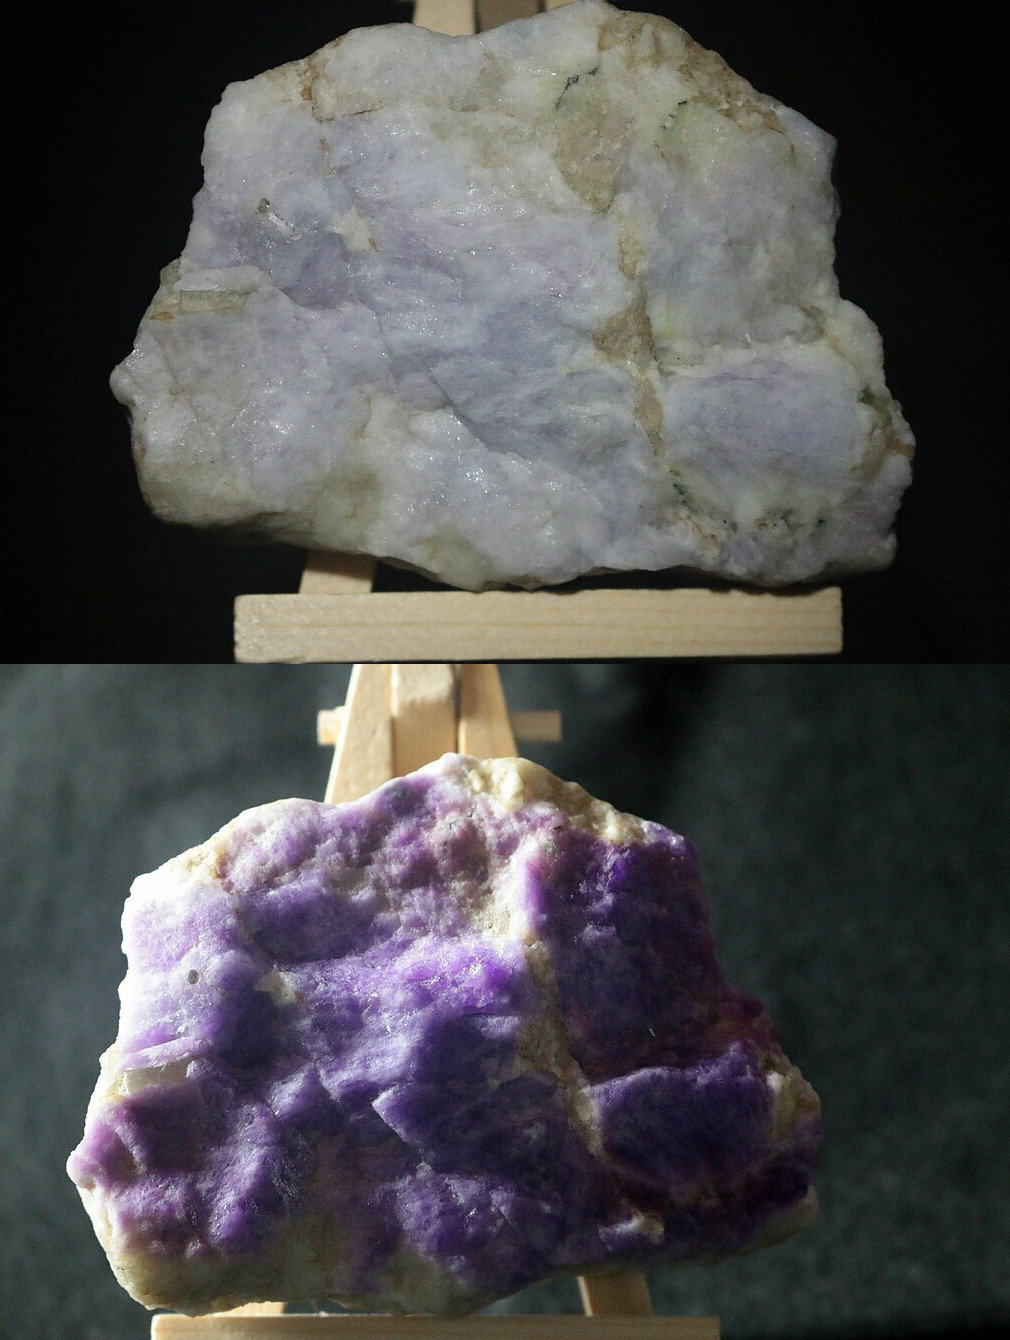
The tenebrescent mineral Hackmanite, before and after UV exposure. Leland Green…, CC BY-SA 2.0 and CC BY-SA 2.0.
The phosphor coating on a traditional CRT screen is replaced by a halide salt, and the property on which the display relies is called tenebrescence, changing colour under the influence of radiation. This seems most associated online with UV treatment of some minerals and gemstones to give them a prettier look, and its use a s a display technology is sadly forgotten.
A high-school physics understanding of the phenomenon is that energy from the UV light or the electron beam in the case of the tube, places some electrons in the crystal into higher energy levels, at which they absorb some visible light wavelengths. This is reversible through heat, in some substances requiring the application of heat while in others the heat of room temperature being enough. Of course here at Hackaday we’re hands-on people, so into the EPROM eraser went a small amount of table salt in a makeshift dish made of paper, but sadly not to be rewarded by a colour change.
On a real dark-trace CRT the dark trace would be illuminated from behind by a ring light round the glass neck of the tube. An interesting aside is that, unlike phosphor CRTs, they were more suitable for vertical mounting. It seems that small amounts of phosphor could detach themselves from a vertically mounted screen and drop into the electron gun, something that wasn’t a problem for tenebrescent coatings.
This display tech has shuffled off into the graveyard of obsolescence, we’re guessing because CRT technology became a lot better over the 1950s, and radar technologies moved towards a computerised future in which the persistence of the display wasn’t the only thing keeping the information on the screen. It seems at first sight to be a surprise that tenebrescent coatings have never resurfaced in other displays for their persistence, but perhaps there was always a better alternative whether it was ultra-low-power LCDs or more recently e-ink style devices.
For more bleeding-edge 1950s radar displays, we’ve previously brought you Volscan, a radar with an early form of GUI, which no doubt was one of those which consigned dark-trace CRTs to history.
Although the basic concept of electrostatic attraction has been known since ancient times, it was only in the 17th century that scientists began to systematically investigate electrostatics. One of the first to explore this new field was Otto von Guericke, who constructed an electrostatic generator to help with his experiments. [Markus Bindhammer] has reconstructed this machine, which formed the basis for later work by the likes of Wimshurst and Van de Graaff. [Markus] kept his machine in an almost period-correct fashion.
Von Guericke’s machine consists of a sulfur ball mounted on a spindle that allows it to be rotated and rubbed against a piece of cloth. By doing so, the ball gains a charge that can be used to attract small pieces of material. [Markus] built a neat wooden frame with faux-antique carved legs and installed a handle, a spindle, and a belt-drive system to rotate whatever’s mounted on the spindle at high speed.
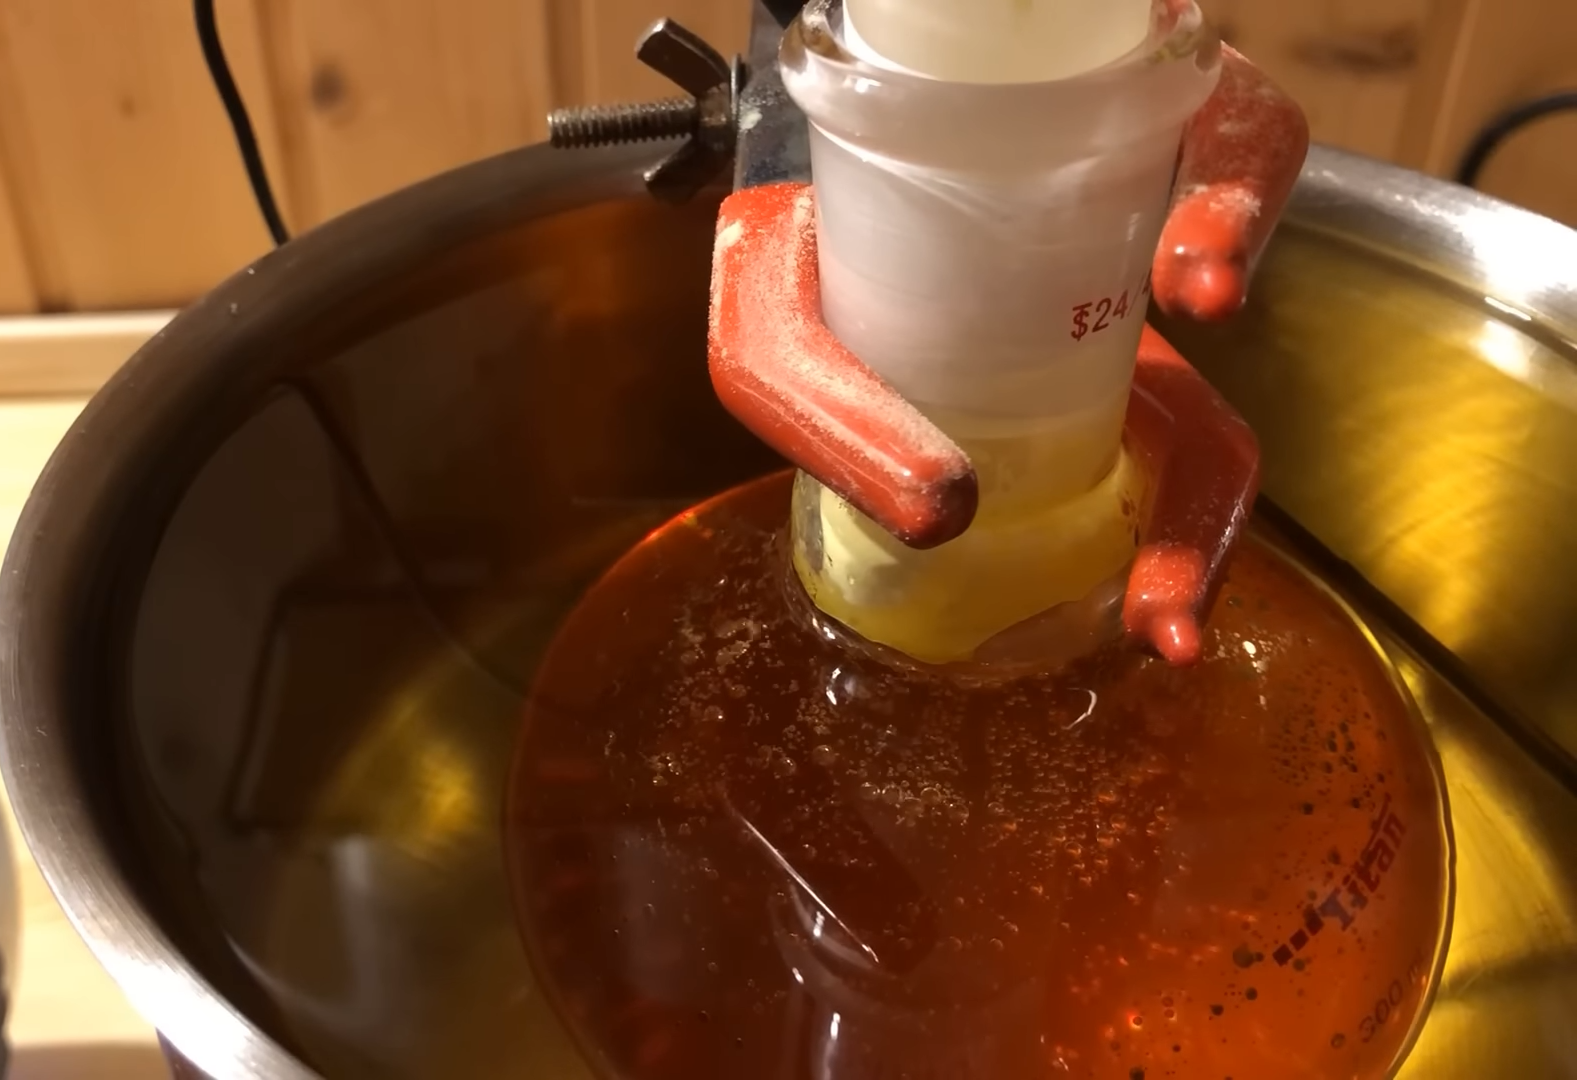
All of this is beautifully documented in [Markus]’s video, but by far the most interesting part of his project is the process of manufacturing the sulfur ball. If you’ve always wanted one, here’s how to make one: first, melt some pieces of pure sulfur in a round-bottom flask using an oil bath. Then, turn on your vacuum pump to remove any air or water vapor trapped inside the liquid. Once the liquid is nice and clear, let it cool down and solidify very slowly; the sulfur ball can then be released from its container by breaking the glass with a hammer.
While it sounds simple, we can imagine it took a bit of experimenting to get all those steps just right. The end result is a simple but useful machine to demonstrate basic electrostatics, which [Markus] is planning to use in science lectures. There are lots of interesting experiments you can do with static electricity, including building a basic motor.
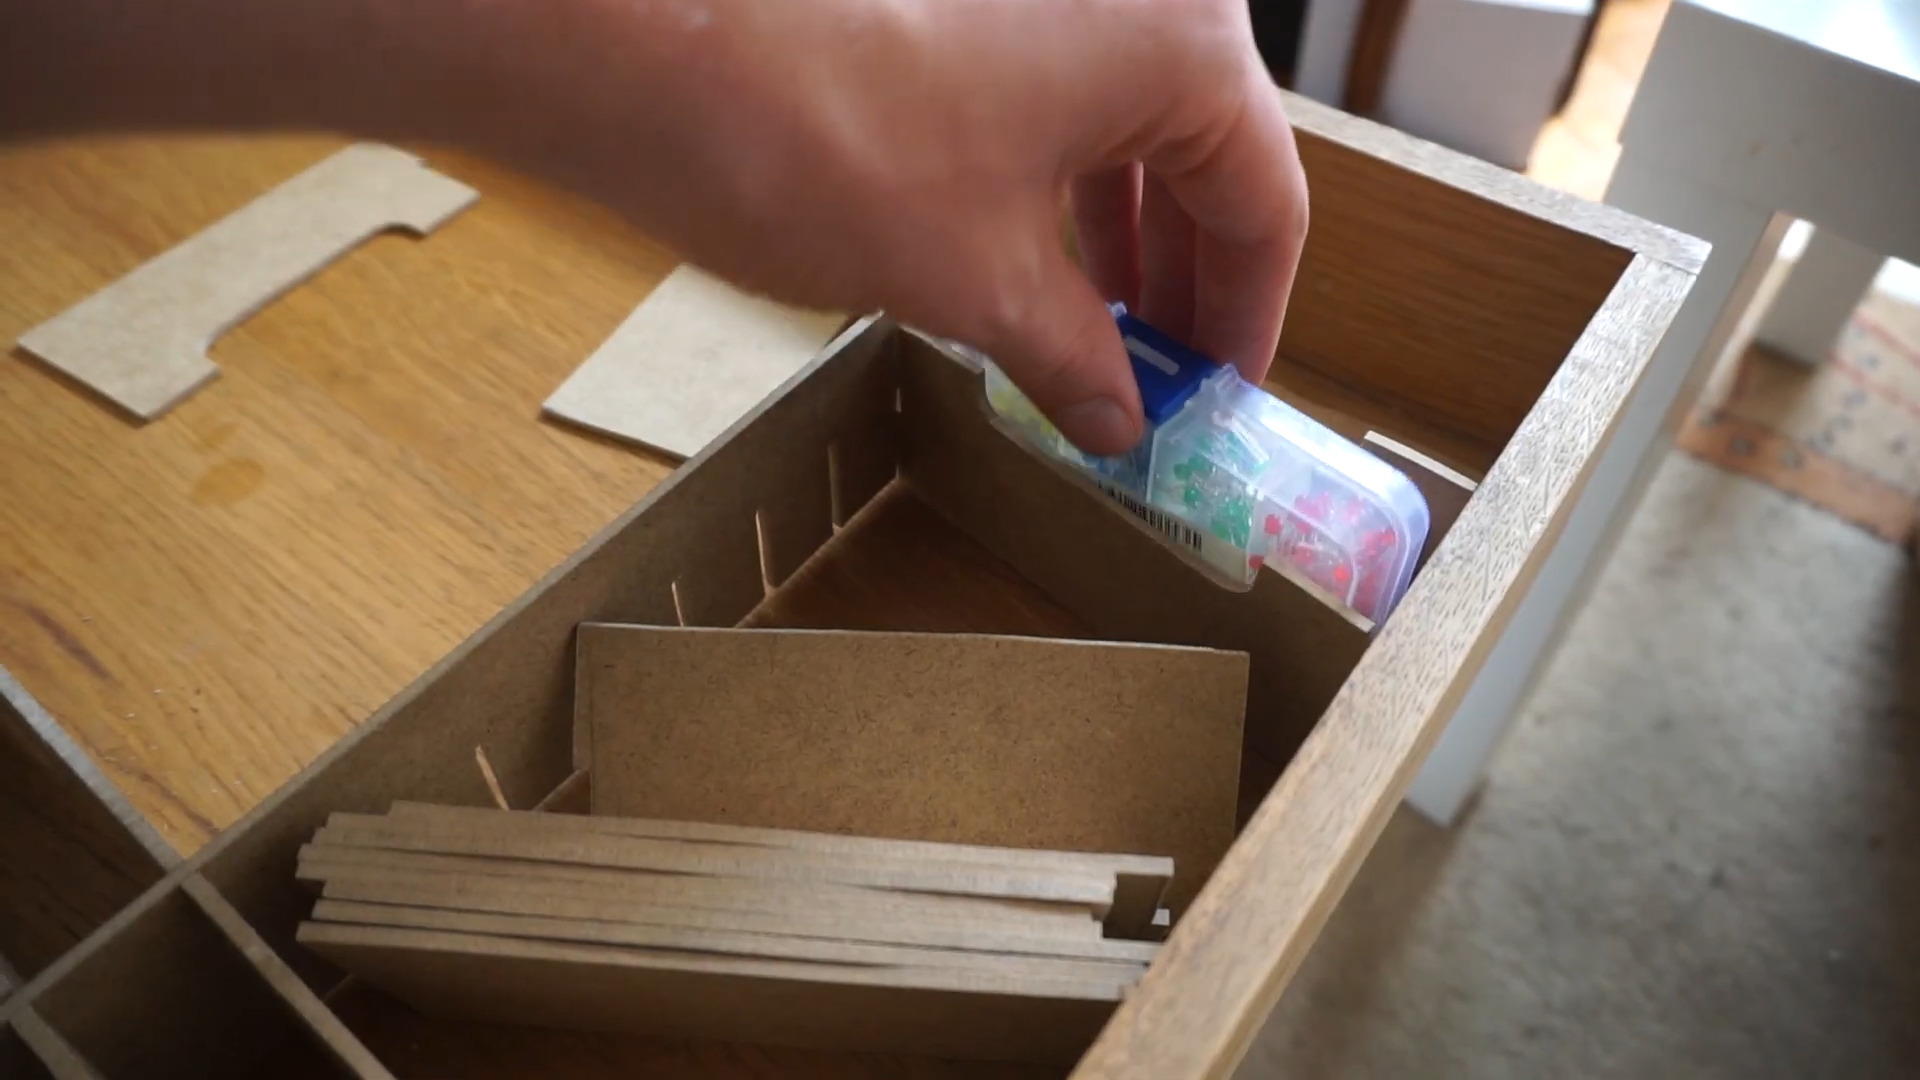
Does your electronics desk have a lap drawer? And is it filled with random, disorganized detritus? Well, [Handy Bear] is here to show you that you can put so much more in every drawer you’ve got if you do it right. And boy, it sure looks like [Handy Bear] did it right.
Hidden inside this beautiful antique desk is plastic storage compartment after plastic storage compartment, all situated inside custom dividers made painstakingly from 3mm MDF. The first iteration, a cubbyhole arrangement, was not modular and looked crappy by [Handy Bear]’s standards.
Back to the drawing board and the scroll saw. [Handy Bear] came up with a new scheme that mimics the dividers in the plastic storage boxes they’re using for components and more. In addition to the slotted parts are open-top boxes for things like the multimeter, helping hands, and the ever-important label maker.
[Handy Bear] used hot glue and simple joinery for everything, sealing all the seams with a mixture of glue and water to keep it from turning to dust. We especially like the caliper holder for the lap drawer. You’ll notice that not quite everything fits inside the desk, so [Handy Bear] put the bigger stuff on a couple of IKEA carts. Be sure to check out the short build video and take the desk tour after the break.
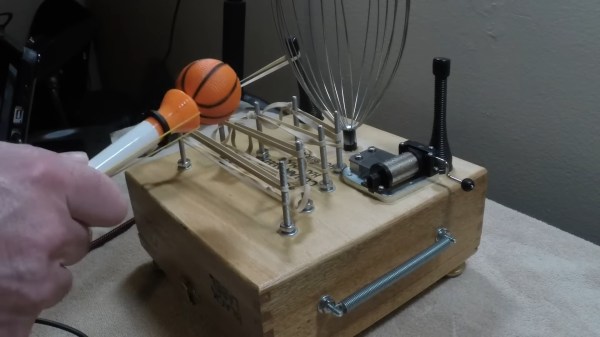
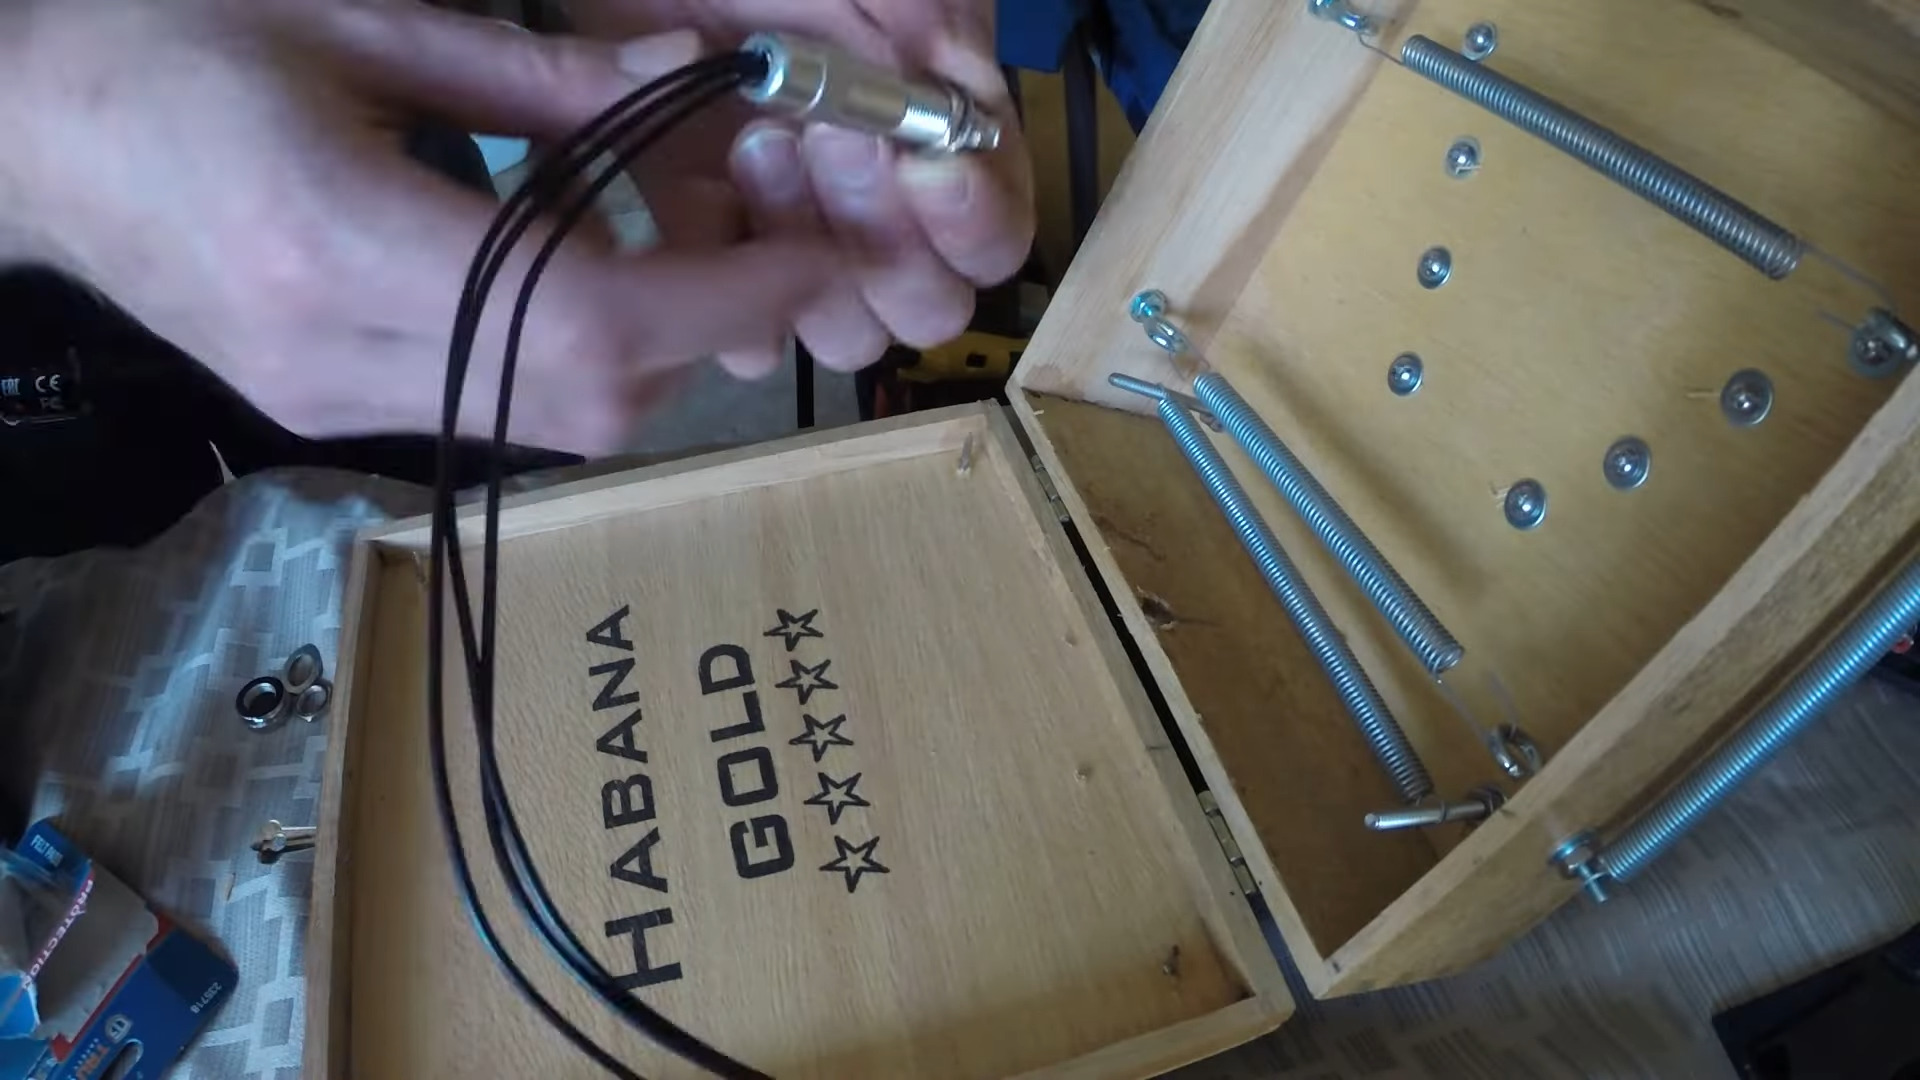
What do you have cooked up to scare trick-or-treaters this Halloween? We humbly suggest adding in some type of noise box, especially one like this offering from [Paisley Computer] that uses reverb and other effects to achieve chilling, thrilling sounds.
As you can see, this instrument is essentially a bunch of doodads affixed to and through a cigar box. And as you’ll hear in the first video after the break, the various rubber bands make great drum sounds. The springs are nice, too, but our personal favorite has to be the head massager thing. Shhhing!
Inside the box you’ll find a guitar jack and some piezos glued to the underside of the top surface, but you’ll also find springs mounted across the inside that add to the resonance of the cigar box.
You can use either an interface and DAW or an effects pedal chain to really make things freaky, and [Paisley Computer] does a showdown between Focusrite interface versus various stomp pedals in the second video. In the third video, we learn how to make one of our own.
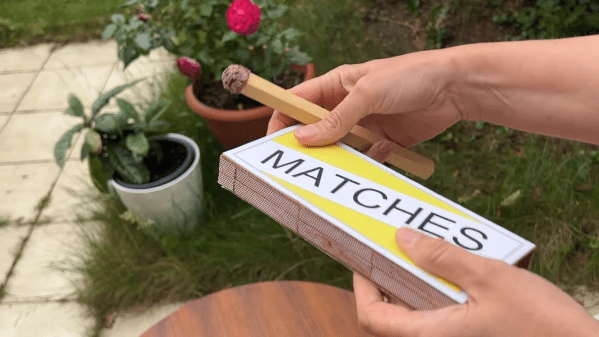
The build starts with a square wooden dowel, cut into lengths to serve as the main body of the matches. Regular tiny matches were then harvested for their flammable matchheads, made of potassium chlorate. Sourcing the material this way is far simpler than attempting a chemical synthesis from raw materials. Once roughly ground, the material was glued on to the end of the wooden rod to finish the match. [Handy Bear] then whipped up a giant matchbox to suit, using the ignition strips from multiple smaller matchboxes in the process.
Impressively, the monster matches work, and work well. They readily ignite when struck, and are able to keep a strong flame burning for some time. However they’re not quite potent enough to fully ignite the wood, so they don’t burn down like the real thing. We could see these being a great way to light a campfire with less hassle than regular matches, even if they are a bulky solution to the problem.
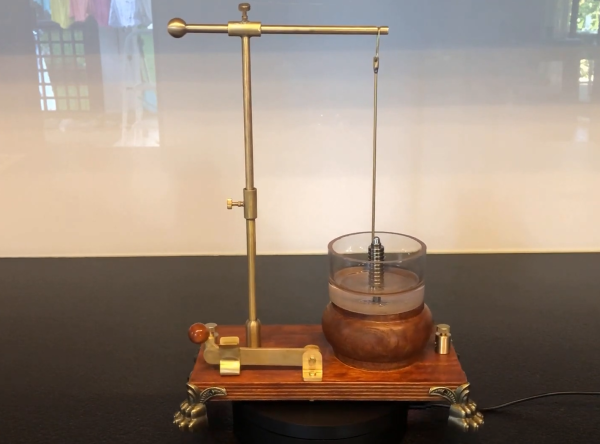
Although new electric motor types are still being invented, the basic principle of an electric motor has changed little in the past century-and-a-half: a stator and a rotor built of magnetic materials plus a bunch of strategically-placed loops of wire. But getting even those basic ingredients right took a lot of experimentation by some of the greatest names in physics. Michael Faraday was one of them, and in the process became the first person to turn electricity into motion. [Markus Bindhammer] has recreated Faraday’s experiment in proper 19th century style.
Back in 1821, the very nature of electricity and its relation to magnetism were active areas of research. Tasked with writing an article about the new science of eletromagnetics, Faraday decided to test out the interaction between a current-carrying wire and a permanent magnet, in a setup very similar to [Markus]’s design. A brass wire is hanging freely from a horizontal rod and makes contact with a conductive liquid, inside of which a magnet is standing vertically. As an electric current is passed through the wire, it begins to rotate around the magnet, as if to stir the liquid.
[Markus]’s video, embedded after the break, shows the entire construction process. Starting from rods and sheet metal, [Markus] uses mostly hand tools to create all basic parts that implement the motor, including a neat knife switch. Where Faraday used mercury as the conductive liquid, [Markus] uses salt water – cheaper and less toxic, although it does eventually eat up the brass wire through electrolysis.
While not particularly useful in itself, Faraday’s motor proved for the first time that electric energy could be converted into motion through magnetism, leading to a whole class of ultra-simple motors called homopolar motors. It would be a while before experiments by the likes of Tesla and Ferraris led to modern AC motors. If you don’t like your motors magnetic, you can use electrostatics instead.