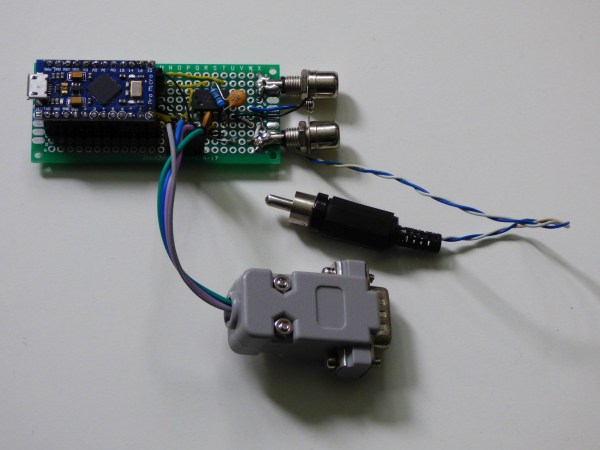
A PCB with an Arduino Micro Pro, RCA connectors and a sub-D connector

Odd Inputs And Peculiar Peripherals: Using A Commodore Light Pen On A Modern(ish) Computer

If you worked with computers back in the 1970s, there’s a good chance you used a light pen at some point: a simple input device that you’d point at the CRT screen to highlight text, choose menu options or manipulate graphic objects. Although ubiquitous in those days, the light pen lost the battle for ergonomics to the humble mouse and was all but extinct by the late 1980s. Touchscreen styluses implement a similar function today, but touching the screen somehow doesn’t feel the same as simply pointing at it.

We therefore applaud [Maciej Witkowiak]’s efforts to bring the light pen into the 21st century by building a USB interface for a Commodore 64/128 light pen. At its heart is an Arduino Micro Pro that implements the USB HID protocol to communicate with any modern computer. It connects to the classic light pen as well as to the computer’s analog display signal and uses those to calculate the delay between the video synchronization pulses and the light pen’s output. The sync pulses are extracted from the video signal by an LM1881, a sync separator chip that will be familiar to anyone who’s worked with analog video signals.

The Arduino calculates the light pen’s position based on the measured timing intervals and reports it to the computer, using the absolute positioning mode that’s also used by things like drawing pads. [Maciej] demonstrates his system in the video embedded below, in which he uses it to operate the menus on an X window system. A great success then, although there’s one catch: light pens only work on CRT displays, so you’ll need to drag one of those big glass beasts out of storage if you want to try this yourself.

We’ve featured the Commodore light pen before in this odd gaming input device. A similar device built with a discrete LED matrix is a good illustration of the light pen’s working principle.

Continue reading “Odd Inputs And Peculiar Peripherals: Using A Commodore Light Pen On A Modern(ish) Computer”

Glass: Classic, But Mysterious

For a large part of human history, people made things from what they could find. Some stones make arrowheads. Others make sparks. Trees can turn into lumber. But the real power is when you can take those same materials and make them into something with very different properties. For example, plant fibers turning into cloth, or rocks giving up the metals inside. One of the oldest engineered materials is glass. You’d think as old as glass is (dating back at least 4,500 years), we’d understand all there is to know about it by now. According to an interesting post by [Jon Cartwright] writing in Physics World, we don’t. Not by a long shot.

According to [Jon] there are at least five “glassy mysteries” that we still don’t understand. Sure, it is easy to just melt sand, soda, and lime — something we’ve talked about before — but, in fact, many materials can turn glassy when cooled quickly from liquid to solid. The problem is, we don’t really understand why that happens. Continue reading “Glass: Classic, But Mysterious”

Homebrew An OS From Scratch? Snowdrop Shows How It’s Done

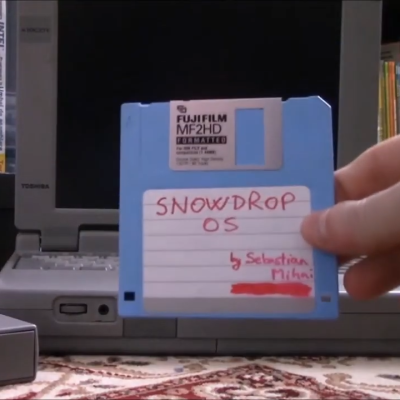
Ever wondered what it would take to roll your own OS? [Sebastian]’s Snowdrop OS might just provide you with some insight into that process, and maybe even some inspiration.

[Sebastian] created Snowdrop completely from scratch, using only x86 assembly language. It’s more than just bare-bones, and boasts a number of useful utilities and programs including a BASIC interpreter and linker (for creating standalone BASIC executables.) That’s not even touching on the useful essentials, like multitasking and a GUI framework. There are even a number of resources specifically for making game development easier. Because as [Sebastian] puts it, what’s a operating system without games?

Interested in giving Snowdrop a try, or peek at the source code? The binaries and sources section has all you need, and the other headings at the top of the page will send you to the various related goodies. If you have a few minutes, we recommend you watch a walkthrough of the various elements and features of Snowdrop in this video tour (embedded after the page break.)

Snowdrop is an ambitious project, but we’re not surprised that [Sebastian] has made it work; we’ve seen his low-level software skills before, with his fantastic efforts around the classic stand-up arcade game, Knights of the Round.

Continue reading “Homebrew An OS From Scratch? Snowdrop Shows How It’s Done”

A fridge magnet with a display showing recycling reminders

Hackaday Prize 2022: BinPal Is A Convenient Recycling Reminder

While curbside pickup of recyclables is convenient, it does require you to keep track of which type of waste is picked up when: miss the biweekly paper pickup and you’ll soon find yourself stockpiling four weeks’ worth of boxes and newspapers. When [Dominic Buchstaller]’s stack of cardboard began to reach his ceiling, he decided to take action by building himself BinPal: a fridge magnet that helps you remember when to take out which bin.

At heart of the simple but effective BinPal is an ESP32 board that connects to Google Apps Script and retrieves the pickup schedule from Google Calendar. If one of four categories of waste is due for pickup, its icon is highlighted on an LCD screen. The user can press a touch-sensitive button to confirm the bin has been brought out for pickup; if that hasn’t been done by 8 pm, the display’s backlight starts flashing as an additional reminder.

The outer shell of the device is made from laser-cut plywood, with a few strong magnets glued inside to ensure the BinPal stays firmly attached to the fridge. In the true spirit of recycling, [Dominic] used only components that he had in his parts bin to make the BinPal. However, these parts are all easily available online, and with the full schematics and code available on the project’s Hackaday.io page it should be easy to adapt the design to different hardware platforms as well.

[Dominic]’s design was inspired by a flashing LED chore reminder we featured a few years ago. You can also make household task reminders by reusing a Kindle for its ePaper display.

Odd Inputs And Peculiar Peripherals: A MacroPad With A Handy Layout Screen

The idea of a macro keypad is a great one, a set of keys programmable with frequent but complex tasks. But once programmed, how can the user keep track of which key does what? To save the world from grubby, hand-written sticky labels, here’s [Andreas Känner] with the Badger 2040 keypad — a macro pad with a display to show keymap info that’s fully programmable using CircuitPython.

At its heart is a Pimoroni Badger 2040 e-ink screen and RP2040 board which sits in a 3D-printed enclosure which in turn magnetically attaches to a 3D-printed keyboard enclosure. Inside is an I/O expander board, which is hand-wired to the switches. The firmware allows for easy configuration and even extension of the keypad itself, and presents itself to the host computer through USB. It’s even possible to have multiple different layouts on the same device.

Full details can be found in a comprehensive write-up on his website, and all the files are in a GitHub repository. If this doesn’t satisfy your need for customisable input goodness, then it’s not the first macro keypad we’ve shown you.

The Tools That Lovingly Tore Apart A Vintage Computer Game

The structure of computer game assets can be a bit of a mystery, even more so the older a game is, and some amount of reverse-engineering can be expected when pulling apart a game like 1995’s Night Light.

[voussoir] had fond memories of this game by GTE Entertainment, which had an interesting “flashlight” mechanic to serve the exploration theme. Spooky shapes in dark rooms would be revealed to be quite ordinary (and therefore not scary at all) once illuminated with a flashlight, which was directed by the mouse.

Extracting game assets was partly straightforward, thanks to many of them being laid out in a handy folder structure, with .bmp files for each level in a modest resolution. But there were also some unusual .mov files that were less than a second long, and those took a little more work to figure out.

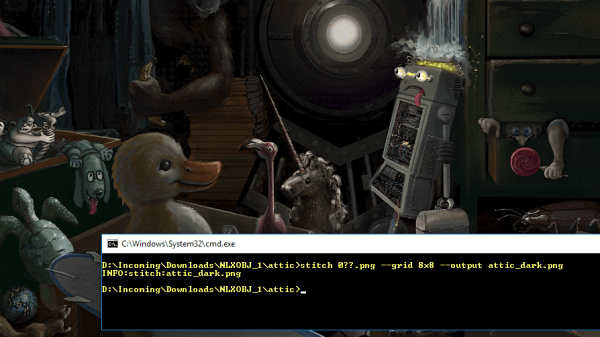
It turns out that these unusual movie files were 80 frames in length, and each frame was a tile of a larger image. [voussoir] used ffmpeg to extract each frame, then wrote a Python script to stitch the tiles together. Behold! The results are high-resolution versions of each level’s artwork. Stitching the first 16 frames into a 4×4 grid yields a 1024×768 image, and the remaining 64 frames can be put into a 8×8 grid for a fantastic 2048×1376 version. The last piece was extracting audio, but sadly the ISO [voussoir] was using seems to have had errors, and not all the audio survived.

With intact assets in hand, [voussoir] was able to re-create the core of the game, which can be seen about halfway down into the writeup. Audio clues play simply while the flashlight effect is re-created in the browser with the game’s original level artwork, and it’s enough to ring those nostalgia bells. It’s a pretty successful project, even though not all of the assets have been tracked down, and not all of the audio was able to be extracted due to corruption. If you have any insights on that front, don’t keep them to yourself! Send [voussoir] an email, or chime in here in the comments.

Reverse engineering has a strong history when it comes to games, and has manifested itself in sometimes unusual ways, like the time Atari cracked the NES. Had the subsequent legal challenge gone differently, the game landscape might have looked very different today.

Inside An EBay Marking Laser

When it comes to trolling eBay for cool stuff, some people have all the luck. Whereas all we ever seem to come across is counterfeit chips and obviously broken gear listed as, “good condition, powers on”, [Les Wright] actually managed to get more than he bargained for with one of his recent eBay purchases.

In his video teardown and tour of an industrial marking laser, [Les] suggests that he was really just in it for the optics — which is not a surprise, given his interest in optics in general and lasers in particular. The 20-W CO2 laser once etched barcodes and the like into products on assembly lines, but with a 2009 date code of its own, it was a safe bet that it was pitched due to a burned-out laser tube. But there were still high-quality IR optics and a precision X-Y galvanometer assembly to be harvested, so [Les] pressed on.

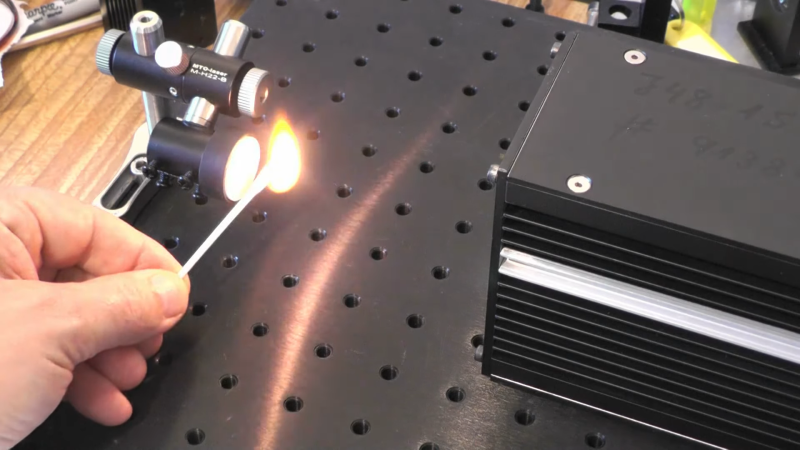
The laser itself ended up being built around a Synrad RF-stimulated CO2 tube. By a happy accident, [Les] found that the laser actually still works, at least most of the time. There appears to be an intermittent problem with the RF driver, but the laser works long enough to release the magic smoke from anything combustible that gets in its way. The galvos work too — [Les] was able to drive them with a Teensy and a couple of open-source libraries.

Galvos, lenses worth more than $800, and a working laser tube — not a bad haul. We’ll be following along to see what [Les] makes of this booty. Continue reading “Inside An EBay Marking Laser”