If you know anything about he design of a CPU, you’ll probably be able to identify that a critical component of all CPUs is the Arithmetic Logic Unit, or ALU. This is a collection of gates that can do a selection of binary operations, and which depending on the capabilities of the computer, can be a complex component. It’s a surprise then to find that a working CPU can be made with just a single NOR gate — which is what is at the heart of [Dennis Kuschel]’s My4th single board discrete logic computer. It’s the latest in a series of machines from him using the NOR ALU technique, and it replaces hardware complexity with extra software to perform complex operations.
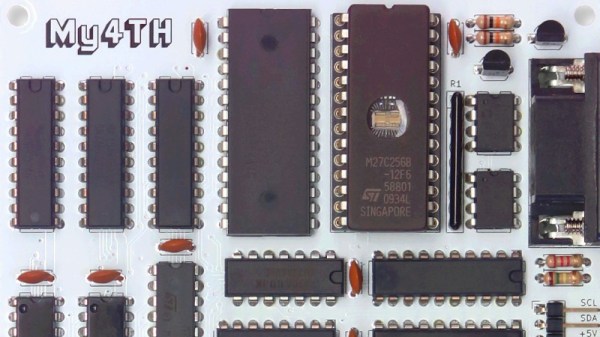
Aside from a refreshingly simple and understandable circuit, it has 32k of RAM and a 32k EPROM, of which about 9k is microcode and the rest program. It’s called My4th because it has a Forth interpreter on board, and it has I2C and digital I/O as well as a serial port for its console.
This will never be a fast computer, but the fact that it computes at all is ts charm. In 2023 there are very few machines about that can be understood in their entirety, so this one is rather special even if it’s not the first 1-bit ALU we’ve seen.
Thanks [Ken Boak] for the tip.