Axe Your Camera (again!)

[Maurice] let us know that his latest photography tool for hackers, the Camera Axe 3.0, is now available. The original allowed you to trigger a high-speed flash and camera from a multitude of sensors, including light and sound. The new one does all that, but also: allows multiple cameras or multiple flashes, clean up of software to make it more user adaptable, and the best (arguably the most important) part – cheaper components! All that and more under the Creative Commons that we do love so much. Keep up the amazingly detailed and just pure awesome work [Maurice].

LED Ring Light

diy-ring-light

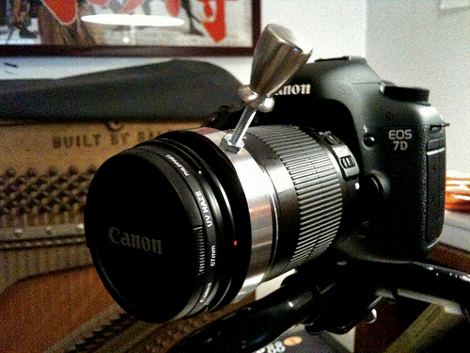
[Jani] built his own photography ring light based on automotive LED rings. The rings he used are meant to encircle headlights on a car and are available at a low cost. The assembly is built around a filter that attaches to his camera lens. Two rings of LEDs are then glued to a case made from the plastic of a CD-R container. To diffuse the light, he sanded both sides of the clear plastic housing to make it translucent.

LED rings operate on DC power and unlike a ring flash, they provide constant light to help set up your shot. His finished project is well-built and should come in between $10-20.

Medium Format Camera, From Scratch

title_image_t

[Peter Johansson] has taken it upon himself to build a medium format camera, from scratch. We know this is a shock to some of you, but this camera uses traditional medium. There is no sensor. He will be loading it with (gasps) film. He bought the lenses pre made, but everything else is being constructed by himself. Probably the most notable parts are the aperture and the shutter. The project is about 80% complete right now. We can’t wait to see it finished.

[via Makezine]

Time-lapse Courtesy Of Arduino

arduino-time-lapse

[Ross] put together a small package for use with time-lapse photography. The Nikon camera he’s using can snap a picture when it receives an IR command. [Ross’] solution connects an IR LED to an Arduino to generate this signal. The delay between frames is set with a potentiometer that is read in through the ADC. This is quite a bit less involved than the last solution we saw.

The unit consisting of an Arduino clone, a 9v battery, and the IR LED on a cable is easy to fit into a camera bag. He’s posted the code and we’ve embedded an example of his work after the break. An enclosure as well as time references around the potentiometer would complete this handy tool.

Continue reading “Time-lapse Courtesy Of Arduino”

CNC Used To Make 3D Video Using One Camera

3d-video-one-camera-cnc

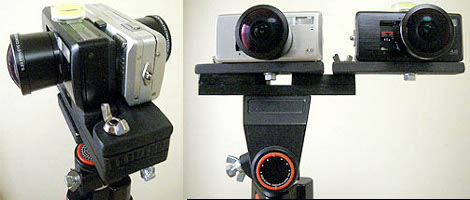
[Gabriel] is making 3D movies using only one camera. This should be impossible because true 3D needs to be stereoscopic, with images from different perspectives for each eye. He’s worked this out by mounting the camera on a CNC gantry and programming it to make two passes along slightly different paths. He’s plotting the camera paths using SketchUp and a plugin that exports paths as CamBam files, automatically adjusting for perspective. The two videos are then merged using Stereo Movie Maker.

We’ve embedded both a 3D video as well as behind-the-scenes filming video after the break but you’ll need the red and blue 3D glasses to view the former. It’s not too much of a stretch to tweak his methods and use this for stopped motion video where one button press takes a frame for each eye. Now, who will be the first to bring us a Star Wars remake filmed in stopped-motion 3D using the original action figures? Continue reading “CNC Used To Make 3D Video Using One Camera”

A Different Breed Of Camera Controllers?

FPV6BBUG0KQOYC3.MEDIUM

We’ve covered almost every way possible to remotely control a camera setup, from lasers, to Lego, to doorbells, and even having a Nintendo DS run the show. But at the end of the day, what if you want something that’s small, simple, has amazing flexibility for future additions, and most importantly doesn’t take away your favorite game system. [Whiternoise] wrote up an extremely detailed guide on getting an AVR to control your camera. We like the clean look the final product has, and the large amount of possible add-ons is a major plus. What do you look for in a cheap multi-function wireless camera controller?

Cheap And Easy Top-down Camera Quadpod

camera-quad-pod

We keep waiting for evolution to give us that third arm but in the mean time, this may be the solution for holding the camera while you document your projects. [DHagen] has made a four legged tripod (quadpod) for his camera in order to use it as a digital copy machine. We’ve spent many a night trying to get a steady and sharp video of an LCD or array of LEDs in action to document our weekend tinkering and this will make that all a lot easier.

His build uses materials that will total between $10-$20 at the hardware store down the street. A chunk of scrap wood is connected to the camera using a bolt in the threaded tripod hole of the camera. Two L-brackets are attached to the wood so that one is on either side of the camera lens. This leaves two mounting holes on either side of the lens to attach threaded rod using nuts. The assembly is capped off with a square of acrylic (plexiglas).

Quick and clean. It’s not the cheapest camera mounting solution we’ve seen, but it sure does a good job.