DIY Night Vision, Where Four Is Better Than Two

Night vision projects are great, and the hardware available to hobbyists just gets better and better. [Just Call Me Koko] shows off just such a build using four low-light, IR-sensitive cameras, four displays, and four lenses in 3D printed enclosures mounted to a helmet. Why four? Well, mounting two cameras and displays per eye is the easiest way to yield a wider field of view, and for bonus points, it sure looks extra weird.

At its heart, each of the four segments is the same. A Foxeer Night Cat 3 camera is mounted at the front, its output is connected directly to a 2″ diagonal NTSC/PAL display, and at the rear is a DCX (double convex) lens 38 mm in diameter with a 50 mm focal length. Add a printed enclosure, and the result is a monocular night vision display. Do it three more times and arrange them around one’s eyeballs, and one can make a night vision system with a panoramic view that probably takes only a little getting used to.

How well does it work? [Just Call Me Koko] does some walking around and also tries some target practice while wearing them, and concludes that while they don’t have nearly the clarity of the real deal (the 320×240 resolution displays limit the details one can perceive), they do work fairly well for what they are. Also, the cost of parts is a small fraction of the cost of the real thing, making it a pretty enjoyable project in the end.

The kind of hardware available to hobbyists today is what makes this kind of night vision project accessible, but there’s always the good old high-voltage analog method.

Continue reading “DIY Night Vision, Where Four Is Better Than Two”

Scratch-Built Industrial Camera’s Modular Design Really Stacks Up

The news here isn’t so much that [Guarav Singh] built this high-quality industrial digital camera from scratch, but it’s in the way it was accomplished. That plus the amount of information that’s packed into the write-up, of course. And the excellent photography.

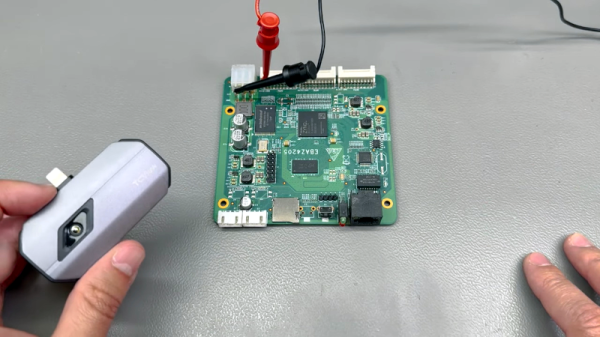
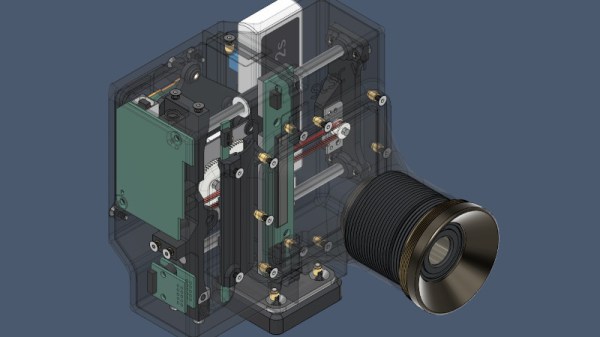
Modularity was one of [Guarav]’s design goals, with the intention of being able to swap out the sensor as the technology changes. To that end, [Guarav] came up with a stack of three PCBs. The middle board of the stack contains a Lattice FPGA chip along with two 16-MB RAMs and the FPGA config flash. The sensor board lies on one side of the FBGA board, while the USB 3.0 board is on the other. Each six-layer board is a masterpiece of high-density design, and the engineering that went into interfacing them and getting everything squeezed into a 3D-printed case with an integrated aluminum C-mount ring is pretty impressive.

[Guarav]’s write-up goes into a great deal of detail on processing the sensor data on the FPGA. Also, there’s quite a bit of practical information on implementing MIPI (Mobile Industry Processor Interface) and the CSI (Camera Serial Interface) specification. We’ve delved into this world before, but this project is a great hands-on explanation that might really help move your MIPI project along.

Thanks for the tip, [STR-alorman].

A Google Pixel 3a with a filter wheel attached to its camera

Hackaday Prize 2022: Multispectral Smartphone Camera Reveals Paintings’ Inner Secrets

Multispectral imaging, or photography using wavelengths other than those in ordinary visible light, has various applications ranging from earth observation to forgery detection in art. For example, titanium white and lead white, two pigments used in different historical eras, look identical in visible light but have distinct signatures in the UV range. Similarly, IR imaging can reveal a painting’s inner layers if the pigments used are transparent to IR.

Equipment for such a niche use is naturally quite pricey, so [Sean Billups] decided to transform an older model smartphone into a handheld multispectral camera, which can help him analyze works of art without breaking the bank. It uses the smartphone’s camera together with a filter wheel attachment that enables it to capture different spectral ranges. [Sean] chose to use a Google Pixel 3a, mainly because it’s cheaply available, but also because it has a good image sensor and camera software. Modifying the camera to enable IR and UV imaging turned out to be a bit of a challenge, however.

Image sensors are naturally sensitive to IR and UV, so cameras typically include a filter to block anything but visible light. To remove this filter from the Pixel’s camera [Sean] had to heat the camera module to soften the adhesive, carefully remove the lens, then glue a piece of plastic to the filter and pull it out once the glue had set. Perfecting this process took a bit of trial and error, but once he managed to effect a clear separation between camera and filter it was simply a matter of reattaching the lens, assembling the phone and mounting the filter wheel on its back.

The 3D-printed filter wheel has slots for four different filters, which can enable a variety of IR, UV and polarized-light imaging modes. In the video embedded below [Sean] shows how the IR reflectography mode can help to reveal the underdrawing in an oil painting. The system is designed to be extendable, and [Sean] has already been looking at adding features like IR and UV LEDs, magnifying lenses and even additional sensors like spectrometers.

We’ve seen a handful of multispectral imaging projects before; this drone-mounted system was a contestant for the 2015 Hackaday Prize, while this project contains an excellent primer on UV imaging.

Continue reading “Hackaday Prize 2022: Multispectral Smartphone Camera Reveals Paintings’ Inner Secrets”

Recreating A Camera Shot

People rolling off shields and spears clashing against swords as the camera zooms in and out wildly makes the hallmark action sequences in the movie 300 so iconic. Unfortunately, achieving this effect wasn’t particularly easy. Three cameras were rolling, each with a different lens (100mm, 50mm, and 21mm) to capture a different view of the same scene. In post-production, you can dramatically switch between the three cameras since the shot is synchronized. The folks over at [Corridor Crew] wanted to recreate the effect, but rather than create a custom mount to hold three expensive cameras, they 3d printed a custom mount to hold three costly smartphones.

While there are three cameras on the back of most phones, most phones can’t shoot in slo-mo from all cameras simultaneously. So they would need a rig to hold three phones. The first design was simple and just brackets to hold phones. While nice and sturdy, getting the phones in or out wasn’t easy, and getting to the record button was tricky. iPhones have this handy little magnetic ring on the back. They had a bracket that worked pretty well after a few iterations on the design and some printer issues. Since each camera has optical image stabilization, it is easy for the lenses to get out of alignment, which can mar the shot. However, they somewhat covered up the effect in post. With a working prototype, the only thing left to do was to slice a bunch of piñatas in slow motion with a thrumming soundtrack.

We love seeing exciting camera setups and iterating to find something that works. This dual-camera setup has a very different goal and tries to lean into the parallax effect rather than hide it. Video after the break.
Continue reading “Recreating A Camera Shot”

Photo rail setup for stop motion

Stop-Motion Angels In The Light Field

Baseball jokes aside, holograms have been a dream for decades, and with devices finally around that support something like them, we have finally started to wonder how to make content for them. [Mike Rigsby] recently entered his stop-motion holographic setup into our sci-fi contest, and we love the idea.

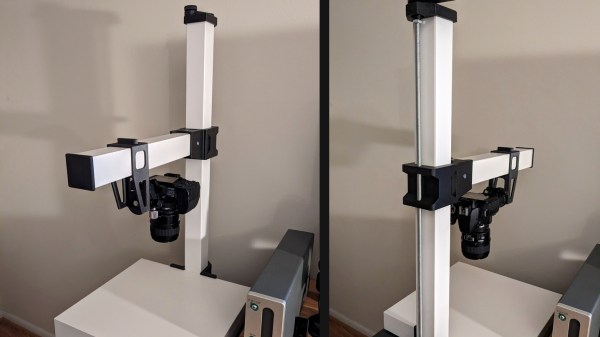
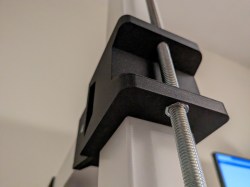
Rather than a three-dimensional model or a 2d picture with pixels, the Looking Glass light field display supports a series of images as quantized points (hence light field). As you move around an object, images are interpolated between the frames you do know, giving a pretty convincing effect. In a traditional stop motion animation, you need to take anywhere between 12-24 frames to equal about one second of animation. Now that you need to take 48 pictures for one frame, over 1152 pictures for just one second of animation. Two problems quickly appear, how to take photographs accurately from the same position every time and how do you manage the deluge of photos sensibly. [Mike] started with a wooden stage for his actors. A magnet was mounted to the photo rail carriage, and a sensor allowed it to detect that it was in the same spot. An Arduino controls the rail, reads the magnet via a sensor, and controls the camera shutter. The DSLR he’s using can’t do that many frames per second, but that’s a problem for another sci-fi contest.

Holographic-ish displays are finally here, and they’re getting better. But if a display isn’t your speed, perhaps some laser-powered glasses can be the holographic experience you’re looking for?

This project was an entry into the 2022 Sci-Fi Contest. Check out all of the winning entries here.

Clever Stereo Camera Uses Sony Wireless Camera Modules

Stereophotography cameras are difficult to find, so we’re indebted to [DragonSkyRunner] for sharing their build of an exceptionally high-quality example. A stereo camera has two separate lenses and sensors a fixed distance apart, such that when the two resulting images are viewed individually with each eye there is a 3D effect. This camera takes two individual Sony cameras and mounts them on a well-designed wooden chassis, but that simple description hides a much more interesting and complex reality.

Sony once tested photography waters with the QX series — pair of unusual mirrorless camera models which took the form of just the sensor and lens.  A wireless connection to a smartphone allows for display and data transfer. This build uses two of these, with a pair of Android-running Odroid C2s standing in for the smartphones. Their HDMI video outputs are captured by a pair of HDMI capture devices hooked up to a Raspberry Pi 4, and there are a couple of Arduinos that simulate mouse inputs to the Odroids. It’s a bit of a Rube Goldberg device, but it allows the system to use Sony’s original camera software. An especially neat feature is that the camera unit and display unit can be parted for remote photography, making it an extremely versatile camera.

It’s good to see a stereo photography camera designed specifically for high-quality photography, previous ones we’ve seen have been closer to machine vision systems.

Digital To Analog In The Darkroom

As the world becomes more and more digital, there are still a few holdouts from the analog world we’ve left behind. Vinyl records are making quite the comeback, and film photography is still hanging on as well. While records and a turntable have a low barrier for entry, photography is a little more involved, especially when developing the film. But with the right kind of equipment you can bridge the gap from digital to analog with a darkroom setup that takes digital photographs and converts them to analog prints.

The project’s creator, [Muth], has been working on this project since he found a 4K monochrome display. These displays are often used in resin 3D printers, but he thought he could put them to use developing photographs. This is much different from traditional darkroom methods, though. The monochrome display is put into contact with photo-sensitive paper, and then exposed to light. Black pixels will block the light while white pixels allow it through, creating a digital-to-analog negative of sorts. With some calibration done to know exactly how long to expose each “pixel” of the paper, the device can create black-and-white analog images from a digital photograph.

[Muth] notes that this method isn’t quite as good as professional print, but we wouldn’t expect it to be. It creates excellent black-and-white prints with a unique method that we think generates striking results. The 4K displays needed to reproduce this method aren’t too hard to find, either, so it’s fairly accessible to those willing to build a small darkroom to experiment. For those willing to go further, take a look at some other darkroom builds we’ve seen in the past.

Continue reading “Digital To Analog In The Darkroom”