Simple Samsung NX Remote Shutter Release From USB Cable

Samsung makes some nice cameras, but they have fallen into the trap of building proprietary controllers. Their NX models, for instance, have a micro USB port rather than the more usual 2.5mm socket for triggering the camera remotely. What’s a hacker to do?

[Niels] did some poking around, and found that it is pretty easy to trigger these cameras remotely, because Samsung simply moved the standard connections for half-press and full press of the shutter onto the USB socket: ground D+ (pin 3) and the camera focuses, then ground D- (pin 2) and the shutter is triggered. In his Instructable, he covers how to build a simple remote from a micro USB cable and a couple of switches.

Don’t feel left out if you have another type of digital camera: there are plenty of ways to build a simple shutter release switch with a few simple parts, or ways to put a microcontroller in control for more sophisticated shoots.

Reverse Engineering A WiFi Security Camera

The Internet of Things is slowly turning into the world’s largest crappy robot, with devices seemingly designed to be insecure, all waiting to be rooted and exploited by anyone with the right know-how. The latest Internet-enabled device to fall is a Motorola Focus 73 outdoor security camera. It’s quite a good camera, save for the software. [Alex Farrant] and [Neil Biggs] found the software was exceptionally terrible and would allow anyone to take control of this camera and install new firmware.

The camera in question is the Motorola Focus 73 outdoor security camera. This camera connects to WiFi, features full pan, tilt, zoom controls, and feeds a live image and movement alerts to a server. Basically, it’s everything you need in a WiFi security camera. Setting up this camera is simple – just press the ‘pair’ button and the camera switches to host mode and sets up an open wireless network. The accompanying Hubble mobile app scans the network for the camera and prompts the user to connect to it. Once the app connects to the camera, the user is asked to select a WiFi connection to the Internet from a list. The app then sends the security key over the open network unencrypted. By this point, just about anyone can see the potential for an exploit here, and since this camera is usually installed outdoors – where anyone can reach it – evidence of idiocy abounds.

Once the camera is on the network, there are a few provisions for firmware upgrades. Usually, firmware upgrades are available by downloading from ‘private’ URLs and sent to the camera with a simple script that passes a URL directly into the shell as root. A few facepalms later, and [Alex]  and [Neil] had root access to the camera. The root password was ‘123456’.

While there’s the beginnings of a good Internet of Camera in this product, the design choices for the software are downright stupid. In any event, if you’re looking for a network camera that you own – not a company with a few servers and a custom smartphone app – this would be near the top of the list. It’s a great beginning for some open source camera firmware.

Thanks [Mathieu] for the tip.

Super Detailed 3d Scans With Photogrammetry

Photogrammetry is a real word, and [shapespeare] built himself a nice setup to take high-res 3d scans using it. A good set of images for photogrammetry are: in sharp focus, well lit, precisely indexed, and have a uniform background. The background was handled by a 3d printed stand and some copier paper. To get even lighting he used four adjustable LED lamps from Ikea.

In order to precisely index the object, he built an indexing set-up with an Arduino and a stepper motor (housed in the, self proclaimed, most elegant of 3d printed enclosures). The Arduino rotates the platform a measured increment, and then using [Sebastian Setz]’s very neat IR camera control library, snaps a photo. This process repeats until multiple photos of the object have been taken.

Once the photos have been taken, they need to be run through a photogrammetry processor. [shapespeare] uses Agisoft Photoscan, but says Autodesk Memento and 123d Catch do pretty well too. After all this work it appears that [shapespeare] used his new powers to 3d print a giant decking screw. Cool.

Five Bucks, Three Parts: WiFi Camera Remote

It’s just ridiculous how cheap and easy it is to do some things today that were both costly and difficult just two or three years ago. Case in point: Hackaday.io user [gamaral] built a WiFi remote control for his Canon E3 camera out of just three parts: an ESP8266 module, a voltage regulator, and a stereo plug that the camera uses as its remote trigger.

And the codebase is just about as minimal, although it’s not without its nice touches. Control is easy — just pull down a pin for focus or shutter. The ESP listens to a custom port, and when it gets the message, “presses” or “releases” the pins. It’s a good, simple example of how to work with the ESP IOT SDK.

The timing is all on the client side. [gamaral] knew that he was going to want to play around with how long to hold down the focus button, for instance, so he left that flexible. Using Netcat makes the client-side code completely trivial: echo -n "SHUTTER HOLD" | nc -w 1 -q 1 roosevelt 9021. Bam. And it worked first time. Check the well-done video just below for more details.

And keep your eye on [gamaral]’s Hackaday.io page, because he’s going to make another video when the PCBs arrive in the mail.

Continue reading “Five Bucks, Three Parts: WiFi Camera Remote”

Flat Camera Uses No Lens

Early cameras and modern cameras work pretty much the same way. A lens (or a pinhole acting as a lens) focuses an image onto a sensor. Of course, sensor, in this case, is a broad term and could include a piece of film that–after all–does sense light via a chemical reaction. Sure, lenses and sensors get better or, at least, different, but the basic design has remained the same since the Chinese built the camera obscura around 400BC (and the Greeks not long after that).

Of course, the lens/sensor arrangement works well, but it does limit how thin you can make a camera. Cell phone cameras are pretty skinny, but there are applications where even they are too thick. That’s why researchers at Rice University are working on a new concept design for a flat camera that uses no lens. You can see a video about the new type of camera below.

Continue reading “Flat Camera Uses No Lens”

PiNoculars – A Farseeing Pi Camera

The Raspberry Pi camera provides a 5 megapixel resolution with still images of up to 2592 x 1944 and multiple video modes including 2592 x 1944 at 15 frames per second. With it being mounted on a small board it is ideal for using in hacks. [Josh Williams] mounted the camera on the lens of binoculars to capture some startling images, including this squirrel.

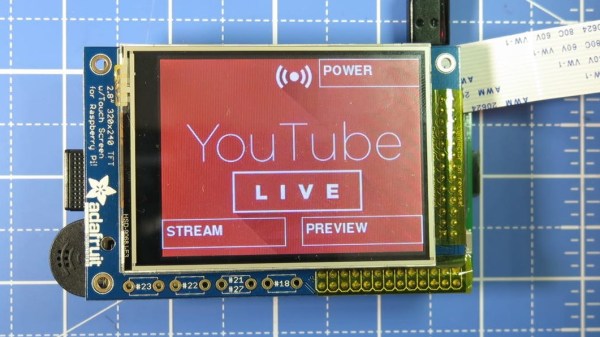
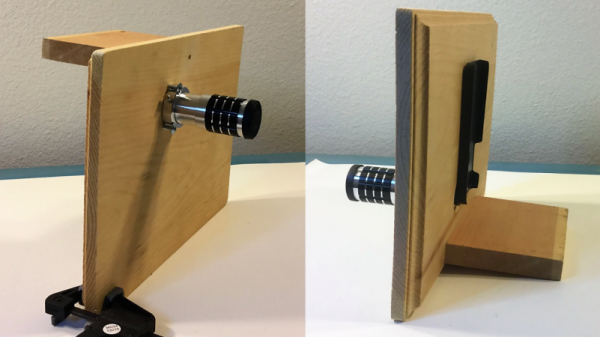
The camera is installed on a custom, laser cut mount that fastens to one eyepiece of the binoculars. The Pi itself is mounted above the binoculars. An LCD touch screen from Adafruit allows [Josh] to select the image and adjust the focus. Snapping pictures is done using either the touch screen or switches that come with the screen.

The Instructable [Josh] wrote is extremely detailed and includes two different ways of mounting the Pi on the binoculars. The quick and dirty method just straps on with tape. The highly engineered method delves into Inkscape to design a plywood mount that is laser cut. For portable operation, [Josh] uses one of the ubiquitous battery packs meant for USB charging.

Basic setup of the Pi and camera are in a video after the break.

Continue reading “PiNoculars – A Farseeing Pi Camera”

Drive A Sony Camera With An ESP8266

Nearly everything has WiFi these days. [glaskugelsehen]’s Sony camera uses the wireless network to transfer photos to the computer, naturally, and it also has a remote-control application that’ll run on Android smartphones. [glaskugelsehen] doesn’t have an Android — but he does have shows us an ESP8266 that he turned into a WiFi-powered remote for the camera (Google translate into English).

Sony actually made [glaskugelsehen]’s work easy here. They have a publicly available API for the camera’s controls, and it’s all run by JSON sent over HTML HTTP POST. Which is to say, that it’s a piece of cake to script as long as you can send HTMLHTTP directives.

[glaskugelsehen]’s code, written in the Arduino environment for the ESP, first finds the camera’s WiFi network and authenticates to it. Then it sets the camera into remote-control mode, and takes over from there. So far, he’s only implemented taking still photos, but from the API it looks like you can also stop and start video recordings and more.

And yeah. We just wrote up another project doing virtually the same thing with a GoPro. [glaskugelsehen] read that too, and mentions it in his blog. We love it when people take inspiration from each other!