Long Exposure Thermal Photography

For apparently inexplicable reasons, the price of thermal imaging cameras has been dropping precipitously over the last few years, but there are still cool things you can do with infrared temperature sensors.

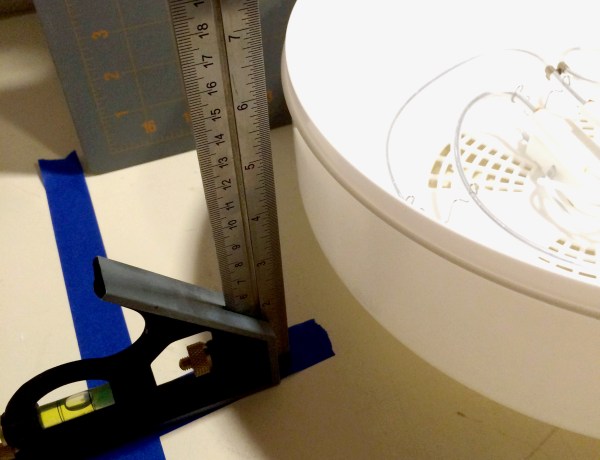
A few years ago – and while he was still writing for us – [Jeremy] came across an absurdly clever thermal imaging camera. Instead of expensive silicon, this thermal camera uses a flashlight with an RGB LED, a cheap IR temperature sensor, and a camera set up to take long exposures. By shining this flashlight/IR sensor around a dark room, a camera with a wide-open shutter can record color-coded thermal images of just about anything.

Since then, an interesting product appeared on the market. It’s the Black & Decker TLD100 Thermal Leak Detector, and it’s basically an infrared thermometer and LED flashlight stuffed into one neat package. In other words, it’s the exact same thing we saw two years ago. We’d like to thank at least one Black & Decker engineer for their readership.

[Jeremy] took this cheap, off-the-shelf leak detector and did what anyone would do after realizing where the idea behind it came from. He set up his camera, turned off the lights, and opened the shutter of his camera. The results, like the original post, don’t offer the same thermal resolution as a real thermal camera. That doesn’t mean it’s still not a great idea, though.

Real World AdBlock

Every day your eyeballs are assaulted by advertisements on your box of cereal, billboards, t-shirts, magazines, milk cartons, plastered on the side of buses, buildings, bananas, and written in the sky. [Reed], [Jonathan], [Tom], and [Alex] came up with a solution to this: a Brand Killer that censors all the advertisements and brands you see every minute of every day. It’s a real-world adblock that you can build right now.

The team’s system uses a custom head mounted display made from cardboard, goggles, a webcam, and a seven-inch display. The software for the system uses Python and OpenCV to monitor the images from the webcam, compares them against a list of brands and logos, and filters them out with an unobtrusive blur.

Right now the system just has a few brands and logos that include Dr. Pepper, Hershey’s, McDonalds, Facebook, Starbucks, and clear evidence this was built at UPenn, Wawa and Tastykake. In the video below, the detection and tracking of these various brands is very good. The system is also stereoscopic, meaning this is wearable all day, every day, without a loss of depth perception.

Continue reading “Real World AdBlock”

DIY Single Pixel Digital Camera

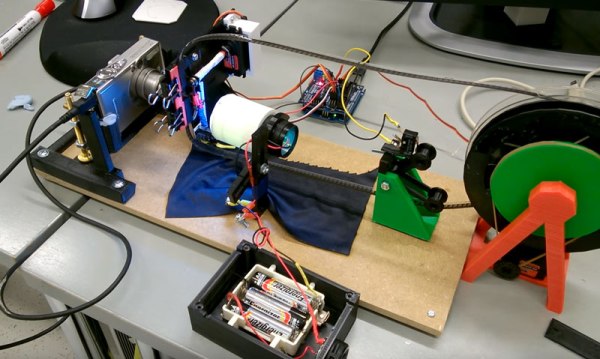
[Artlav] wanted to build a digital camera, but CCDs are expensive and don’t respond well to all wavelengths of light. No problem, then, because with a photodiode, a few stepper motors, the obligatory Arduino, and a cardboard box, it’s pretty easy to make one from scratch.

The camera’s design is based on a camera obscura – a big box with a pinhole in one side. This is all a camera really needs as far as optics go, but then there’s the issue of digitizing the faint image projected onto the rear of the camera. That’s fine, just build a cartesian robot inside the box and throw a photodiode in there.

There are a few considerations when choosing a photodiode for a digital camera. Larger photodieodes have higher noise but lower resolution. [Artlav] has been experimenting with a few diodes, but his options are limited by export control restrictions.

Even with the right photodiode, amplifying the tiny amount of current – picoamps in some cases – is hard. The circuit is extremely sensitive to EMI, and it’s inside a box with stepper motors pulled from the scrap bin. It’s amazing this thing works at all.

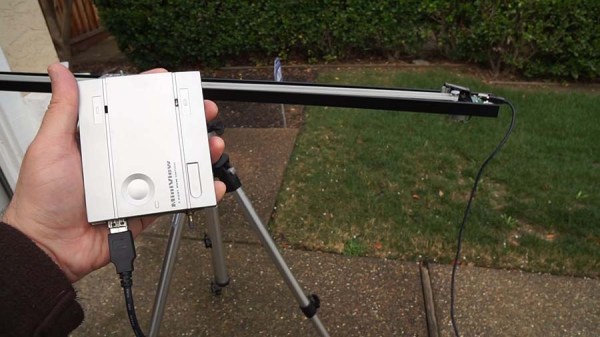
Still, [Artlav] was able to get some very high resolution images across a huge range of wavelengths. He’s even getting a few images in mid-wave infrared, turning this homebrew digital camera into the slowest thermal imaging camera we’ve ever seen.

camera battery emulator

3D Printed Camera Battery Emulator

There are certainly battery hungry devices out there on the market and, unless you do some serious research before the purchase of said device, you really don’t know how it will perform. Needless to say, some of us get stuck with power hog device, and it seriously sucks because changing out batteries often is expensive and just plain annoying.

If you couldn’t tell, I am speaking from experience, my old Sony DSC-H5 camera works great with the exception of needing new batteries every hour. And if you get cheap batteries, the camera won’t even turn on! There’s a USB connector on the camera but it is only for transferring data and there is also no DC input jack. The entire situation is a totally bummer.

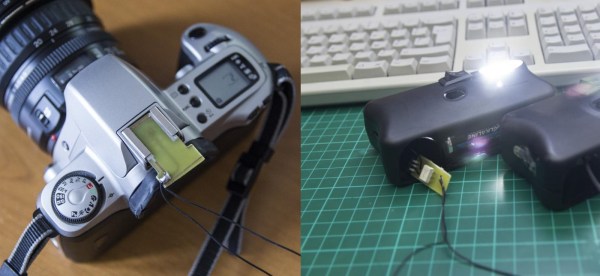
I’m happy (or disappointed) that I am not alone in the world. [Phil] wrote into the HaD tip line to tell us about his solution to this very problem. He has a Canon SD1000 camera and although the battery works fine he needs it to work at an altitude of 15km in order to take some sunrise photos. Cold weather testing (in the fridge freezer) showed that the battery isn’t going to cut the mustard for the hour-long flight. The rest of the balloon-lifted unit already has a battery pack and the plan would be to tap into that to power the camera. Unfortunately his camera, like mine, doesn’t have a DC input jack and can not be powered off the USB port.

[Phil] decided to make a 3D printed battery emulator. It sits in place of the stock battery and holds bare wire where the batteries terminals normally are. The other end of the wires are run out of the camera to a voltage regulator that converts the battery pack’s 6 volts down to the 3.9 that the camera needs.

Continue reading “3D Printed Camera Battery Emulator”

DIY Camera Shutter Control

Full SHTTTRRR Control Lets You Take Your Time…

[Glitchmaker] loves photography and wrote in to tell us about his newest project. He has a Canon 1000D camera but, unfortunately, it does not have time lapse capability. So, instead of shelling out a chunk of change for a new camera [Glitchmaker] decided to make an external shutter control device that can continue to instruct the camera to take photos at predetermined intervals. He calls his project: SHTTTRRR. You didn’t think that meant something else, did you?

You can see the unassuming box above, there is just enough stuff packed in there to get the job done, nothing extra or fancy. Luckily, the Cannon camera has a remote shutter input jack that only requires connecting one pin to another in order to take a photo. Inside the box is an ATTINY45 microcontroller. It reads the button pushes from the single panel-mounted button and calculates the time between two button presses. That time between button presses determines the frequency of the photos taken. At the appropriate times, the ATTINY45 signals a transistor to connect the two appropriate pins on the camera’s remote shutter input jack. The device continues to tell the camera to take photos until it is shut off. The result is a series of time-lapse photos that was previously not possible on that camera!

This is a simple project that solves a problem and gets the job done. What’s better than that? [Glitchmaker] is proud of the SHTTTRRR he made and also learned a bunch about programming the ATTINY45 along the way. Check a video of it working after the break.

Continue reading “Full SHTTTRRR Control Lets You Take Your Time…”

[Tesla500] Builds A High-Speed Video Camera

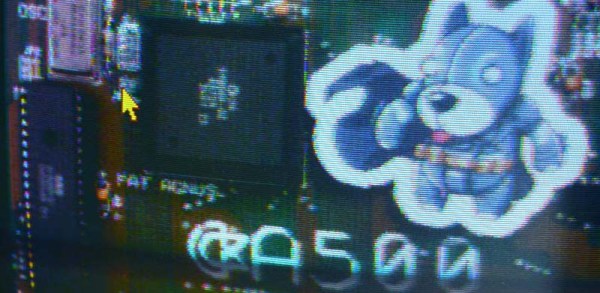
[Tesla500] has a passion for high-speed photography. Unfortunately, costs for high-speed video cameras like the Phantom Flex run into the tens or even hundreds of thousands of dollars. When tools are too expensive, you do the only thing you can – you build your own! [Tesla500’s] HSC768 is named for the data transfer rate of its image sensor. 768 megapixels per second translates to about 960MB/s due to the 10 bit pixel format used by the On Semiconductor Lupa1300-2 image sensor.

This is actually [Tesla500’s] second high-speed camera, the first was HSC80, based upon the much slower Lupa300 sensor. HSC80 did work, but it was tied to an FPGA devboard and controlled by a PC. [Tesla500’s] experience really shows in this second effort, as HSC768 is a complete portable system running Linux with a QT based GUI and a touchscreen. A 3D printed case gives the camera that familiar DSLR/MILC  shape we’ve all come to know and love.

The processor is a Texas Instruments TMS320DM8148 DaVinci, running TI’s customized build of Linux. The DaVinci controls most of the mundane things like the GUI, trigger I/O, SD card and SATA interfaces. The real magic is the high-speed image acquisition, which is all handled by the FPGA. High-speed image acquisition demands high-speed memory, and a lot of it! Thankfully, desktop computers have given us large, high-speed DDR3 ram modules. However, when it came time to design the camera, [Tesla500] found that neither Xilinx nor Altera had a FPGA under $1000 USD with DDR3 module support. Sure, they will support individual DDR3 chips, but costs are much higher when dealing with chips. Lattice did have a low-cost FPGA with the features [Tesla500] needed, so a Lattice ECP3 series chip went into the camera.

The final result looks well worth all the effort [Tesla500] has put into this project. The HSC768 is capable of taking SXGA (1280×1024) videos at 500 frames per second, or 800×600 gray·scale images at the 1200 frames per second. Lower resolutions allow for even higher frame rates.  [Tesla500] has even used the camera to analyze a strange air oscillation he was having in his pneumatic hand dryer.  Click past the break for an overview video of the camera, and the hand dryer video. Both contain some stunning high-speed sequences!

Continue reading “[Tesla500] Builds A High-Speed Video Camera”

Selfie-Bot

Selfie-Bots Will Take Your Best Shots For You

Professor [Bruce Land] teaches a microcontroller class at Cornell University, and it seems like this year’s theme was selfie-taking-robots.

First up is a clever mix of technology by [Han, Bihan and Chuan]. What happens when you take an iPhone, three microphones and a microcontroller? The ultimate device in selfie-taking-technology, that’s what — Clap-on! The iPhone is mounted on a few servo motors which allows the bot to direct the camera towards, you guessed it, a clapping noise. On the second clap, the phone takes your picture. Cute.

Next up is a bit more sophisticated — a facial recognition selfie-bot. This little robot can be programmed to track faces and take pictures of you and your friends when your arm is just not long enough. Not only that, you can set all kinds of parameters so you get the perfect picture. It uses OpenCV to crunch the raw data and outputs commands to an ATmega1284 which controls the servo motors that direct the camera. This project was by [Michael and Jennifer] — two fourth year students at Cornell.

Continue reading “Selfie-Bots Will Take Your Best Shots For You”