Talking Arduino Tells GoPro What To Do

It’s 2017 and even GoPro cameras now come with voice activation. Budding videographers, rest assured, nothing will look more professional than repeatedly yelling at your camera on a big shoot. Hackaday alumnus [Jeremy Cook] heard about this and instead of seeing an annoying gimmick, saw possibilities. Could they automate their GoPro using Arduino-spoken voice commands?

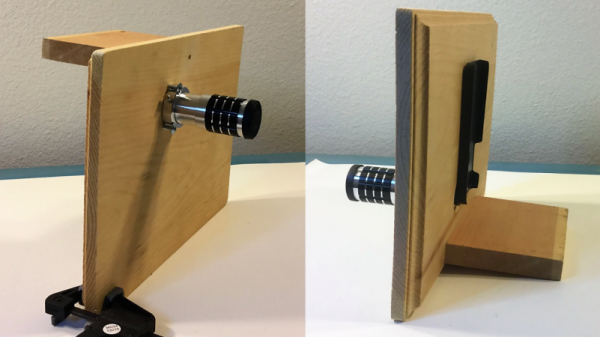
It’s an original way to do automation, for sure. In many ways, it makes sense – rather than mucking around with trying to make your own version of the GoPro mobile app (software written by surfers; horribly buggy) or official WiFi remote, stick with what you know. [Jeremy] decided to pair an Arduino Nano with the ISD1820 voice playback module. This was then combined with a servo-based panning fixture – [Jeremy] wants the GoPro to pan, take a photo, and repeat. The Arduino sets the servo position, then commands the ISD1820 to playback the voice command to take a picture, before rotating again.

[Jeremy] reports that it’s just a prototype at this stage, and works only inconsistently. This could perhaps be an issue of intelligibility of the recorded speech, or perhaps a volume issue. It’s hard to argue that a voice control system will ever be as robust as remote controlling a camera over WiFi, but it just goes to show – there’s never just one way to get the job done. We’ve seen people go deeper into GoPro hacking though – check out this comprehensive guide on how to pwn your GoPro.

Motorized Camera Dolly Rolls With The Changes

Over the last semester, Cornell student [Ope Oladipo] had the chance to combine two of his passions: engineering and photography. He and teammates [Sacheth Hegde] and [Jason Zhang] used their time in [Bruce Land]’s class to build a motorized camera dolly for shooting time-lapse sequences.

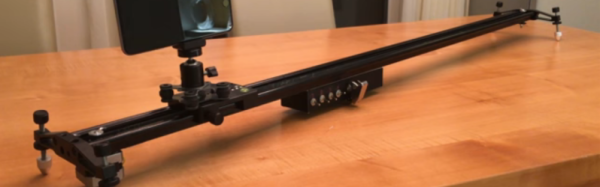
The camera, in this case the one from an iPhone 6, is mounted to an off-the-shelf robot chassis that tools around on a pair of DC motors. The camera mount uses a stepper motor to get just the right shot. A PIC32 on board the ‘bot takes Bluetooth commands from an iOS app that the team built. The dolly works two ways: it can be controlled manually in free mode, or it can follow a predetermined path at a set speed for a specified time in programmed mode.

Our favorite part of the build? The camera’s view is fed to a smart watch where [Ope] and his team can take still pictures using the watch-side interface. Check it out after the break, and stick around for a short time-lapse demo. We’ve featured a couple of dolly builds over the years. Here’s a more traditional dolly that rides a pair of malleable tubes.

Continue reading “Motorized Camera Dolly Rolls With The Changes”

Custom Zynq/CMOS Camera Unlocks Astrophotography

Around here we love technology for its own sake. But we have to admit, most people are interested in applications–what can the technology do? Those people often have the best projects. After all, there’s only so many blinking LED projects you can look at before you want something more.

[Landingfield] is interested in astrophotography. He was dismayed at the cost of commercial camera sensors suitable for work like this, so he decided he would create his own. Although he started thinking about it a few years ago, he started earnestly in early 2016.

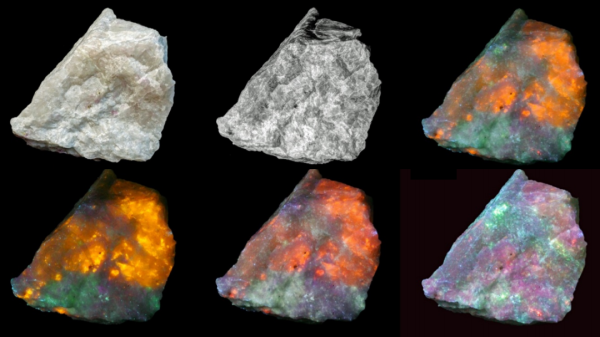
The project uses a Nikon sensor and a Xilinx Zynq CPU/FPGA. The idea is the set up and control the CMOS sensor with the CPU side of the Zynq chip, then receive and process the data from the sensor using the FPGA side before dumping it into memory and letting the CPU take over again. The project stalled for a bit due to a bug in the vendor’s tools. The posts describe the problem which might be handy if you are doing something similar. There’s still work to go, but the device has taken images that should appear on the same blog soon.

Continue reading “Custom Zynq/CMOS Camera Unlocks Astrophotography”

Mod Your Camera With ModBus

Industrial hardware needs to be reliable, tough, and interoperable. For this reason, there are a series of standards used for command & control connections between equipment. One of the more widespread standards is ModBus, an open protocol using a master-slave architecture, usually delivered over RS-485 serial. It’s readily found being used with PLCs, HMIs, VFDs, and all manner of other industrial equipment that comes with a TLA (three letter acronym).

[Absolutelyautomation] decided to leverage ModBus to control garden variety digital cameras, of the type found cluttering up drawers now that smartphones have come so far. This involves getting old-school, by simply soldering wires to the buttons of the camera, and using an Arduino Nano to control the camera while talking to the ModBus network.

This system could prove handy for integrating a camera into an industrial production process to monitor for faults or defective parts. The article demonstrates simple control of the camera with off-the-shelf commercial PLC hardware. Generally, industrial cameras are very expensive, so this hack may be useful where there isn’t the budget for a proper solution. Will it stand up to industrial conditions for 10 years without missing a beat? No, but it could definitely save the day in the short term for a throwaway price. One shortfall is that the camera as installed will only save pictures to its local memory card. There’s a lot to be said for serving the images right to the engineer’s desk over a network.

We’ve seen [Absolutelyautomation]’s work before – check out this implementation of Pong on an industrial controller.

Instant Camera With This Year’s Hottest Dithering Technique

Digital cameras are great, because you can take thousands of pictures without running out of film. But there’s something to be said for having a tangible image you can hold in your hand. The Polaroid cameras of yesteryear were great for this, but now they’re hard to find and the price per photograph is ludicrously expensive.

dither
Dithering allows the camera to print a much better image.

Over the past few years, a few people have sought a way to create printed photographs at a lower cost. One of the best ways to do this is to find something much cheaper than Polaroid film — like thermal paper.

[Fabien-Chouteau]’s thermal printing camera isn’t the first — you’ve got the Gameboy Camera/Printer and a few others to thank for that. But it’s a great example of the form. The camera combines an Adafruit thermal receipt printer with an OpenMV camera, both easily sourced, if not exactly cheap. It even adds a ST7735 LCD for live display of the camera’s image, just like consumer-grade cameras!

It’s not just a slapped together kludge of parts bin components, however. While the thermal printer is only capable of printing black or white pixels, its resolution is much higher than the image from the camera. This allows the camera to use a 3×3 block of printed pixels to represent a single pixel from the camera, and with some fancy dithering techniques, can emulate shades of grey quite effectively. It’s tricks like this that really add polish to a project, and make a big difference to the picture quality at the end of the day.

It’s not the first thermal printer camera we’ve seen – [Ch00f]’s woodgrain instant camera build highlighted the issues of careful camera selection when pursuing this type of build.

Video after the break.

Continue reading “Instant Camera With This Year’s Hottest Dithering Technique”

Raspberry Pi Camera Flash

The Raspberry Pi Camera is a great tool; it allows projects that require a camera to be put together quickly and on a budget. Plus, having a Linux back end for a little processing never hurt anybody. What can be difficult however, is imaging in low light conditions. Most smartphones have an LED flash built in for this purpose. [Wim Van Gool] decided to follow suit and build an LED flash for the Raspberry Pi.

The project consists of a custom PCB with surface-mount LEDs in an attractive concentric layout. This is a good way to get a nice even distribution of light, particularly when taking photos close up. The board is designed around the Texas Instruments TPS61169 LED driver, which is controlled by a PWM signal from the Raspberry Pi. The flash mounts as a Raspberry Pi HAT, and there’s a hole routed in the centre to allow the camera to fit in nice and snug when using standard 11mm standoffs. It might seem simple, but it’s an impressively tidy piece of engineering and a testament to [Wim]’s abilities.

The Raspberry Pi Camera turns up in all sorts of projects — like these far-seeing PiNoculars.

Build This Barn Door Tracker Today, Take Stunning Shots Of The Galaxy Tonight

Think you need some fancy equipment to get stunning shots of the night sky? Surely those long-exposure shots that show the Milky Way in all its glory take expensive telescopes with complicated motor-driven equatorial mounts, right? Guess again – you can slap together this simple barn door tracker for a DSLR for a couple of bucks and by wowing people with your astrophotography prowess tonight.

Those stunning, deeply saturated shots of our galaxy require a way to cancel out the Earth’s movement, lest star trails ruin your long exposure shots. Enter the barn door tracker, a simple device to let you counter the Earth’s rotation. [benrules2]’s version of the tool is ridiculously simple – two boards connected by a hinge. A short length of threaded rod with a large handle passes through a captive nut in the upper board.

A little trig allows you to calculate how much and how often to turn the handle (by hand!) to counter the planet’s 0.25°/minute diurnal rotation. Surprisingly, the long exposure times seem to even out any jostling introduced by handling the rig, but we’d still imagine a light touch and a sturdy tripod would be best. Those of you with less patience might automate this procedure.

It seems a lot to ask of a rig that you could probably throw together in an hour from scrap, but you can’t argue with [benrules2]’s results. His isn’t the only barn door tracker we’ve covered, but it looks like the simplest by far and would be a great project to build with kids.

[via r/DIY]