There was a time in the late 80s and early 90s where the Amiga was the standard for computer graphics. Remember SeaQuest? That was an Amiga. The intro to Better Call Saul? That’s purposefully crappy, to look like it came out of an Amiga. When it comes to the Amiga and video, the first thing that comes to mind is the Video Toaster, hardware and software that turns an Amiga 2000 into a nonlinear video editing suite. Digital graphics, images, and video on the Amiga was so much more than the Video Toaster, and at this year’s Vintage Computer Festival East, [Bill] and [Anthony] demonstrated what else the Amiga could do.
Aiming to improve the image quality of the photos on his website, [Jean] needed an external flash unit.
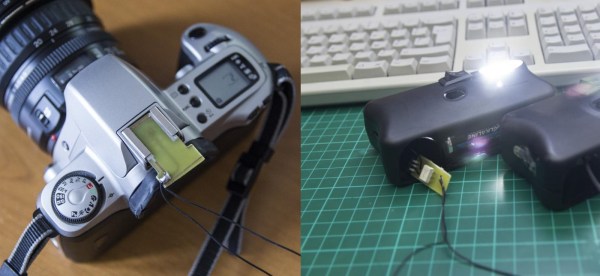
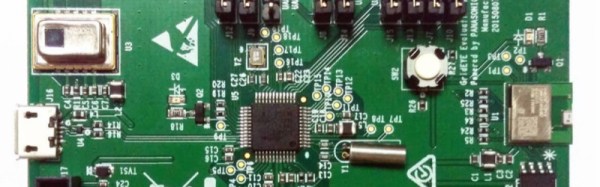
Say what you will about disposable cameras, but the fact that they were mass-produced, and are now nearly obsolete, means they are an absolute treasure trove of electronics components when you can buy them for dirt cheap. So [Jean] decided to turn a few of his disposable cameras into an external flash system for his DSLR (Translated).
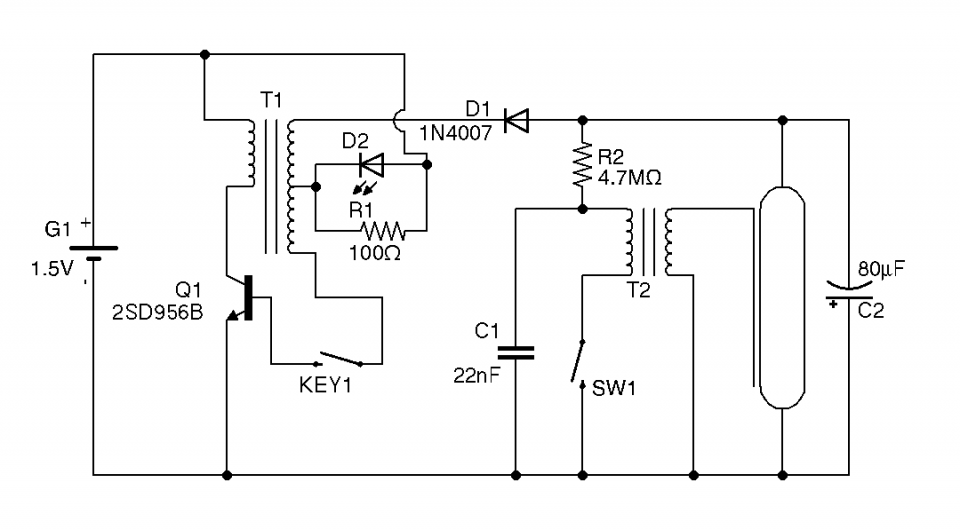
He started by taking apart a Kodak digital camera and examining the circuit board. KEY1 enables the charging of the capacitor (the camera ON switch) and SW1 is located under the shutter-release.
Now all he had to do was replace SW1 with an electronic trigger from his DSLR.
Wherever you stand on the topics of road safety and vehicle speed limits it’s probably fair to say that speed cameras are not a universally popular sight on our roads. If you want a heated argument in the pub, throw that one into the mix.
But what if you live in a suburban street used as a so-called “rat run” through route, with drivers regularly flouting the speed limit by a significant margin. Suddenly the issue becomes one of personal safety, and all those arguments from the pub mean very little.
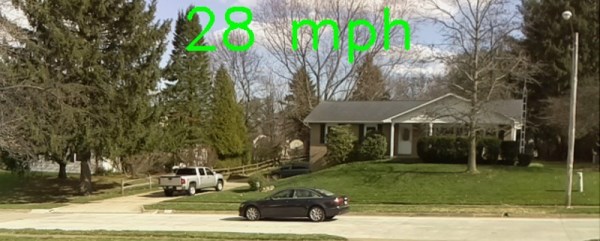
Sample car speed measurements
[Gregtinkers]’ brother-in-law posted a message on Facebook outlining just that problem, and sadly the local police department lacked the resources to enforce the limit. This set [Gregtinkers] on a path to document the scale of the problem and lend justification to police action, which led him to use OpenCV and the Raspberry Pi camera to make his own speed camera.
The theory of operation is straightforward, the software tracks moving objects along the road in the camera’s field of view, times their traversal, and calculates the resulting speed. The area of the image containing the road is defined by a bounding box, to stop spurious readings from birds or neighbours straying into view.
Thermal imaging cameras are objects of desire for hackers and makers everywhere, but sadly for us they can be rather expensive. When your sensor costs more than a laptop it puts a brake on hacking.
All that has now changed though with this board. It features the Grid-EYE sensor itself, an Atmel ATSAM-D21G18A microcontroller, and onboard Bluetooth, but has an interesting feature that, as well as being a standalone device, can be used as an Arduino shield. A full range of APIs are provided, and the code is BSD licensed.
This module is not the highest-spec thermal imaging camera on the market by any means, after all it has a resolution of only 64 pixels in an 8×8 grid. But its affordability and easy availability should trigger a fresh crop of thermal camera projects in our community, and we applaud that.
The 8mm film look is making a comeback, but distributing it is an issue. [Heikki Hietala] wanted an easy way to digitally capture the 8mm movies he made. So, he built an 8mm digitizer from an Arduino, a cheap Canon camera and the guts of an old 8mm film camera. When you throw in a few 3D printed components and some odd electronics, you get an impressive build that captures 8mm film with impressive speed and quality.
This build started with a Canon Ixus 5 camera running CHDK (the Canon Hack Development Kit) to lock the settings down. This points at the film strip through a macro lens so each frame of the strip fills the frame. An Arduino then triggers the camera to take a photo using a USB cable. The same Arduino also controls a motor that winds the film and triggers the film gate from the camera that he salvaged. By reversing the function and triggering it with a servo motor, he can easily blank off the edges of the frame so no stray light shining through the film material causes any problems. Once the camera has captured every frame on the strip, he feeds the captured images into Blender, which processes them and spits out the final movie.
This is a very impressive build overall. [Heikki] has obviously put a lot of thought into it, and the whole thing looks like it runs very efficiently and quickly. The captured video looks great, as you can see from this sample. The decision to use a salvaged film gate was a smart one: there is no point in reinventing the wheel if engineers of previous generations have solved the problem. Kudos to [Heikki] for also documenting the process in a lot of detail: he has produced a 5-part series on his blog that shows how and why he made the decisions he did. This series goes over the overall view of the project, using CHDK to control the camera, 3D printing parts, wiring the Arduino and writing the code that controls the system.
This sits nicely alongside the 8mm to video camera hack that we wrote about recently. This one doesn’t involve taking apart the camera (except for the sacrificial one that supplied the gate), and you still get that wonderfully grainy, jumpy look of 8mm film.
If you are a lover of the aesthetic of vintage photography and Instagram’s filters don’t quite cut it for you, then there are plenty of opportunities even in this post-film age to sample the real thing. Plastic lens cameras from the former Soviet Bloc countries or the Pacific rim are still in production, and you can still buy 35mm and 120 roll film to put in them.
You can even still buy 8mm film for your vintage movie camera, but it’s rather pricey. [Claire Wright] is a young film maker who had an old 8mm camera and really wanted that analog film feel to her work, and she and her father solved this problem by using the 8mm camera’s lens in front of a Raspberry Pi camera sensor. Since an 8mm film frame is 4.5mm x 3.3mm and the Pi camera sensor size is 3.76mm x 2.74mm, it’s quite a good fit.
Their first prototype had a custom case which concealed the Pi camera behind the lens on rails taken from an old CD-ROM drive, and had an HDMI screen on top and a pistol grip to make it portable. An external thumb screw allowed the camera to be positioned in the focal plane.
A further refinement has stepper motor driven focus driven from an Adafruit motor drive HAT. The software is simply the standard Pi camera utilities. To demonstrate the system, she made a short video about how it came to be, and took the camera on a road trip to Austin, Texas. She tells us a local 3D print shop is working on a 3D model to replicate the camera, but sadly as yet there are no resources for the Hackaday crowd to examine.
Her video is below. She has certainly captured the feel of an 8mm film very well. If the SUVs were replaced by cars with more chrome in her Mainstreet America, you might almost be there in the 1950s.
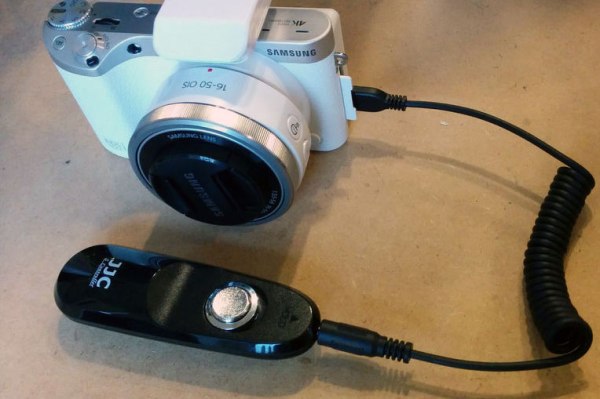
Samsung makes some nice cameras, but they have fallen into the trap of building proprietary controllers. Their NX models, for instance, have a micro USB port rather than the more usual 2.5mm socket for triggering the camera remotely. What’s a hacker to do?
[Niels] did some poking around, and found that it is pretty easy to trigger these cameras remotely, because Samsung simply moved the standard connections for half-press and full press of the shutter onto the USB socket: ground D+ (pin 3) and the camera focuses, then ground D- (pin 2) and the shutter is triggered. In his Instructable, he covers how to build a simple remote from a micro USB cable and a couple of switches.