In reaction to the other air gap flash unit we featured a few days ago, [Eirik] sent us a tip about another one he recently made. In his setup, the duration of the flash peak intensity is around 300ns (1/3,333,333 of a second). As a reminder, an air flash unit consists of a circuit charging a high voltage capacitor, a circuit triggering a discharge on demand, a high voltage capacitor and the air flash tube itself. The flash tube contains two wires which are separated just enough to not spark over at max potential. Isolated from the other two, a third wire is placed in the tube. This wire is connected to a trigger/pulse transformer, which will ionize the gap between the two capacitor leads. This causes the gap to breakdown and a spark to form, thereby creating a flash of light.
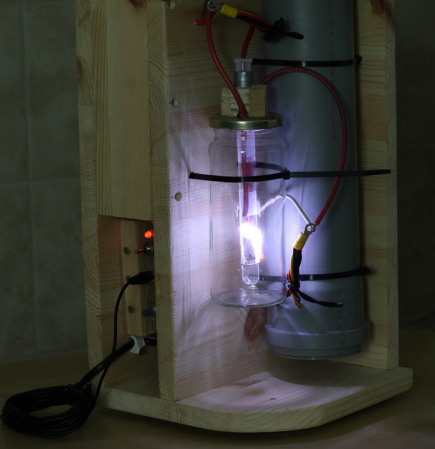
[Eirik] constructed his flash tube using an olive jar and a glass test tube. As you can see from the (very nice) picture above, the spark travels along the glass test tube, making the quenching much faster than in an open air spark. [Eirik] built his own high voltage capacitor, using seven rolled capacitors of roughly 2nF each made with duct-tape, tin foil and overhead transparencies. For ‘safety’ they are stored in a PP-pipe. A look at the schematics and overall circuit shown on the website reveals how skilled [Eirik] is, making us think that this is more a nice creation than a hack.
Disclaimer: As with the previous airgap flash, high voltages are used here, so don’t do this at home.