You can fly a brick if it has offset mass and you can fly a microwave because it breaks the law of the conservation of momentum. A paper on the EM Drive was recently published by the Eagleworks team, and the results basically say, ‘if this works, it’s a terrible thruster that shouldn’t work’. Experts have weighed in, but now we might not have to wait for another test in the Eagleworks lab: China will fly an EM Drive on their space station. Will it work? Who knows.
The ESP32 is just now landing on workbenches around the globe, and already a few people are diving into promiscuous mode and WiFi packet injection.
The Large Hadron Collider is the most advanced piece of scientific apparatus ever built. It produces tons of data, and classifying this data is a challenge. The best pattern recognition unit is between your ears, so CERN is crowdsourcing the categorization of LHC data.
Holy crap this is cyberpunk. [SexyCyborg] created a makeup palette pen testing device thing out of a Rasberry Pi and a few bits and bobs sitting around in a parts drawer. The project is cool, but the photolog of the finished project is awesome. It’s exactly what you would use to break into the Weyland-Yutani database while evading government operatives on the rooftops of Kowloon Walled City before escaping via grappling hook shot into the belly of a spaceplane taking off.
The Mini NES is Nintendo’s most successful hardware offering since the N64. This tiny device, importantly packaged in a minified retro NES enclosure, is out of stock everywhere. That doesn’t matter because now there’s a mini Genesis. The cool kids had a Genesis. You want to be a cool kid, right? Mortal Kombat was better on the Genesis.
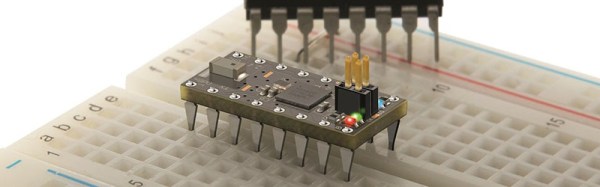
The Arduino (what once was two is again one) launched a new vowel-hating model: MKRZero. The narrow board is powered by USB or LiPo, centers around an Atmel SAMD21 Cortex-M0+ chip, and sports both an I2C breakout header and a microSD card slot. Just watch those levels as these pins are not 5v tolerant.
The American Association for the Advancement of Science is holding a Scientific Maker Exhibit during its annual meeting. This type of exhibit isn’t a poster or presentation — it’s just some table space and a chance to show off a 3D printed apparatus, a new type of sensor, equipment, or some other physical thing. Details in this PDF. This is actually cooler than it sounds, and a significant departure from the traditional poster or presentation found at every other scientific conference.
Did you know Hackaday has a retro edition made specifically for old computers connected to the Internet? That’s my baby, and it’s time for a refresh. If you have any feature requests you’d like to see, leave a note in the comments.

!["Get ready for a life that smells of hot plastic, son!" John Atherton [CC BY-SA 2.0], via Wikimedia Commons.](https://hackaday.com/wp-content/uploads/2016/12/656px-early_1950s_television_set_eugene_oregon.jpg)

 That is just the experience of one hackspace, but it evidently does not end there. Every other day it seems that


