[Dino] wanted to make this New Year’s celebration a bit more interesting, but he can’t make it to New York for the ball drop. Instead, he decided to make his own mini display in his workshop. Obviously he’s working with a slightly smaller budget than the folks at Times Square, but we think his display is pretty neat. If anything, [Dino] can at least guarantee that his New Year’s is 100% Seacrest-free.
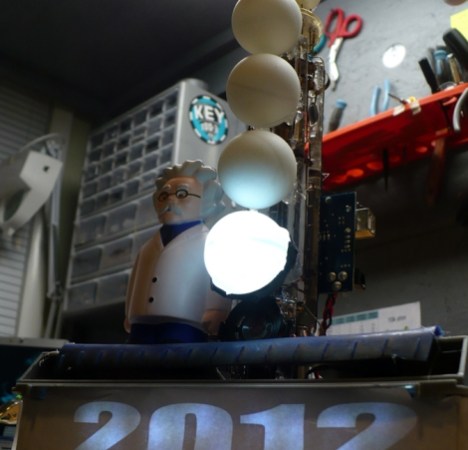
The ball drop is made up of five ping pong balls, each backlit by a 10mm LED. The LEDs and ping pong balls were mounted on the electron gun from a broken oscilloscope, giving it a cool look. The balls are lit one at a time by an Arduino, which illuminates each one for 15 seconds while the final minute of 2011 is counted down. Once midnight hits, a flashing “2012” sign illuminates while Auld Lang Syne plays from a tiny speaker.
The musical part of this build is something that [Dino] spent a lot of time on. He thoroughly explains how he translated the song from sheet music into its digital form, a process that would be helpful for beginners to watch.
Continue reading to see how the display was built, and if you’re just antsy to see the ball drop in action, a short demo can be found at 12:13.
Continue reading “Build Your Own Mini Ball Drop For New Year’s Eve”


