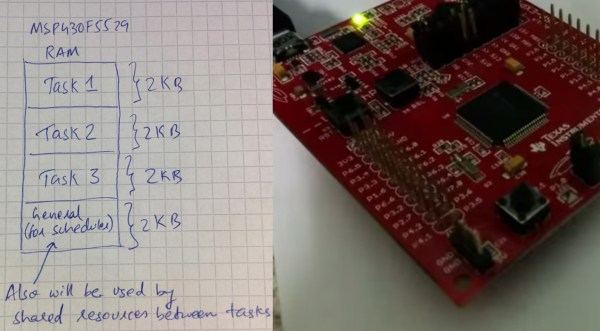
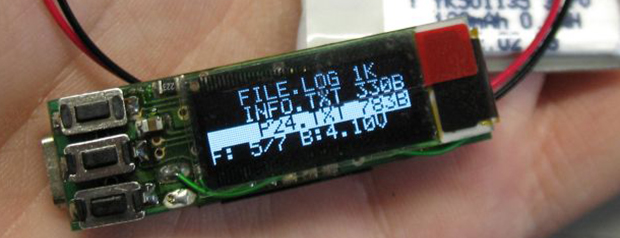
What exactly is multitasking, scheduling, and context switching? This is a great question for those interested in understanding how operating systems work, even small real-time operating systems (RTOS). [Jeffrey] had the same question, so he built a multitasking scheduler for the MSP430F5529 LaunchPad.
These topics are some of the most difficult to wrap your head around in the embedded world. Choosing a project that helps you understand tough topics is a great way to learn, plus it can be very rewarding. In his post, [Jeffrey] goes over the basics of how all of these things work, and how they can be implemented on the MSP430. Overall, it is a great read and very informative. For more information on RTOS, check out a few sections in the FreeRTOS book. Be sure to see his code in action after the break.
[Jeffery] was nice enough to release all of his code as open source, so be sure to check out his repository on GitHub. “Feel free to use it and learn more. I have made the code self explanatory. Enjoy!”
via [43oh.com]
Continue reading “Multitasking On The MSP430F5529 LaunchPad”

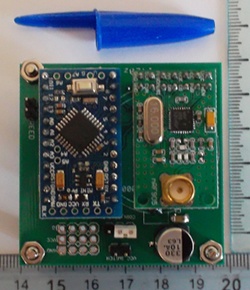 [Texane] had been thinking about how to monitor the state of his garage door from a remote place. The door itself isn’t around any power outlets, and is a few floors away from where his server would be located in his apartment. This presented a few design challenges – namely, the sensor itself should have a wireless connection to the server, and being low power would be a great idea. This led to the development of a


