When we hear spectrometer, we usually think of some piece of high-end test equipment sitting in a CSI lab. Sure, a hacker could make one if he or she put their mind to it. But make one out of a webcam, some cheap diffraction grating purchased off ebay and some scrap? Surely not.
[Renaud] pulls off this MacGyver like build with a detailed knowledge of how spectrometers work. A diffraction grating is used to split the incoming light into its component wavelengths. Much like a prism would. The wavelengths then make their way through a slit, which [Renaud] made from two pieces of highly polished brass, so the webcam sensor can see a specific wavelength. While the spectrometer-from-webcam concept isn’t new, the build is still impressive.
Once the build was complete, [Renaud] put together some software to make sense of the data. Though a bit short on details, we hope this build will inspire you to make your own spectrometer, and document it on hackaday.io of course.
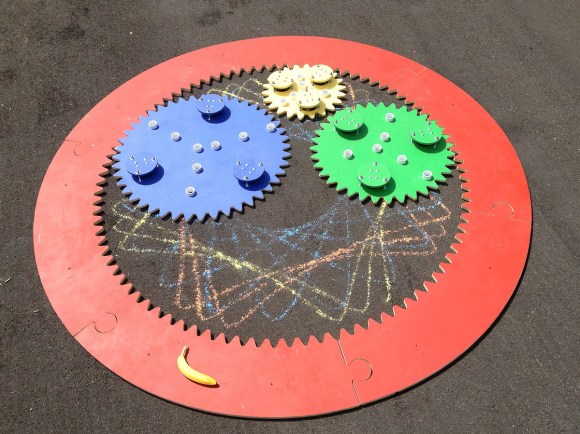
Late last year at a craft show, [hahabird] and a friend came across a laser-cut Spirograph and they both had a go at it. After mocking his friend’s lack of fine motor skills, [hahabird] was struck with the idea of making a giant-scale Spirograph that would (hopefully) be less frustrating for kids of all ages.
He generated the gears using an InkScape plugin, and then moved the project to Illustrator for adjustments. After nesting the inner gear drawings, he was able to print them out on one 3×3′ piece of paper at the local FedEx-Kinko’s. To make a template for routing he pieces that make up the eight-foot diameter outer ring, [hahabird] first cut it out of MDF and then bolted that to plywood. The outer ring’s size was dictated by the number of sections that fit on a 4×8 piece of plywood.
The challenge of the inner cogs was to make them move smoothly and still mesh with the teeth of the outer ring. [hahabird] solved this by mounting casters on raised platforms, which double nicely as handles. Each inner cog has a series of PVC couplers that take the 1″ PVC chalk holder insert.
So far, [hahabird] has cut 22-, 35-, and 44-tooth cogs, all of which are painted in nice, bright colors. According to his reddit comments, he will have a video or gif of it in a few days. We hope he makes the plus sign cog and the tongue depressor piece, too.
If you’re a cigar aficionado, you know storing cigars at the proper temperature and humidity is something you just need to do. Centuries of design have gone into the simple humidor, and now, I guess, it’s time to put some electronics alongside your cigars.
The design of [dzzie]’s smart humidor consists of an Arduino, WiFi shield, LCD + button shield, and most importantly, a DHT22 temperature and humidity sensor. In a bit of thoughtfulness, only the DHT22 is mounted inside the humidor; everything else is in an enclosure mounted outside the humidor, including a few buttons for clearing alerts and logging when water is added.
The smart humidor reads the DHT22 sensor every 20 minutes and uploads the data to a web server where useful graphs are rendered. The control box will send out an alert email to [dzzie] if the temperature or humidity is out of the desired range.
All it takes is one little seed. One tiny little seed, that when planted into the ground and nourished correctly, can flourish into a healthy and happy plant. But there are some challenges involved. For example, maintaining a steady temperature and keeping moisture at an optimum level can be difficult at times, especially when just starting out.
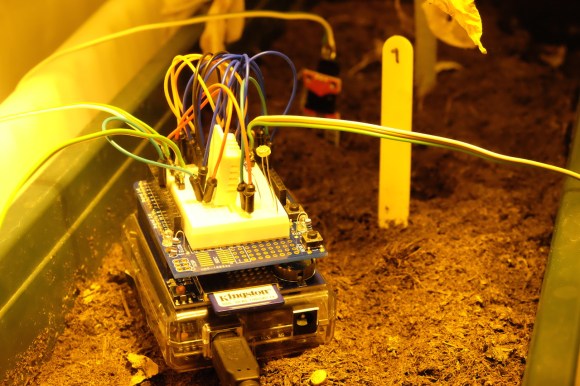
This Arduino grow-op monitoring solution helps to solve those problems. It was built by [growershower] as a fun side project to monitor the vital signs of 3 marijuana plants. The board is an Uno and has an SD card shield with a DHT22 temperature sensor plus a soil moisture sensor. A photo diode is also used to measure light.
The graph produced from the data is a weed grower’s wet dream:
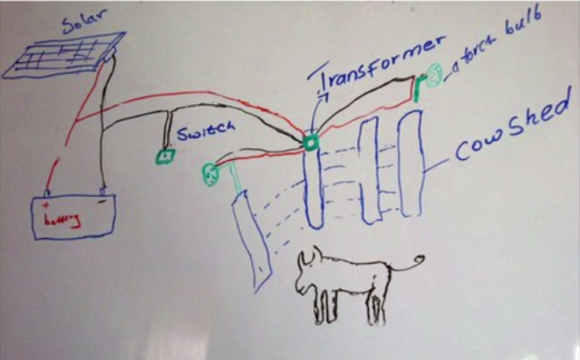
[Richard’s] community in Kenya had a problem. The people depended on local livestock for survival, but the local lion population had started consuming that very same food source. The result was that people suffered from loss of the livestock, but the lions also suffered when the people killed them to protect their source of food. [Richard] knew he could do something to help both his community, and the lion population. He ended up building a lion attack prevention system.
He first tried a sort of scarecrow, to keep the lions away from the cattle. Unfortunately the lions proved to be too “tricky” and quickly realized that the scarecrows were no threat. Then one day, [Richard] was working with a flashlight. This led him to realize that the lions seemed to be afraid of moving light. That gave him the idea for his invention.
He had previously taken apart his mothers new radio, much to her dismay. He learned a lot about electronics in the process. He combined his electronics knowledge with this new knowledge about lions, to create his lion attack prevention system. The core component is the turn signal circuit from a motorbike. The circuit is hooked up to a rechargeable battery and a solar cell. This all runs through a switch so [Richard] can turn it on only when needed. The circuit is switched on at night to keep the lions away. [Richard] claims that they have experienced no lion attacks since the system was put in place two years ago!
This protects both the local cattle as well as the lions themselves. The whole thing is powered from the sun, so it’s likely to last a very long time. This kind of project may seem simple to many readers, but it’s a great example of the good ideas and ingenuity that can grow out of necessity. Oh, did we mention that [Richard] is only 13 years old? His invention is now reportedly being used all over Kenya and has led [Richard] to receive a scholarship to what he calls “one of the best schools in Kenya”.
While this hack has clearly changed the lives of many people in [Richard’s] region. You don’t have to make something overly complicated to change the world.
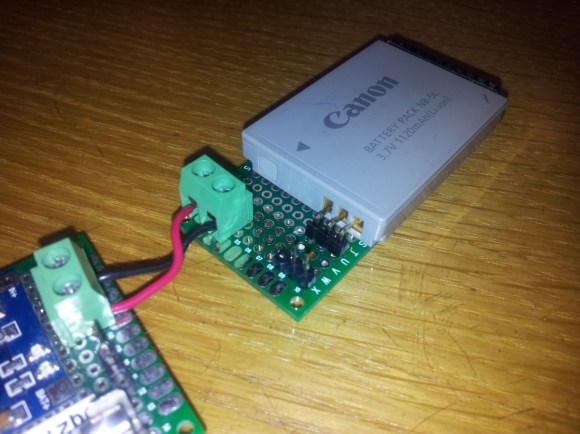
For projects requiring a bit more juice, the mass production of those small rectangular lithium ion batteries for cell phones, cameras and other electronics are extremely useful — the problem is, how do you mount them, short of soldering the terminals in place? With a bit of perfboard of course!
[Jason] came up with this idea when he was trying to figure out a way to mount small lithium cells for a battery fuel gauge for another one of his projects. He found if you use good quality perfboard you can use a 90 degree male pin header to contact the terminals, and a strip of female pin header as a kind of battery stop at the other end. This allows you to very snugly squeeze the battery in place — you may need to adjust the length of the male pins though in order to fine tune the fit!
Now you can add a nice wire terminal, solder up the connections, and there you have it, an easy to make, extremely useful battery holder!
I don’t use that label lightly. After the Red Bull Creation’s day of show and tell was over — winners having been presented with trophies and stuffed with barbecue over at Bert’s — people started to trickle into OmniCorp Detroit for the party.
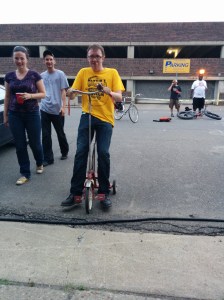
Like all of the best parties we didn’t really see it coming. I grabbed a folding chair on the street out front with a beer in my hand and enjoyed a rotating variety of interesting people to talk with. [Brian] rolled up riding one of the trophies, a modified toddler’s tricycle that proves his future with a travelling circuit is still viable. They roped off the area and set up huge speakers for the DJ. Then two guys game lumbering down the street sharing the work of hauling a tub full of ice and 12-ounce clear glass bottles with colored liquid inside. Turns out they just opened a distillery down the street and decided to donate some vodka infusions for the festivities. Yum!
Upstairs, a couple hundred square feet of area was ringed by a bar (with wide variety of kegs, slushy drinks, and one of those hot dog rollers), couches, a few work benches, a second DJ booth, and a photobooth. We only got one picture before the smoke machine reduced visibility.
Unlike a lot of ragers I’ve been at, it was easy to start up a conversation with just about anyone. Living expenses are so low in Detroit and artists are flocking to the area. This is who made up most of the group. Fascinating people who are working on a multitude of different projects and have stories of building community on their streets while rehabbing houses that cost $1-2.5k to purchase but didn’t come with most of what you’d assume a house should.
Then the fire dragon showed up
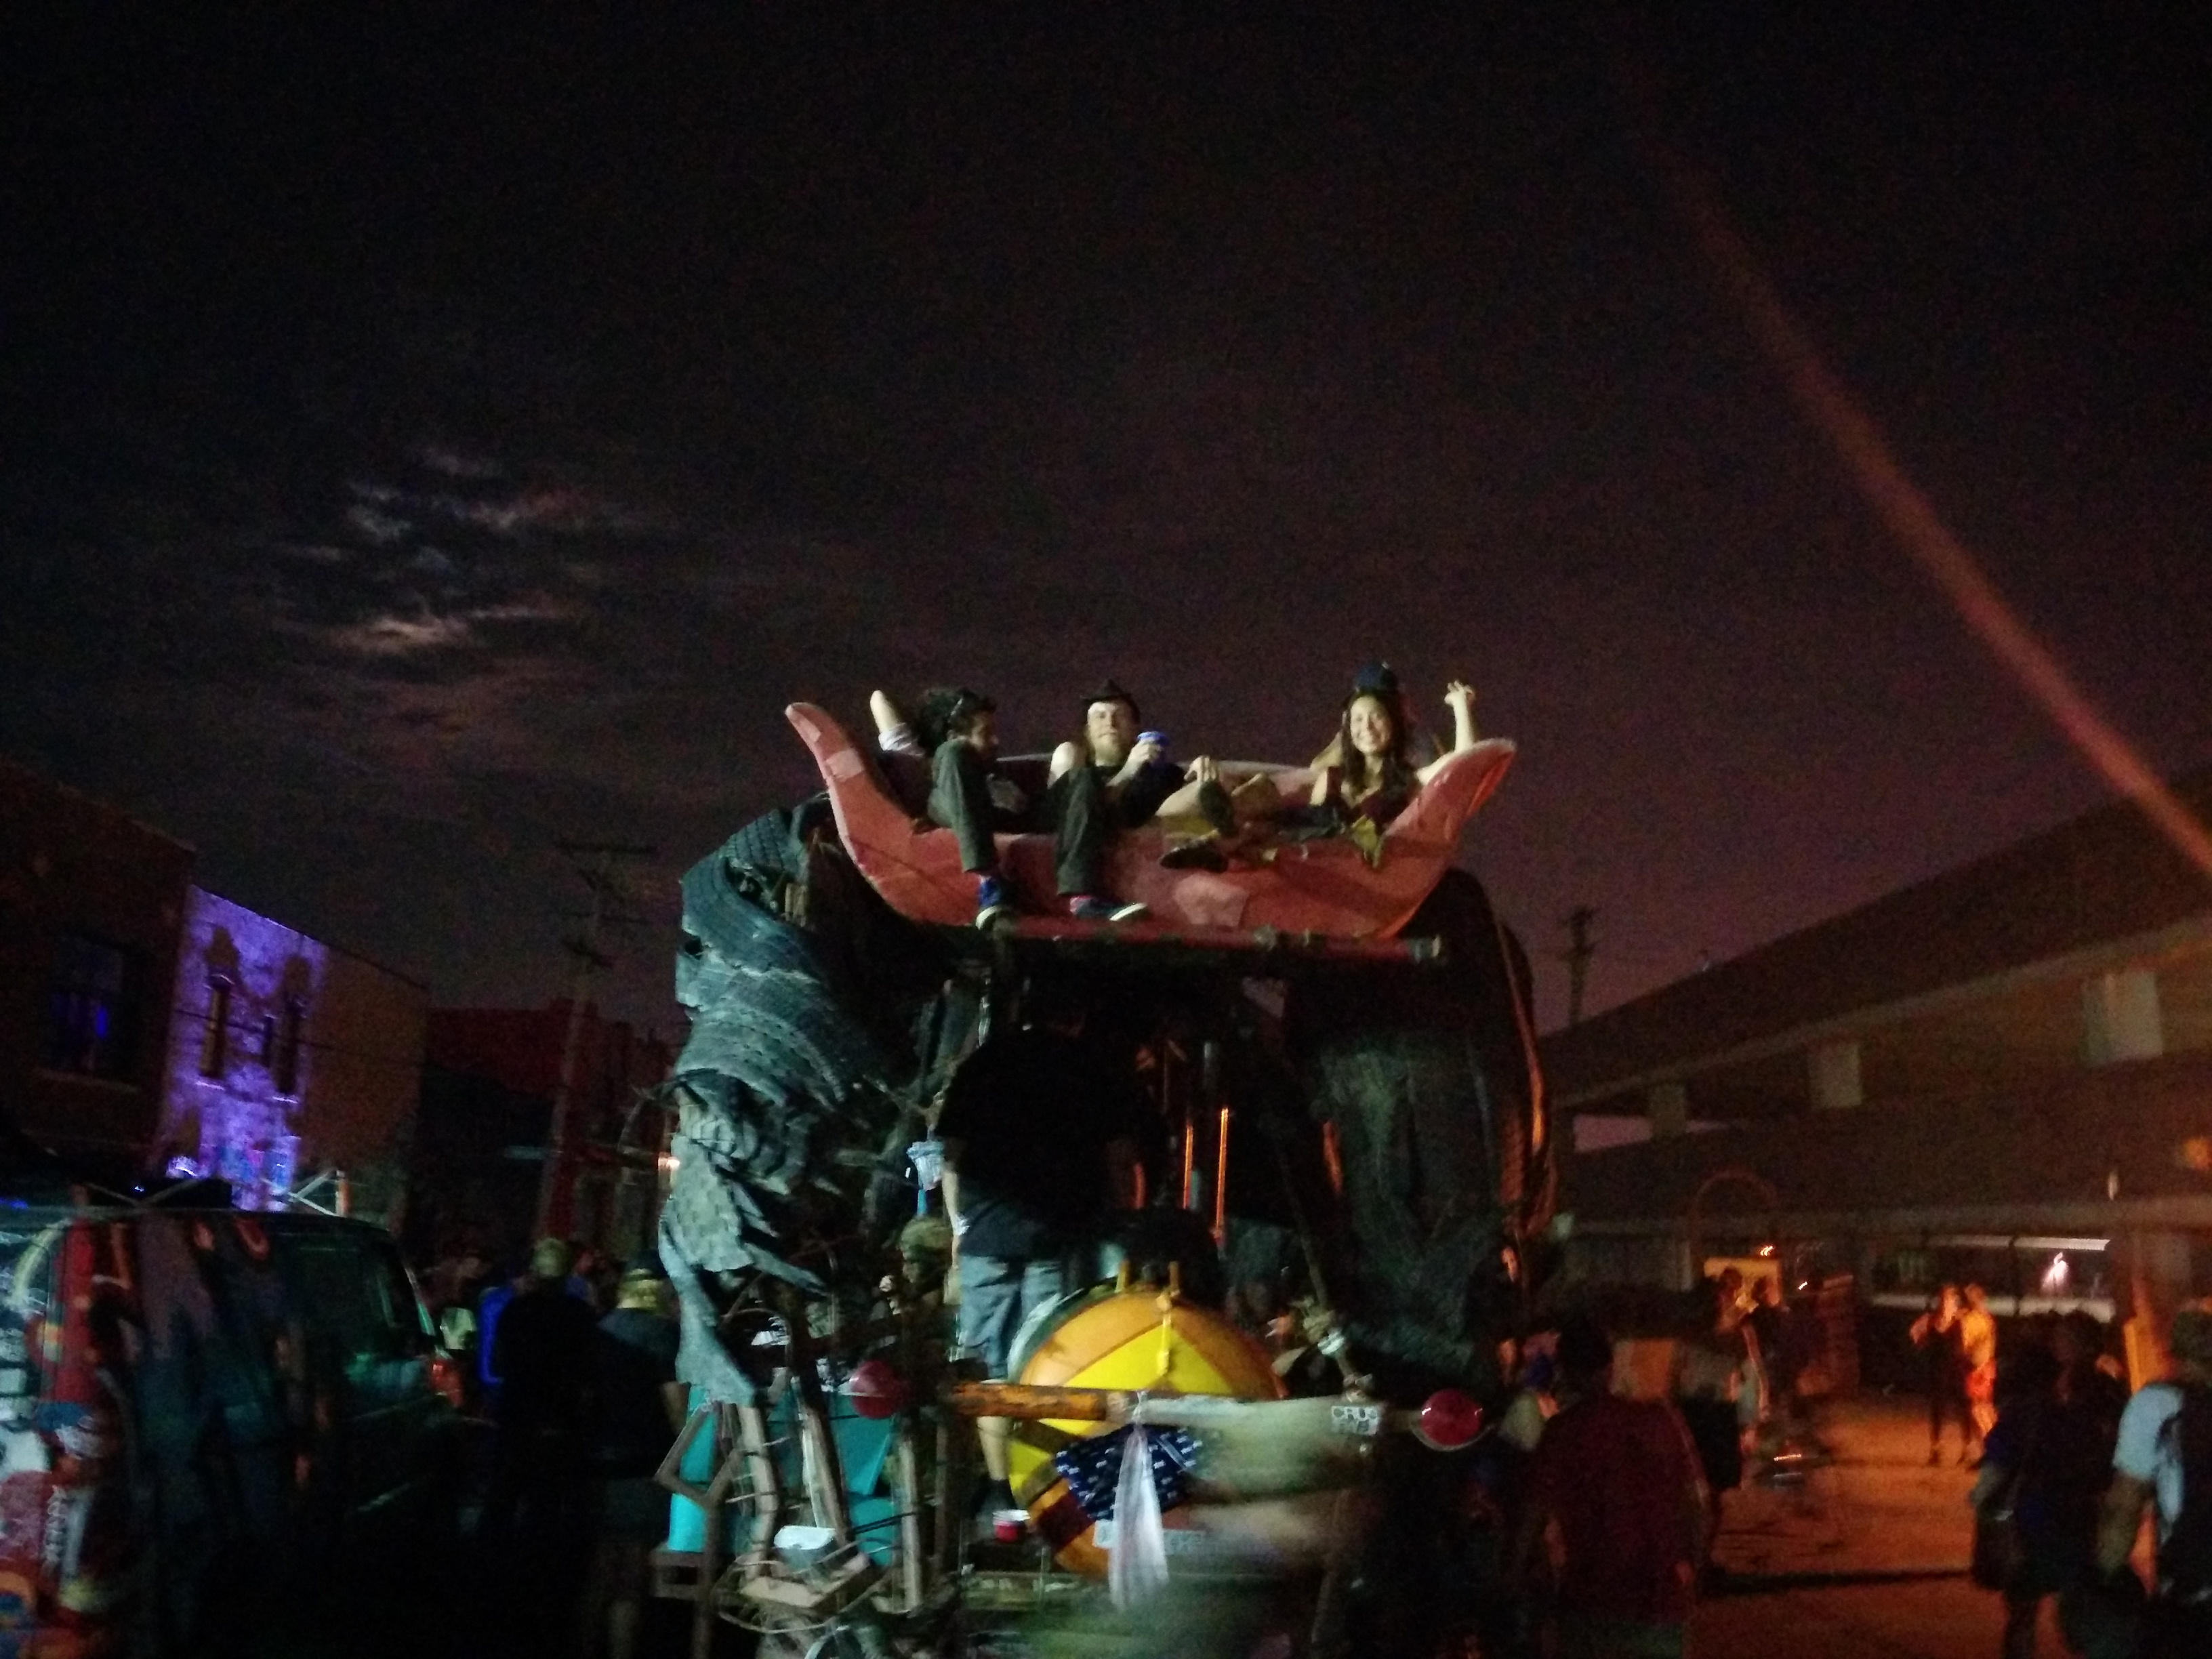
Inside was packed and outside was starting to get crowded. Then the fire dragon showed up. Named Gon KiRin, it’s the collaboration between [Teddy Lo] and [Ryan C. Doyle] who was on Team Detroitus and is artist in residence at Recycle Here!, the build venue for the Red Bull Creation. The beast is built on the frame of a 1960’s dump truck and most of the building materials were found on the sides of the highway. The huge propane tank on the back allows it to breathe fire. I love that three daisy-chained 9-volts and two bare wires are the control mechanism for this. One thing became readily apparent; you don’t stand in front of Gon KiRin while it’s breathing fire.
The crowd piled onto the couches on top of the tail and at either rear hip. The dragons back also bore a continually rotating set of people. After midnight the guests really started to flood in. [Caleb] and I tried to close down the party but a few hours after midnight it didn’t seem to be getting any slower.
Capping off the weekend like this really proves that you need to get your team into next year’s Red Bull Creation. I got in the easy way — judges don’t have to stay up for 72 hours building stuff. Despite the sleep deprivation for contestants I didn’t come across anyone who wasn’t having a blast during the build, while goofing off, or trying to stay awake as this party got moving.
Bravo Detroit, you’re now on my short list of best party towns. Who else wants to be added to that list? Hackaday’s going to be in Las Vegas for DEFCON in a few weeks. Anyone know of parties planned that weekend and how we can get in?
The fire-breather “Gon KiRin”
We only got one picture before the fog machine was turned on
Chris and Mike tried out the Omnicorp Photobooth which prints out your photos
Brian Benchoff trys out the team choice trophy — a modified toddler’s tricycle

 Late last year at a craft show, [hahabird] and a friend came across a laser-cut Spirograph and they both had a go at it. After mocking his friend’s lack of fine motor skills, [hahabird] was struck with the idea of making
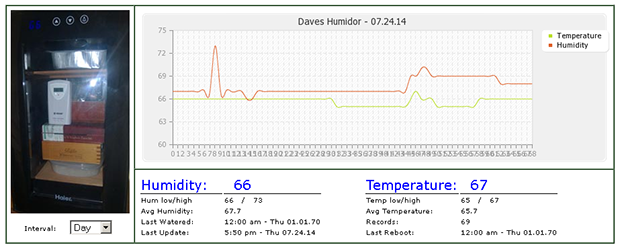

 [Brian] rolled up riding one of the trophies, a modified toddler’s tricycle that proves his future with a travelling circuit is still viable. They roped off the area and set up huge speakers for the DJ. Then two guys game lumbering down the street sharing the work of hauling a tub full of ice and 12-ounce clear glass bottles with colored liquid inside. Turns out they just opened