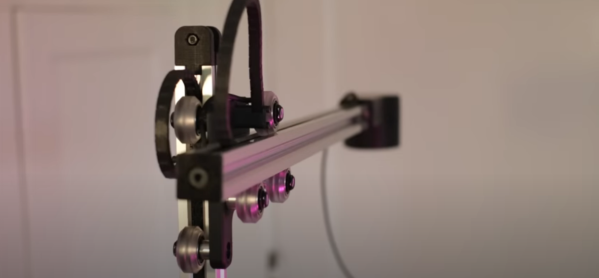
Every once in a while we stumble across something so simple yet so clever that we just have to call it out. This custom linear Hall effect sensor is a perfect example of this.
By way of backstory, [Nixieguy], aka [The Electronic Mercenary], offers up a relatable tale — in the market for suitable hardware to make the game Star Citizen more enjoyable, and finding the current commercial joystick offerings somewhat wanting, he decided to roll his own controllers. This resulted in the need for a linear sensor 100 mm in length, the specs for which — absolute sensing, no brushes or encoders, easily sourced parts — precluded most of the available commercial options, like linear pots. What to do?
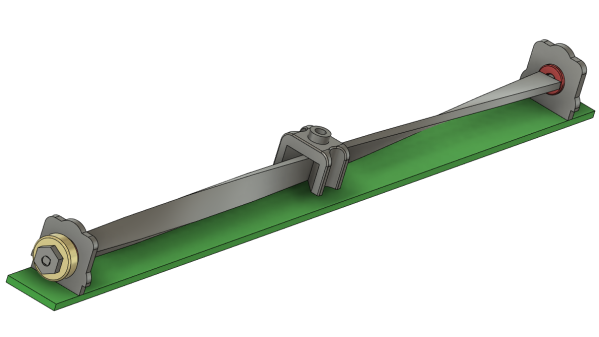
The solution [Nixieguy] settled on was to use a Hall effect sensor and a diametrally magnetized neodymium ring magnet. The magnet is rotated through 180 degrees by a twisted aluminum bar, which is supported in a frame by bearings. A low-friction slider with a slot captures the bar; moving the slider along the length of the control rotates the bar, which rotates the magnet, which allows the Hall sensor to measure the angle of the magnetic field. Genius!
The parts for the prototype sensor are all made from 0.8-mm aluminum sheet stock and bent to shape. The video below shows the action better than words can describe it, and judging by the oscilloscope trace, the output of the sensor is pretty smooth. There’s clearly a long way to go to tighten things up, but the basic mechanism looks like a clear win to us.
Hats off to [Nixieguy] for this one, which we’ll surely be following for more developments. In the meantime, if you need to brush up on the Hall effect, [Al Williams] did a nice piece on that a while back.
Continue reading “Clever Mechanism Makes A Linear Control From A Rotary Hall Sensor”