Robust I2C And SPI In Space Thanks To Bus Isolation

Imagine you’re sending a piece of hardware to space on a satellite. Unless you’re buddy-buddy with NASA, it’s pretty unlikely you’ll ever be able to head up there and fix something if it goes wrong once it’s launched. Robust design is key, so that even in the event of a failure in one component, the rest of the hardware can keep working.

The example I2C isolation circuit from [Max’s] paper. The SPI implementation is even simpler.
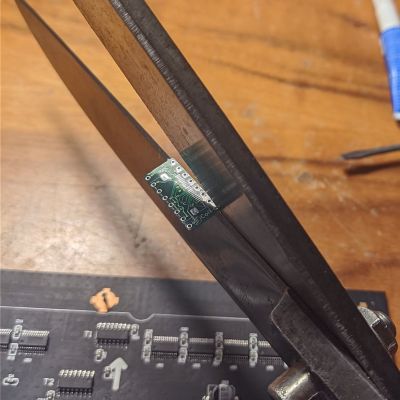
[Max Holliday] found himself in this exact situation, running 69 I2C and SPI devices in a single satellite. Thus, he came up with circuits to auto-isolate devices from these buses in the event of an issue. That work is the subject of a research paper now available on the TechRxiv Preprint Server.

The problem is that these simple buses aren’t always the most robust, being vulnerable to single-point failures where one bad part takes down other parts of the bus. [Max] notes that vast numbers of sensors and devices rely on these standards, and it can be difficult or prohibitively expensive to design without them, so a solution was needed.

To fix this, [Max] developed a simple external circuit that could be placed on each node of a I2C or SPI communication bus. In the event of malfunction, that node can be cut off from the bus by this circuit, allowing the rest of the system to go on functioning.

With little more than a few transistors, MOSFETs and passives, you too could protect your buses from malfunctions using these techniques. [Max] did just that on the NASA V-R3x mission which flew successfully in January 2021 if you needed any further confirmation of the value of this technique.

It’s something that won’t bother the home hobbyist building a garage door opener, but it could be of great value to those designing systems that must fail gracefully if they fail at all. Be sure to share your best tips and tricks for robust SPI and I2C buses in the comments below!

A r0tring CS-50 scriber. You type, it writes the letters with a pen on your blueprint or technical drawing.

Plotting To Restore A R0tring CS-50

If you’re of a certain vintage and have ever done any technical drawing, chances are good that you used a r0tring of some kind, be it pencil or pen. Well, r0tring makes more than writing implements.  They also made electronic scribers — a small plotter that pens ISO lettering on technical drawings based on typed input. This was a huge time saver over doing it freehand or stenciling each letter. The CS-50 is designed to hold the top-of-the-line r0tring drawing pen, which turned out to be the most expensive part of this restoration aside from the time spent sniffing out issues.

[Atkelar] likes to open things up and give them a visual inspection before powering them on. We think this is good practice, even if the suspense kills you. But really, [Atkelar] did so much more than that. He started by replacing the likely late-80s-era coin cell even though it registered north of 3 V. Then he swapped out all the electrolytic caps and one tantalum, cleaned the rubber dome keyboard parts with a cheap electric toothbrush, (another great idea), and completely disassembled the x-y mechanism to clean and re-oil it.

Continue reading “Plotting To Restore A R0tring CS-50”

an image of the volume adjustment board

Is Your Movie Too Loud? Can’t Hear The Dialogue? This Circuit Can Help.

Everyone loves watching movies, that is, so long as you can hear what the characters on screen are saying. [GreatScott] found this second part difficult while watching through BladeRunner 2049, so he designed an automatic volume adjuster to assist.

At a high level, the solution is fairly straightforward; when there is loud music playing in a movie, turn the volume down. The challenge is how to actually achieve that. The first step was controlling the volume. To avoid having to modify or damage his sound system, [GreatScott] opted instead to mimic the volume up and down signals of his remote over IR. Using the very handy IRremote library for Arduino and its built-in decoding functionality, he was able to identify and replicate the signals with his own IR LED.

The second step in this process was measuring the volume of the movie. [GreatScott] achieved this with a microphone and amplifier circuit, that was then piped into one of the analog pins of the Arduino Pro Micro at the heart of the build. Since the audio being sampled could have a frequency as high as 20 kHz, the ADC Prescaler had to be adjusted from its standard value, which would have only permitted measurements at less than 5 kHz.

The third step was writing the algorithm to detect loud music and adjust the volume accordingly. The Arduino will measure the audio until a sound greater than the dead band value, set with one of the two onboard potentiometers, is detected. This then triggers the Arduino to start a timer, to see how frequently the upper limit is being surpassed. If it is just one or two occasionally loud noises (like a scream, a clap, whistling, etc.) the Arduino will not take any action, but multiple loud noises in rapid succession will then trigger the volume down command over the IR LED. A second potentiometer allows for adjustment of this timer’s critical value, so that you can make the system respond faster or slower depending on the movie.

Once the sound has been detected to have dropped down below a critical vaue, the Arduino assumes that the movie is back to dialog and will increase the volume by the number of times it decreased it before, leaving you back at the perfect volume.

Maybe you’re the type that cares more for the visuals of a movie, rather than the audio. In that case, this e-paper movie display will be perfect for giving you time to appreciate every frame!

Continue reading “Is Your Movie Too Loud? Can’t Hear The Dialogue? This Circuit Can Help.”

Put A Landscape Scanner On Your Bike And Ride

Google have a fleet of cars travelling the roads of the world taking images for their online StreetView service. You could do much the same thing pedalling on two wheels, with the help of this landscape scanner from [Celian_31].

The basic concept is simple. A powerbank on the bike runs a Raspberry Pi, kitted out with its typical Pi Camera within a 3D-printed housing. A reed switch on the bike’s frame detects pulses from a magnet attached to the valve stem of one tire, and this is used to trigger the taking of photos at regular intervals with the aid of a Python script. Further scripts are then used to knit all the photos taken on a ride together into one contiguous image.

It’s unlikely you’ll recreate Google’s entire StreetView in this fashion. You’d probably want a spherical camera anyway. However, if you wish to undertake regular static surveillance of your local area in an inconspicuous fashion, this would be a great way to do it while also staying in shape. If you do that, please don’t tell us as it would be a major violation of operational security. We’d love to hear about any other projects, though! Video after the break.

Continue reading “Put A Landscape Scanner On Your Bike And Ride”

Making A Metal Hand Doorknob

Regular doorknobs are widely reviled for their bare simplicity, but by and large society has so many other problems that it never really comes up in day to day conversation. Fear not, however, for [Matthew] has created something altogether more special: a doorknob in the shape of his own outstretched hand.

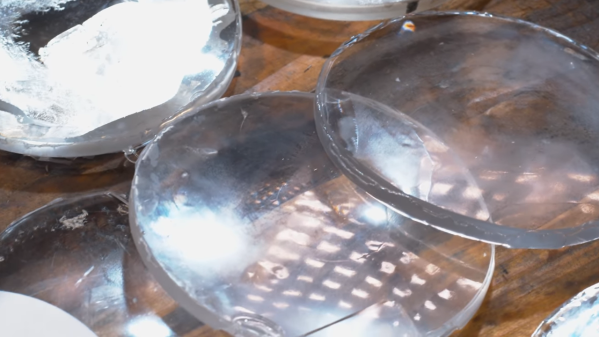
The build was inspired by a similar doorknob at the WNDR museum in Chicago, and its one you can recreate yourself, too. It’s achieved through a multi-stage mold making process. [Matthew]’s first step was to make a flexible mold of his hand using Perfect Mold alginate material to do so.

Once solidified, [Matthew’s] hand was removed and the mold filled with wax. The wax duplicate of [Matthew]’s hand was then used to create an investment plaster mold for casting metal. Vents were added in the end of each fingertip in the mold to allow molten metal to effectively fill the entire cavity.

Once the investment mold was solid and dry, the wax was melted out and it was ready for casting. A propane furnace was used to melt the casting metal and fill the mold using a simple gravity casting method. [Matthew] ended up making two hands, one in aluminium and one in copper. Some cleanup with grinders and a wire wheel, and a replica of [Matthew]’s hand was in his hands!

The finished piece looks great attached to a door knob, and we’re sure it’s quite satisfying shaking hands with your hefty metal self every time you open the door. It bears noting that the same techniques can be used with 3D printing, too! If you pull off your own great home casting project, be sure to drop us a line. Video after the break.

Continue reading “Making A Metal Hand Doorknob”

The Most Important Device In The Universe on display at Modern Props

The Most Important Device In The Universe Is Powered By A 555 Timer

The Hackaday comments section has become infamous for a recurring theme that goes something like “I don’t know why they used an Arduino, they could have done it with a 555 timer!” If you’ve ever thought the same way, then this post is for you!

What is The Most Important Device In The Universe, then? It’s the Modern Props #195-290-1, a movie prop originally built in the 1970’s. It’s a product of the creative mind of [John Zabrucky] who founded Modern Props in 1977 to serve Sci-Fi television and movie productions that wanted to invent the future with their props. Known for their high quality and impeccable craftsmanship, Modern Props’ products were in demand until the day they closed the doors so that [John] could retire.

This particular piece is called The Most Important Device In The Universe due to its ubiquity in modern productions that we’ve all heard of: several Star Trek franchises, The Last Starfighter, Knight Rider, Airplane II, Austin Powers, and countless others. The next time you sit down to watch a Sci-Fi show, see if you can spot it! Be sure to check the video below the break to see several examples.

Nobody is sure what The Most Important Device does, aside from the fact that it has red lights that go back and forth. What we do know, thanks to a comment by the man who installed the electronics, [Gene Turnbow], is how it’s powered. [Gene] explained that 45w NPN power transistors drive the neon tubes through step up transformers. The transistors themselves are connected to a 74C4514 demultiplexer, which is itself driven by a 7493 binary counter. What’s the 7493 driven by? You guessed it: the venerable 555 Timer. And so it is that the 555 timer runs The Most Important Device In The Universe.

We did think that [Gene]’s final comment was rather indicative of how much things have changed since the prop was originally built. After explaining the device, he says “These days we would just use an Arduino to do the same job.” Indeed.

Don’t worry, 555 lovers. We’ve got you covered with this Vacuum Tube 555, and and the Trollduino, a 555 on an Arduino Shield. Thanks [Matt K] for the great tip. Don’t forget to submit your favorite hacks to our Tip Line!

Continue reading “The Most Important Device In The Universe Is Powered By A 555 Timer”

Making Tea Pots With Antique Machinery

We in the West take quite a lot for granted. We’re used to certain standards of care in our homes and our places of work, so much so that we rarely even take time to notice it. Workplace accidents are a big deal, and failing to report can lead to you finding yourself being shown the door. So it’s a little sobering to see how things get made in countries with a less stringent approach in certain areas of basic health and safety.

With the urge to drive prices to the lowest possible, low-tech items such as clothing and housewares tend not to be made in highly sophisticated, automated factories, but more likely in smaller facilities employing more labour, which favours countries where such labour is cheaper and more available. The video we’re highlighting here shows a small factory in what is likely Pakistan (but equally could be a few other places, we’re only guessing) which would seem fairly typical for the level of sophistication required to make enameled teapots.

The video shows the production process, starting from sheet steel cut by hand with shears, which is trued before being stamped into a shallow dish. These first two machines are driven by exposed belts, which is particularly risky, given the style of free-flowing fabric clothes several of the workers wear. In the background you can see electrical wiring just slung around, hanging off nails. The whole building is the same, improvised machines with no protective features, managed by skilled manual workers dedicated to their allocated task, all working in perfect unison. It’s lovely to watch, but also saddening at the same time, as you know those guys are right in the middle of a thousand potential hazards, and only their skill and dexterity is stopping something bad happening. The machines themselves are heavily worn all over the place, but clearly hacked by someone there knows enough to just keep them ticking over. Just checkout the deep wear in the tool rest at [4:20] in the video!

Continue reading “Making Tea Pots With Antique Machinery”