Lego Plays Electronic Drums

The ability to quickly try out an idea, and then expand and develop it, is what rapid prototyping is all about. Although we tend to think of 3D printing when rapid prototyping is mentioned, [Brick Technology] reminds us of the power of Lego, as he rapidly builds and improves an electromechanical drum machine.

Using Lego Technic pieces, he starts with a simple music box-style drum with moveable pins that pluck on spring-loaded levers, which in turn hit piezoelectric discs. The electronics side is simple, with the discs wired to a Roland sound module from an existing electronic drum kit. With the ability to instantly adjust, add and remove pieces, he quickly finds and fixes the problem of getting eleven hammer mechanisms together and working smoothly.

To get around the limited pin space on the drum and increase the length and variation potential of the rhythms, [Brick Technology] moved to a belt design that can accommodate significantly more pins. He also added an electric motor and various gearbox ratios for consistent and adjustable tempo. Together with his water vortex ball machine, he makes us think our workshops probably need a few hundred Lego Technic pieces.

Continue reading “Lego Plays Electronic Drums”

An LCD mounted inside a Roland synthesizer

Reverse-Engineering A Display Protocol To Repair A Roland Synthesizer

Repairing electronic devices isn’t as hard as it used to be. Thanks to the internet, it’s easy to find datasheets and application notes for any standard component inside your gadget, and once you’ve found the faulty one, you simply buy a replacement from one of a million web shops — assuming you don’t end up with a fake, of course. When it comes to non-standard components, however, things get more difficult, as [dpeddi] found out when a friend asked him for help in repairing a Roland Juno-G synthesizer with a broken display.

The main issue here was the fact that the display in question was a custom design, with no replacement or documentation available. The only thing [dpeddi] could figure out from the service manual was the basic pinout, which showed a parallel interface with two lines labelled “chip select” — an indication that the display contained two separate controllers. But the exact protocol and data format was not documented, so [dpeddi] brought out his logic analyzer to try and decode the signals generated by the synthesizer.

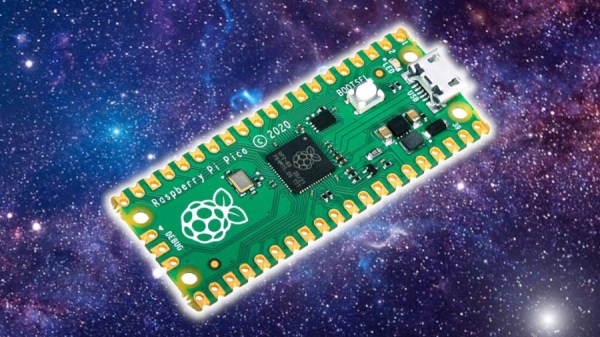
After a bit of trial and error, he was able to figure out the protocol: it looked like the display contained two KS0713-type LCD controllers, each controlling one half of the screen. Finding a compatible replacement was still proving difficult, so [dpeddi] decided instead to decode the original signals using a microcontroller and show the picture on a modern LCD driven by SPI. After some intial experiments with an ESP32, it turned out that the task of reading two reasonably fast parallel buses and driving an even faster serial one was a bit too much for the ESP, so [dpeddi] upgraded to a Raspberry Pi Pico. This worked a treat, and thanks to a 3D-printed mounting bracket, the new display also fit snugly inside the Roland’s case.

The Pico’s code is available on [dpeddi]’s GitHub page, so if you’ve also got a dodgy display in your Juno-G you can simply download it and use it to plug in a brand-new display. However, the method of reverse-engineering an existing display protocol and translating it to that of a new one is pretty universal and should come in handy when working with any type of electronic device: say, a vintage calculator or multimeter, or even another synthesizer.

Arduino Lo-Fi Orchestra closeup thumbnail

Lo-Fi Orchestra Learns Tubular Bells

Hardware projects often fall into three categories: Those that flash lights, those that make sounds and those that move. This virtuoso performance by [Kevin]’s “Lo-Fi Orchestra” manages all three, whilst doing an excellent job of reproducing the 1973 musical classic Tubular Bells by Mike Oldfield.

Producing decent polyphonic sounds of different timbres simultaneously is a challenge for simple microcontroller boards like Arduinos, so [Kevin] has embraced the “More is more” philosophy and split up the job of sound generation in much the same way as a traditional orchestra might. Altogether, 11 Arduino Nanos, 6 Arduino Unos, an Arduino Pro Mini, an Adafruit Feather 32u4, and a Raspberry Pi running MT32-Pi make up this electronic ensemble.

Arduino servo drumkit
Arduino Servo & Relay Drumkit

The servo & relay drumkit is a particular highlight, providing some physical sounds to go along with the otherwise solid-state generation.

The whole project is “conducted” over MIDI and the flashing sequencer in the middle gives a visual indication of the music that is almost hypnotic. The performance is split into two videos (after the break), and will be familiar to fans of 70’s music and classic horror movies alike. We’re astonished how accurately [Kevin] has captured the mood of the original recording.

If this all looks slightly familiar, it may be because we have covered the Lo-Fi Orchestra before, when it entertained us with a rousing rendition of Gustav Holst’s Planets Suite. If you’re more interested in real Tubular Bells than synthesized ones, then check out this MIDI-controlled set from 2013. Continue reading “Lo-Fi Orchestra Learns Tubular Bells

Fixing A 30-year Old Roland Bug

The Roland CM-500 is a digital synthesizer sound module released in 1991 that combines two incredibly powerful engines into one unit. However, in 2005 enthusiasts of the Roland MT-25 (one of the engines that went into the CM-500) noticed a difference between the vibrato rate on the MT-25 and the CM-500, rendering it less useful as now midi files would need to be adjusted before they sounded correct. Now thirty-something years later, there is a fix through the efforts of [Sergey Mikayev] and a fantastic writeup by [Cloudschatze].

They reached out to Roland Japan, who decided that since the device’s lifecycle had ended, no investigation was warranted. That led the community to start comparing the differences between the two systems. One noticeable difference was the change from an Intel 8098 to an 80C198. In theory, the latter is a superset of the former, but there are a few differences. First, the crystal frequency is divided by three rather than two, which means the period of the LFO would change even if the crystal stayed the same. Changing the 12 MHz crystal out for 8 MHz gave the LFO the correct period, but it broke the timings on the MIDI connection. However, this is just setting the serial baud rate divisor, which requires changing a few bytes.

Replace the ROM chip with a socket so you can slot your newly flashed PDIP-28 64kx8 ROM into a quick desoldering. Then swap the crystal, and you’ll have a machine that matches the MT-25 perfectly. The forum post has comparison audio files for your enjoyment. Finally, if you’re curious about other fixes requiring an inspiring amount of effort and dedication, here’s a game installer that was brought back from the dead by a determined hacker.

Trombone Controls Virtual Trombone

Guitar Hero was a cultural phenomenon a little over a decade ago, and showed that there was a real fun time to be had playing a virtual instrument on a controller. There are several other similar games available now for different instruments, including one called Trombone Champ that [Hung Truong] is a fan of which replaces the traditional guitar with a trombone. The sliding action of a trombone is significantly different than the frets of a guitar, making it a unique challenge in a video game. But an extra challenge is building a controller for the game that works by playing a real trombone.

Unlike a guitar which can easily map finger positions to buttons, mapping a more analog instrument like a trombone with its continuous slide to a digital space is a little harder. The approach here was to use an ESP32 and program it to send mouse inputs to a computer. First, an air pressure sensor was added to the bell of the trombone, so that when air is passing through it a mouse click is registered, which tells the computer that a note is currently being played. Second, a mouse position is generated by the position of the slide by using a time-of-flight sensor, also mounted to the bell. The ESP32 sends these mouse signals to the computer which are then used as inputs for the game.

While [Hung Truong] found that his sensors were not of the highest quality, he did find the latency of the control interface, and the control interface itself, to be relatively successful. With some tuning of the sensors he figures that this could be a much more effective device than the current prototype. If you’re wondering if the guitar hero equivalent exists or not, take a look at this classic hack from ’09.

Continue reading “Trombone Controls Virtual Trombone”

3D Printing The Key To A Bass Clarinet

Playing music as part of a group typically requires that not only are all of the instruments tuned to each other, but also that the musicians play in a specific key. For some musicians, like pianists and percussionists, this is not terribly difficult as their instruments are easy to play in any key. At the other end of the spectrum would be the diatonic harmonica, which is physically capable of playing in a single key only. Other orchestral instruments, on the other hand, are typically made for a specific key but can transpose into other keys with some effort. But, if you have 3D printed your instrument like this bass clarinet from [Jared], then you can build it to be in whichever key you’d like.

The bass clarinet is typically an instrument that comes in the key of B flat, but [Jered] wanted one that was a minor third lower. Building a traditional clarinet is not exactly the easiest process, so he turned to his 3D printer. In order to get the instrument working with the plastic parts, he had to make a lot of the levers and keys much larger than the metal versions on a standard instrument, and he made a number of design changes to some of the ways the keys are pressed. Most of his changes simply revert back to clarinet designs from the past, and it’s interesting to see how simpler designs from earlier time periods lend themselves to additive manufacturing.

While [Jared] claims that the two instruments have slightly different tones, our amateur ears have a hard time discerning the difference. He does use a standard clarinet bell but other than that it’s impressive how similar the 3D printed version sounds to the genuine article. As to why it’s keyed differently than the standard, [Jared] points out that it’s just interesting to try new things, and his 3D printer lets him do that. We’d be happy to have another instrument in our 3D printed orchestra, too.

Continue reading “3D Printing The Key To A Bass Clarinet”

Building An Old Guitar From A New One

Anyone who’s ever played guitar to at least the skill level required to form a terrible garage band knows the names of the most legendary guitars. The driving sound of the Gibson Les Paul played by Jimmy Page, the upside-down and smooth Fender Stratocaster from Jimi Hendrix, or the twangy Rickenbacker made famous by George Harrison are all lusted-after models. The guitar that [Frank] really wanted was a Danelectro DC59 and since they’ve been steadily creeping up in price, he decided to build his own.

The body of the clone guitar is hollow and made from effectively scrap wood, in this case plywood. As the original guitars were in fact famous for using the least expensive materials possible, this makes it a great choice for a clone. [Frank] made the guitar using almost exclusively hand tools and glued everything together, but did use a few donor parts from a modern Stratocaster-type guitar. With most of the rough shape of the guitar finished, it was time to add the parts that make the guitar sound the way that a real Danelectro should: the lipstick-style pickups. He purchased these completely separately as they are the most important part to get right to emulate the tone and feel of the original.

With everything finally soldered and assembled, [Frank] got right to work recording a sample audio track which is included at the end of the video. It certainly sounds like the original to our untrained ears, and for around $100 it’s not a bad value either. If you’d like to see a guitar built from the ground up without using another as a clone, take a look at this build which brings a completely original guitar into existence, entirely from scratch.

Continue reading “Building An Old Guitar From A New One”