The 80s were the golden age of synthesizers in pop music. Hugely complicated setups that spared no expense were the norm, with synths capable of recreating anything from pianos and guitars to percussion, strings, and brass. These types of setups aren’t strictly necessary if you’re looking to make music, though, especially in the modern age of accessible microcontrollers. This synthesizer from [Folkert] with MIDI capabilities, for example, creates catchy tunes with only a handful of parts.
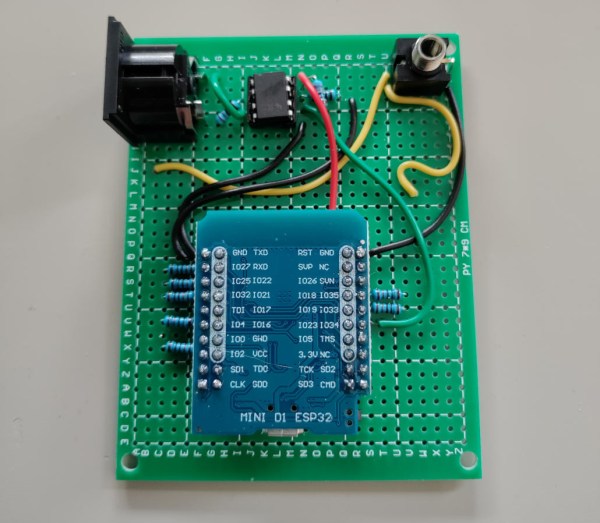
This tiny synth is built around an ESP32 and works by generating PWM signals normally meant for LEDs. In this case, the PWM signals are sent through a rudimentary amplifier and then on to an audio output device. That could be a small speaker, an audio jack to another amplifier, or a capture device.
The synth’s eight channels use up most of the ESP32’s I/O and provide a sound that’s reminiscent of the eight-bit video game era. The total parts count for this build is shockingly small with only a handful of resistors, the ESP, an optocoupler, and a few jacks.
For those wishing to experiment with synthesizers, a build like this is attractive because it’s likely that all the parts needed are already sitting around in a drawer somewhere with possibly the exception of the 5 pin DIN jacks needed for MIDI capabilities. Either way, [Folkert] has made all of the schematics available on the project page along with some sample mp3 files. For those looking to use parts from old video game systems sitting in their parts drawer, though, take a look at this synthesizer built out of a Sega Genesis.