Forming Fipples And Accompanying Accoutrements

[Dr. Suess] created memorable books with minimal words and bright artwork. He inspired children and adults alike, and one of them, [Len], grew up to create wind instruments for the Bellowphone channel on YouTube. Behind the whimsy of his creations is significant engineering, and this time, we get to see the construction of a fipple. The video is also shown after the break. Even though fipple sounds like a word [Dr. Suess] would have coined, it is a legitimate musical term that means a whistle-like mouthpiece. In this case, it blows air across glass jars to create the sound for [Len]’s bottle organ. Check out the second video below for a performance from The Magic Flute.

[Len] uses clear rigid PVC for the fipples and a custom forming die to shape them while they are soft. The rest is precision hand-tool work with a razor saw, hand file, and wet-dry sandpaper. Once complete, the fipple looks like any musical instrument part produced by exacting construction techniques. Making a mouthpiece is one thing, but if it is not directed correctly it will not make any sound, so we also learn how to turn steel strapping into an organ bottle assembly. If you add some tubing and rubber squeeze balls, you can make your own instrument.

Part of the reason the Bellowphone channel exists is that [Len] found a lot of support in the pipe organ community that showed him the secret inner workings of their livelihood and now is his chance to share that enthusiasm with the maker community.

Continue reading “Forming Fipples And Accompanying Accoutrements”

Chiptunes Via USB MIDI With The AY-3-8910

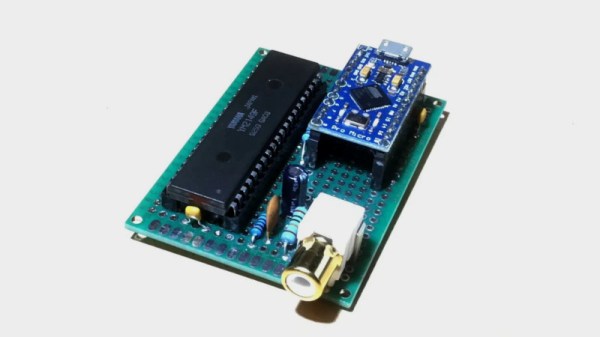
There are many venerable soundchips in the chiptune pantheon, of which the AY-3-8910 is perhaps one of the lesser known. Having not served on active duty for Nintendo or Commodore it’s somewhat unloved in the USA, but it made its name in a variety of arcade and pinball machines and has quite a European following due to its appearance in machines bearing the Amstrad and Sinclair names. [TheSpodShed] decided to whip up a USB MIDI interface for the chip, with the help of the Arduino Pro Micro.

The Arduino Pro Micro is a Sparkfun creation, using the ATmega32U4 microcontroller. Its USB MIDI functionality makes it a perfect candidate for such a build, and it also packs enough digital IO to run the AY-3-8910, with 13 lines required to get things going. [TheSpodShed] whipped up the project on protoboard, with only a few passives needed along with the sound chip and Arduino.

The Arduino code was written with an eye to making the most of the chip’s limited polyphony. The synth prioritises the most recent received notes, while also aiming to keep the highest and lowest of the currently requested notes still playing where possible. This gives the synth the best chance of keeping the expected bass and melody intact when playing a wide variety of MIDI content.

It’s a tidy build, and one that shows some love for a soundchip some have forgotten. Of course, it’s not the only option – we’ve also seen the SAM2695 and YM2612 given the same treatment. Video after the break.

Continue reading “Chiptunes Via USB MIDI With The AY-3-8910”

A Simple Way To Analyze Guitar Pickups

To the uninitiated an electric guitar seems fairly simple: you pluck a string and the electronics send the corresponding audio signal on the 6.3 mm jack output, all ready for for the amplifier to work its magic. Much of what makes a guitar like that sound good depends on the pickups, however. These are the devices which are placed between the guitar body and the strings. Depending on the guitar there can be one, two, or more of them, of varying types and configurations.

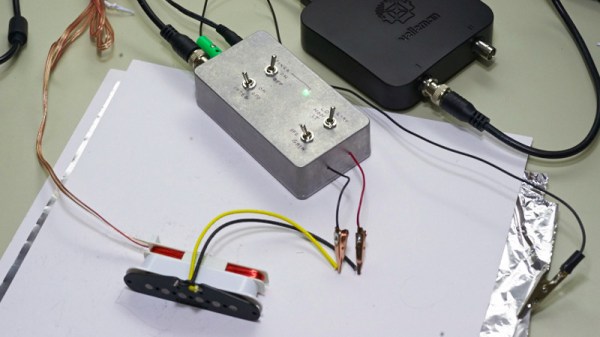
As a Gibson fan who upon getting introduced to a Fender Telecaster just had to replace its pickups with humbucking types, [Ken Willmott] found himself thrown into the wonderful world of pickup design and characterization. After two years of working through a number of designs and approaches, he eventually settled on a preamplifier design featuring a JFET opamp (LT1058) on a custom PCB which amplifies the pickup response from a test signal, acting as a front end signal conditioner.

Continue reading “A Simple Way To Analyze Guitar Pickups”

Cheap Speakers Sound Great In A Proper Enclosure

It’s possible to pick up a low-cost set of speakers for a few dollars, but by and large, you don’t get a lot of quality for your money. Expect a small pair of drivers, with tinny sound and ugly noises from the enclosure’s cheap materials. [JSK-koubou] has shown us, however, that these speakers can become so much more.

The internal structure helps improve the frequency response.

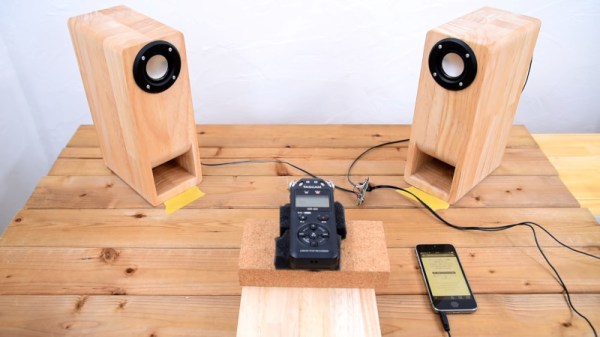
In this case at least, the basic speaker drivers and electronics inside were passable. Harvesting these, the builder then proceeds to create a stunning pair of tuned wooden enclosures for the speakers. This is achieved with a routing template, large blocks of wood and plenty of elbow grease.

The internal structure makes a huge difference to the bass response of the speakers, allowing them to far more faithfully recreate the music under test. Thanks to the artisan-level craftsmanship, the final product is stunning to look at, too. It’s impressive just how well a cheap pair of drivers can perform with a proper enclosure, and of course, there’s nothing to stop an even better set of drivers being installed, either.

When building your own speakers, your creativity is the limit. Video after the break.

Continue reading “Cheap Speakers Sound Great In A Proper Enclosure”

XFM: A 32-Voice Polyphonic FM Synthesizer On An FPGA

There’s something about Frequency Modulation (FM) synthesizer chips that appeals to a large audience. That’s one of the reasons behind [René Ceballos]’s XFM project, aiming to duplicate on an FPGA the sound of pure-FM synthesizer chips of the past such as the Yamaha DX series, OPL chip series and TX81Z/802/816. The result is a polyphonic, 32-voice, 6-operator FM synthesizer stereo module.

The project page goes into a lot of detail about the design choices which ultimately led to XFM being implemented on an FPGA, instead of using a dedicated DSP or MCU. Coming from the world of virtual synthesizers running on PCs, [René ]’s first impulse was to implement something on a Raspberry Pi or equivalent. Unfortunately these boards require a lot of power (ruling out battery-powered operation) and can hardly be called real-time, which led [René ] to abandon this attempt.

The design choice against the use of an MCU is simple: though capable of real-time processing, they lack the necessary power to make them a good choice for audio-processing. Working through the calculations to determine what kind of processing power would be needed, it was found that around 650 MIPS would be needed, a figure which most MCUs struggle to achieve a fraction of.

As one of the further requirements for XFM was that it should be as cheap as possible, this ruled out as too expensive the DSP chips which do have the power and hardware features needed. The component chosen was a Xilinx Spartan 6 FPGA, which though somewhat infamous and shunned in FPGA circles turns out to be a very economical option for this project.

Continue reading “XFM: A 32-Voice Polyphonic FM Synthesizer On An FPGA”

Probability-Based Drummer Leaves The Beats Up To Chance

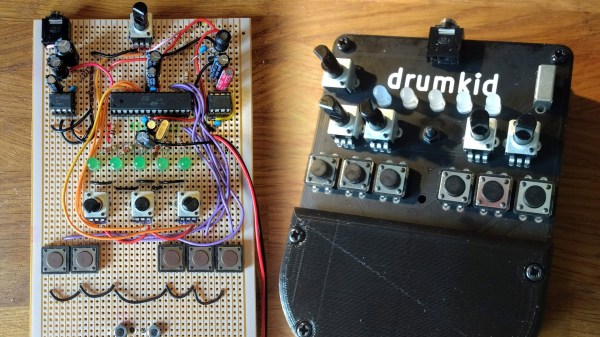
Drum machines may seem like one of the many rites of passage for hardware makers, they’re a concept you can implement simply or take into the extreme making it as complex as you want. [Matt’s] DrumKid is one of them, and its long development history is wonderfully documented in the project logs.

[Matt’s] original intention was to use the automatic drummer as part of his band, wanting “the expressiveness of a good drummer but without the robotic tendencies of a simple drum machine”. For that, he created the first iteration of the DrumKid, a web-based project using the Web Audio API. The interface consisted of bars showing levels for different settings which could be intuitively tweaked, changing the probability of a drum sound being played. This gave the “drummer” its unpredictability, setting itself apart from any regular old drum machine.

Fast forward a few years, and [Matt] now wants to recreate his DrumKid as a proper piece of musical gear, porting the concept into a standalone hardware drum machine you can plug into your mixer. He decided to go with the Arduino framework for his project rather than the Teensy platform in order to make it cheaper to build. The controls are simplified down to a few buttons and potentiometers, and the whole thing runs off of three AAA batteries. Also, targeting the project for hardware like this allowed for new features to be added, such as a bit-crush filter.

We already saw the first prototype here on Hackaday when it was featured in a Hackaday Prize mentor session, and it’s nice to see how the project evolved since. After a number of revisions, the new prototype takes design cues from Teenage Engineering’s “Pocket Operator” drum machine, using the main PCB as its own faceplate rather than a 3D printed case in a familiar way we’ve seen before. Unfortunately, the latest board is non-functional due to a routing mistake, but you can see the previous working prototypes in his project logs.

DIY Teensy Looper Multiplies Music

If you’re into electronic music, chances are good that you like to roll your own. While step one is usually to build something, anything that makes sound, a natural step two is to build a looping device to extend and play with those sounds.

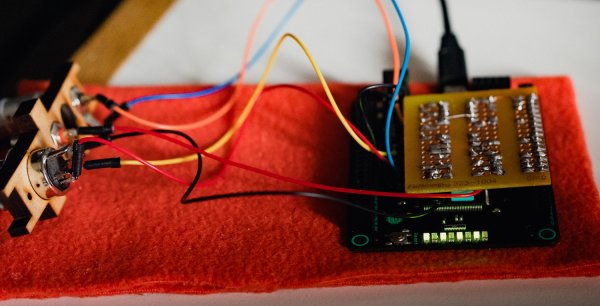
[Cutlasses] has finished version one of his Teensy-based Eurorack-style looper. He plugs in a thing, records some tunes, and the resulting loop gets divvied up into eight equal pieces. He can cut the loop together live using the eight buttons to jump around between sections. It supports unlimited overdubs, although too many will cause clipping. But hey, that just means free derivative sounds.

The looper records its audio to an SD card. Since this is typically a slow endeavor, [Cutlasses] used two circular buffers. One reads audio, and the other writes it. This took a lot of trial and error, which he may have to repeat with future SD cards.

[Cutlasses]’ plans for future versions include a separate audio CODEC for better sound, CV control, and a pedal option for hands-free operation. We’d love to hear some sweet Theremin loopage, wouldn’t you? Jog past the break to watch [Cutlasses] demo his looper with a kalimba and a DIY noise box that uses a string bow to make metal tines sing.

Feeling out of the music-making loop? There are (slightly) easier ways. Check out this LEGO looper or this multiplayer Pi-ano.

Continue reading “DIY Teensy Looper Multiplies Music”