Open-Source Arm Puts Robotics Within Reach

In November 2017, we showed you [Chris Annin]’s open-source 6-DOF robot arm. Since then he’s been improving the arm and making it more accessible for anyone who doesn’t get to play with industrial robots all day at work. The biggest improvement is that AR2 had a closed-loop control system, and AR3 is open-loop. If something bumps the arm or it crashes, the bot will recover its previous position automatically. It also auto-calibrates itself using limit switches.

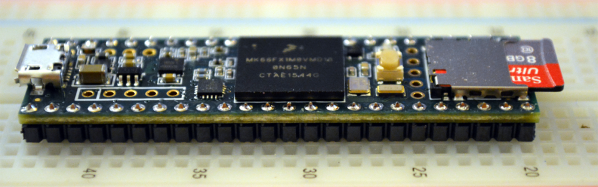
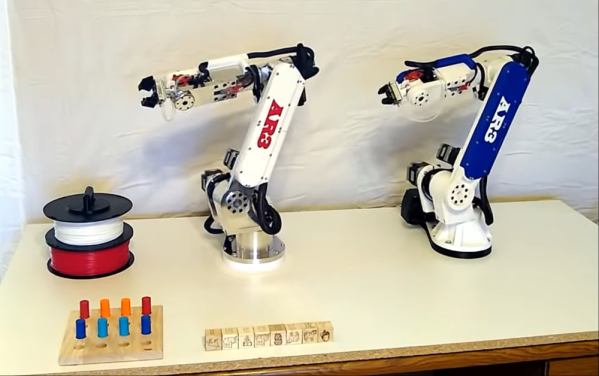
AR3 is designed to be milled from aluminium or entirely 3D printed. The motors and encoders are controlled with a Teensy 3.5, while an Arduino Mega handles I/O, the grippers, and the servos. In the demo video after the break, [Chris] shows off AR3’s impressive control after a brief robotic ballet in which two AR3s move in hypnotizing unison.

[Chris] set up a site with the code, his control software, and all the STL files. He also has tutorial videos for programming and calibrating, and wrote an extremely detailed assembly manual. Between the site and the community already in place from AR2, anyone with enough time, money and determination could probably build one. Check out [Chris]’ playlist of AR2 builds — people are using them for photography, welding, and serving ice cream. Did you build an AR2? The good news is that AR3 is completely backward-compatible.

The AR3’s grippers work well, as you’ll see in the video. If you need a softer touch, try emulating an octopus tentacle.

Continue reading “Open-Source Arm Puts Robotics Within Reach”

DIY Teensy Looper Multiplies Music

If you’re into electronic music, chances are good that you like to roll your own. While step one is usually to build something, anything that makes sound, a natural step two is to build a looping device to extend and play with those sounds.

[Cutlasses] has finished version one of his Teensy-based Eurorack-style looper. He plugs in a thing, records some tunes, and the resulting loop gets divvied up into eight equal pieces. He can cut the loop together live using the eight buttons to jump around between sections. It supports unlimited overdubs, although too many will cause clipping. But hey, that just means free derivative sounds.

The looper records its audio to an SD card. Since this is typically a slow endeavor, [Cutlasses] used two circular buffers. One reads audio, and the other writes it. This took a lot of trial and error, which he may have to repeat with future SD cards.

[Cutlasses]’ plans for future versions include a separate audio CODEC for better sound, CV control, and a pedal option for hands-free operation. We’d love to hear some sweet Theremin loopage, wouldn’t you? Jog past the break to watch [Cutlasses] demo his looper with a kalimba and a DIY noise box that uses a string bow to make metal tines sing.

Feeling out of the music-making loop? There are (slightly) easier ways. Check out this LEGO looper or this multiplayer Pi-ano.

Continue reading “DIY Teensy Looper Multiplies Music”

RC Controller Becomes XInput Controller

XInput is an API that is used by applications to interface with the Xbox 360 Controller for Windows. The 360 controller became somewhat of a “standard” PC gamepad, and thus many games and applications support the XInput standard.

[James] is working on an entry for a robotics competition, and wanted a controller to use with their PC that was more suited to their build. They took an RC controller, and converted it to work with XInput instead.

The controller in question is the JJRC Q35-01, a trigger-type RC controller available for under $20. The conversion is executed neatly, with the original STM microcontroller being removed from the board, and the PCB traces instead being connected to a Teensy 3.5 which takes over running the show.

The conversion is remarkably complete, with the team not stopping at just reading the buttons and steering potentiometer. A USB logic analyzer was used to figure out how to control the LCD, and a calibration mode implemented just in case.

[James] has shared the work on Github so it’s reproducible for the average maker. We’ve seen plenty of builds in this space, like this tilt controller from [Electronoobs]. Video after the break.

Continue reading “RC Controller Becomes XInput Controller”

Incredibly Heavy Ornament Likely Inappropriate To Hang On Tree

It’s that time of year again, and the Christmas hacks are flooding in thick and fast. To get into the Christmas spirit,  the FoxGuard team wanted a custom ornament to hang from the tree. They may have gotten more than they bargained for.

It’s a simple build that demonstrates the basic techniques of working with DACs and scopes in a charming holiday fashion. A Tektronix T932A analog oscilloscope is pressed into service as a display, by operating in XY mode. A Teensy 3.5 was then chosen for its onboard digital to analog converters, and used to output signals to draw a Christmas tree and star on the screen.

Old-school coders will appreciate the effort taken to plot the graphics out on graph paper. While the hack doesn’t do anything cutting edge or wild, it’s impressive how quick and easy this is thanks to modern development methods. While the technology to do this has existed for decades, a hacker in 1998 would have spent hours breadboarding a PIC microcontroller with DACs, let alone the coding required. We’ve come a long way.

It’s a bit of fun, but we highly recommend you don’t try and hang an analog scope off your tree at home. These WiFi-controlled ornaments are perhaps more suitable. Video after the break. Continue reading “Incredibly Heavy Ornament Likely Inappropriate To Hang On Tree”

Flood Damaged 386 Gets A Modern Rebuild

Until a flood claimed its life, the 386 tower [Tylinol] found on the side of the road served him well as a DOS gaming rig. In the aftermath of the flood, the machine was left with ruined internals and a rusted case; it ended up being tossed in storage where it was slowly rotting away. But a recent idea got him to drag this old dinosaur back out into the light of day and give it a new lease on life with some modern gear.

For our viewing pleasure [Tylinol] documented the restoration of the computer, dubbed SErEndIPITy, from start to finish. The rebuild starts with tearing the machine down to the steel frame and sanding all the rust off. Luckily it looks like no structural damage was done, and a coat of engine enamel got the frame looking more or less like new. The original motherboard mounting solution wouldn’t work for his modern board, so he ended up riveting a piece of sheet metal in and drilling new holes for standoffs to thread into.

A nice element of this rebuild is that [Tylinol] didn’t want to drastically change the outward appearance of the machine. The customary yellowed plastic was left alone, and wherever possible the original hardware was reused. Rather than blow a hole in the case, he took his Dremel to the decorative ribbed design of the front panel and turned it into a stock-looking vent.

The real star of this rebuild is the LED CPU “Speed” display on the front of the case. In its original form, this was a fake display that simply cycled through predefined digits when you pressed the “Turbo” button on the front panel. By grounding them one at a time, [Tylinol] figured out which lines on the PCB controlled each segment of the display and wired it up to a Teensy 3.5. He was then able to write a C# plugin for CoreTemp to display the temperature.

The rebuilt machine is packing an i5-6500 processor, GTX 970 video card, and 8 GB of DDR4 RAM. Not exactly a speed demon compared to some of the modern desktops out there, but it certainly beats the original hardware. Incidentally, so does the Teensy 3.5 controlling the front panel display. There’s a certain irony there…

Cramming modern hardware into the carcass of an outdated computer is nothing new, of course. But we especially like the builds that take the time to make it all look stock.

[via /r/DIY]

The Tiny SCSI Emulator

For fans of vintage computers of the 80s and 90s, SCSI can be a real thorn in the side. The stock of functioning hard drives is dwindling, and mysterious termination issues are sure to have you cursing the SCSI voodoo before long. Over the years, this has led to various projects that aim to create new SCSI hardware to fill in where the original equipment is too broken to use, or too rare to find.

[David Kuder]’s tiny SCSI emulator is designed for just this purpose. [David] has combined a Teensy 3.5 with a NCR5380 SCSI interface chip to build his device. With a 120MHz clock and 192K of RAM, the Teensy provides plenty of horsepower to keep up with the SCSI signals, and its DMA features don’t hurt either.

Now, many earlier SCSI emulation or conversion projects have purely focused on storage – such as the SCSI2SD, which emulates a SCSI hard drive using a microSD card for storage. [David]’s pulled that off, maxing out the NCR5380’s throughput with plenty to spare on the SD card end of things. Future work looks to gain more speed through a SCSI controller upgrade.

But that’s not all SCSI’s good for. Back in the wild times that were the 80s, many computers, and particularly the early Macintosh line, were short on expansion options. This led to the development of SCSI Ethernet adapters, which [David] is also trying to emulate by adding a W5100 Ethernet shield to his project. So far the Cabletron EA412 driver [David] is using is causing the Macintosh SE test system to crash after initial setup, but debugging continues.

It’s always great to see projects that aim to keep vintage hardware alive — like this mass repair of six Commodore 64s.

Introducing The Teensy 3.5 And 3.6

Paul Stoffregen has built a new Teensy. The latest in the line of very powerful, USB-capable microcontrollers is the Teensy 3.5 and 3.6 development boards. It’s faster, more capable, and bigger putting even more pins on a solderless breadboard.

The first Teensy was one of the first Arduino compatible boards with native USB. The Teensy 2.0 was even better with support for USB keyboards, mice, and MIDI. Even today, the Teensy 2.0 is the de facto board to use if you want to build anything like a USB keyboard. The Teensy 2.0 was followed by the exceptionally powerful Teensy 3.0, the first 32-bit Arduino compatible board, and thanks to Paul’s contributions of a pile of Arduino libraries, doing cool stuff faster has never been easier. Since the launch of the Teensy 3.0, its successors, the 3.1 and 3.2 have launched. If you want the power of an ARM microcontroller with the deepest Arduino library support, there’s only one board you should consider.

Like the launch of the Teensy 3.0, Paul is Kickstarting the launch of the latest Teensys with a crowdfunding campaign. Let’s dig into everything these new boards have to offer.

Continue reading “Introducing The Teensy 3.5 And 3.6”