The hurdy gurdy is the perfect musical instrument. It’s an instrument with a crank, and a mechanical wonderment of drone strings and weird chromatic keyboards. No other musical instrument combines the sweet drone of bagpipes with the aural experience of an eight-year-old attempting to play Hot Cross Buns on a poorly tuned violin.
Now, the hurdy gurdy is going digital. The Digi-Gurdy is [XenonJohn]’s entry into this year’s Hackaday Prize, and it’s exactly what it says on the tin: it’s a musical instrument that drones on and on, with keys plunking out a melody.
If you’re not familiar with a hurdy gurdy, this video is a varily good introduction. It’s a box with somewhere between four and six strings mounted on the outside. The strings vibrate by means of a wooden wheel powered by a crank. There’s a keyboard of sorts along the body of the instrument that ‘fret’ a single string providing the melody; all the other strings are drone strings that sound continuously. I think it was in, like, a Led Zeppelin video, man.
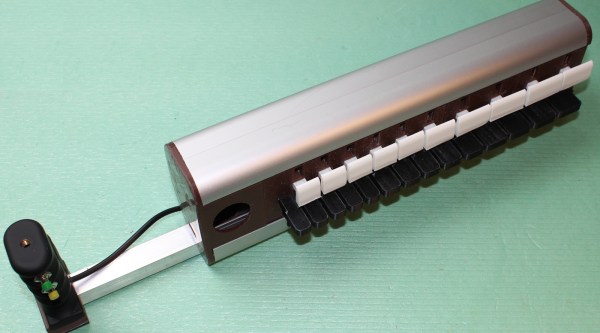
While it’s a slightly complicated build to make an analog hurdy gurdy, delving into the digital domain is easy: [XenonJohn] is building a hurdy gurdy that simply outputs MIDI commands with some buttons and a Teensy 3.6 microcontroller. The parts are 3D printed, and since this hurdy gurdy is completely digital, you can change the tuning of the drone strings without actually tuning them. Awesome.


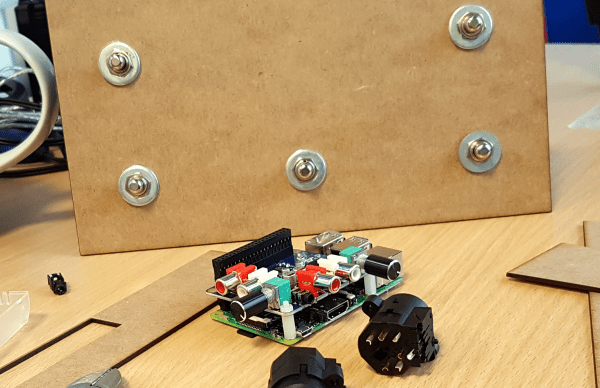
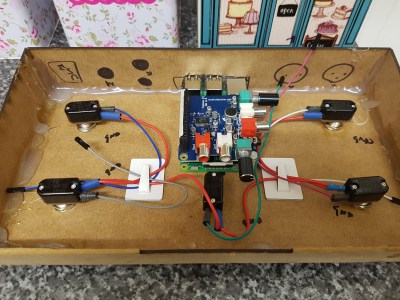 At the center of the box is a Raspberry Pi with an AudioInjector stereo sound card. The card takes care of stereo in and out, and passing the signal to the Pi. The software is Modep, an open source audio processor that allows the setup of a chain of digital effects plugins to be run on the Pi. After finding some foot switches, [Craig] connected them to an Arduino Pro Micro which he set up as a MIDI device that sends MIDI messages to the Modep software running on the Pi.