Turning A $2 IKEA Lantern Into A Stylish Enclosure

It’s fair to say that the average Hackaday reader enjoys putting together custom electronics. Some of those builds will be spaghetti on a breadboard, but at some point you’ll probably have a project that needs a permanent case. If you’re looking for a small case for your latest creation, check out [Julius Curt’s] modification of an IKEA Vårsyren lantern into a customizable enclosure!

Continue reading “Turning A $2 IKEA Lantern Into A Stylish Enclosure”

Faux Potentiometers Use Magnets, No Contacts

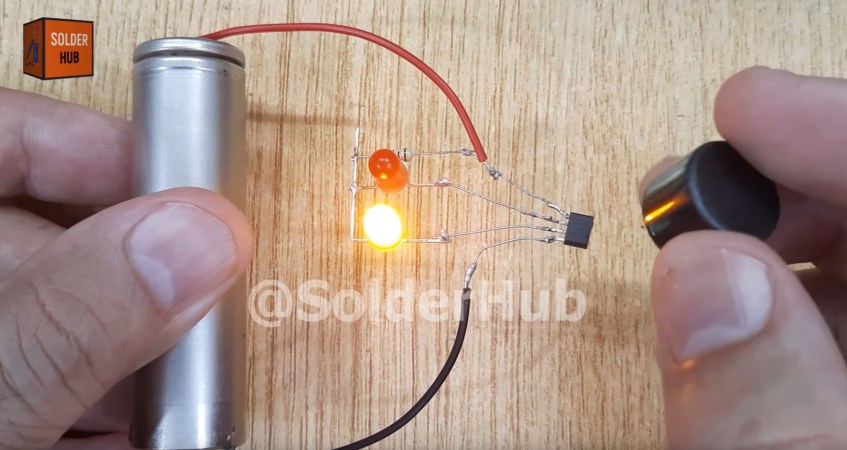
Ever tear open a potentiometer? If you haven’t, you can still probably guess what’s inside. A streak of resistive material with some kind of contact that moves across it as you rotate the shaft, right? Usually, you’d be right, but [T. K. Hareedran] writes about a different kind of pot: ones that use magnetic sensing.

Why mess with something simple? Simplicity has its price. Traditional units may not be very accurate, can be prone to temperature and contamination effects, and the contact will eventually wear out the resistive strip inside. However, we were a little curious about how a magnetic potentiometer could offer a resistive output. The answer? It doesn’t.

Really, these would be better described as rotary encoders with a voltage output. They aren’t really potentiometers. The SK22B mentioned in the article, for example, requires a 5 V input and outputs somewhere between 10% and 90% of that voltage on the ersatz wiper pin.

That makes the devices much easier to puzzle out. The linearity of a device like that is better than a real pot, and, of course, the life expectancy is greatly increased. On the other hand, we’d rather get one with quadrature or I2C output and read it digitally, but if you need a voltage, these devices are certainly an option.

[T. K.] goes on to show how he fabricated his own non-contact sensor using photosensors and a gray-coded wheel with a single track. You do need to be careful about where you position the sensors, though.

Could you make a real non-contact resistive pot? Seems like you could get close with an FET output stage, but it wouldn’t be as generally applicable as a good old-fashioned smear of carbon. If you have a better idea, drop it in the comments or build it and give us a tip.

Want a 20A-capable device? Build it. Want to see how we like to read encoders?

Tips For Homebrewing Inductors

How hard can it be to create your own inductors? Get a wire. Coil it up. Right? Well, the devil is definitely in the details, and [Nick] wants to share his ten tips for building “the perfect” inductor. We don’t know about perfect, but we do think he brings up some very good points. Check out his video below.

If you are winding wire around your finger (or, as it appears in the video, a fork) or you are using a beefy ferrite core, you’ll find something interesting in the video.

Continue reading “Tips For Homebrewing Inductors”

A set of three linear actuators set atop a green with yellow grid cutting mat. The electric actuator on the top of the image is silver and has a squarish tube. It is slender compared to the other two. A black, hydraulic actuator sits in the middle and is the largest of the three. A silver pneumatic actuator at the bottom of the image is the middle sized unit.

Linear Actuators 101

Linear actuators are a great help when you’re moving something along a single axis, but with so many options, how do you decide? [Jeremy Fielding] walks us through some of the high level tradeoffs of using one type of actuator over another.

There are three main types of linear actuator available to the maker: hydraulic, pneumatic, and electric. Both the hydraulic and pneumatic types move a cylinder with an attached rod through a tube using pressure applied to either side of the cylinder. [Fielding] explains how the pushing force will be greater than the pulling force on these actuators since the rod reduces the available surface area on the cylinder when pulling the rod back into the actuator.

Electric actuators typically use an electric motor to drive a screw that moves the rod in and out. Unsurprisingly, the electric actuator is quieter and more precise than its fluid-driven counterparts. Pneumatic wins out when you want something fast and without a mess if a leak happens. Hydraulics can be driven to higher pressures and are typically best when power is the primary concern which is why we see them in construction equipment.

You can DIY your own linear actuators, we’ve seen tubular stepper motors, and even a linear actuator inspired by muscles.

Continue reading “Linear Actuators 101”

Flyback Converter Revealed

As [Sam Ben-Yaakov] points out in a recent video, you don’t often see flyback converters these days. That’s because there are smarter ways to get the same effect, which is to convert between two voltages. If you work on old gear, you’ll see plenty of these, and going through the analysis is educational, even if you’ll never actually work with the circuit. That’s what the video below shows: [Sam’s] analysis of why this circuit works.

The circuit in question uses a bridge rectifier to get a high-voltage DC voltage directly from the wall. Of course,  you could just use a transformer to convert the AC to a lower AC voltage first, but then you probably need a regulator afterwards to get a stable voltage.

Continue reading “Flyback Converter Revealed”

Continuous-Path 3D Printed Case Is Clearly Superior

[porchlogic] had a problem. The desire was to print a crystal-like case for an ESP32 project, reminiscent of so many glorious game consoles and other transparent hardware of the 1990s. However, with 3D printing the only realistic option on offer, it seemed difficult to achieve a nice visual result. The solution? Custom G-code to produce as nice a print as possible, by having the hot end trace a single continuous path.

The first job was to pick a filament. Transparent PLA didn’t look great, and was easily dented—something [porchlogic] didn’t like given the device was intended to be pocketable. PETG promised better results, but stringing was common and tended to reduce the visual appeal. The solution to avoid stringing would be to stop the hot end lifting away from the print and moving to different areas of the part. Thus, [porchlogic] had to find a way to make the hot end move in a single continuous path—something that isn’t exactly a regular feature of common 3D printing slicer utilities.

The enclosure itself was designed from the ground up to enable this method of printing. Rhino and Grasshopper were used to create the enclosure and generate the custom G-code for an all-continuous print. Or, almost—there is a single hop across the USB port opening, which creates a small blob of plastic that is easy to remove once the print is done, along with strings coming off the start and end points of the print.

Designing an enclosure in this way isn’t easy, per se, but it did net [porchLogic] the results desired. We’ve seen some other neat hacks in this vein before, too, like using innovative non-planar infill techniques to improve the strength of prints.

Continue reading “Continuous-Path 3D Printed Case Is Clearly Superior”

A pink sine wave is seen against the black background of an oscilloscope display.

Coping With Disappearing Capacitance In A Buck Converter

Designing a circuit is a lot easier on paper, where components have well-defined values, or lacking that, at least well-defined tolerances. Unfortunately, even keeping percentage tolerances in mind isn’t always enough to make sure that circuits work correctly in the real world, as [Tahmid] demonstrates by diagnosing a buck converter with an oddly strong voltage ripple in the output.

Some voltage ripple is an inherent feature of the buck converter design, but it’s inversely proportional to output capacitance, so most designs include a few smoothing capacitors on the output side. However, at 10 V and a 50% duty cycle, [Tahmit]’s converter had a ripple of 0.75 V, significantly above the predicted variation of 0.45 V. The discrepancy was even greater at 20 V.

The culprit was the effect of higher voltages on the ceramic smoothing capacitors: as the voltage increases, the dielectric barrier in the capacitors becomes less permittive, reducing their capacitance. Fortunately, unlike in the case of electrolytic capacitors, the degradation of ceramic capacitors performance with increasing voltage is usually described in specification sheets, and doesn’t have to be manually measured. After finding the reduced capacitance of his capacitors at 10 V, [Tahmid] calculated a new voltage ripple that was only 14.5% off from the true value.

Anyone who’s had much experience with electronics will have already learned that passive components – particularly capacitors – aren’t as simple as the diagrams make them seem. On the bright side, they are constantly improving.