Light Painting With The Raspi

The art of taking long exposure photographs with blinking RGB LEDs has improved greatly over the years, mostly due to the extremely easy to use Arduino and hundreds of tutorials on the web. If there’s one problem with light painting with a ‘duino, it’s that large, full color images take up a ton of storage space, much more than the flash memory on an Arduino can provide. Wanting fancier and more colorful light painted images, [Phil] over at Adafruit used a Raspberry Pi to make some very awesome light painted images.

Like any Adafruit tutorial that uses LEDs, the build begins with a digital RGB LED strip wired to the GPIO pins on the Raspi. After loading up the Adafruit educational Raspi Linux distro for hardware SPI support, the only thing left to do was writing a Python script to display images in the air.

[Phil] says vertical, hand-held LED bars are old hat, so he took a hula hoop and a few bits of PVC pipe, attached the LED strip, and put it on his bike. The results are really impressive – we’re loving the flames in the title pic – and considering the Raspi is a full-fledged computer, light paintings larger than what [Phil] made are very possible.

Not Quite Building A Raspi Arduino Bridge


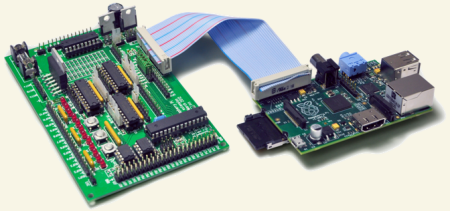
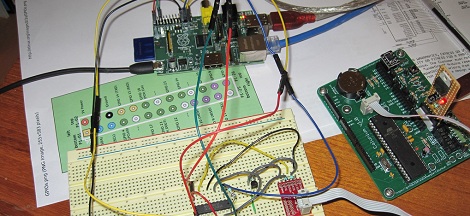
A few months ago, [Omer] sent in a Raspberry Pi to Arduino bridge he’s been working on called Ponte. Now that he’s gotten a few assembled, he can actually test out his ideas for combining the powerful Raspi with the ubiquitous Arduino.

Ponte revision 0 used a pair of 12-bit analog to digital converters, but during the soldering and debugging phase of development [Omer] discovered a few things were wrong with his original design. The FETs on the fabricated boards had the drain and source pins mixed up, but that problem was easily solved with a bit of board surgery.

The worst problem was the mechanical design of Ponte rev. 0 – the power jack on the Ponte is directly above the Raspi’s USB port, meaning it’s impossible to plug the Ponte into the Pi.

[Omer] is working on these problems and should have  the revised boards completed shortly. A few people have asked where they can get a Ponte, but right now there are no plans to assemble and ship boards. That may change, but for now if might be worth bugging [Omer] to put his new and improved Ponte (with an 8-port I2C port expander!) up on SeeedStudio


Using An Oscilloscope As A Composite Video Adapter

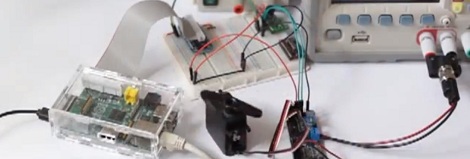
Confronted with a monitor that would display neither HDMI signal, nor composite video, [Joonas Pihlajamaa] took on a rather unorthodox task of getting his oscilloscope to work as a composite video adapter. He’s using a PicoScope 2204 but any hardware that connects to a computer and has a C API should work. The trick is in how his code uses the API to interpret the signal.

The first thing to do is make sure the voltage levels used in the composite signal are within the tolerances of your scope. [Joonas] used his multimeter to measure the center pole of the RCA connector and found that the Raspberry Pi board puts out from 200 mV to 2V, well within the PicoScope’s specs. Next he started to analyze the signal. The horizontal sync is easy to find, and he ignored the color information — opting for a monochrome output to ease the coding process. The next big piece of the puzzle is to ascertain the vertical sync so that he knows where each frame starts. He got it working and made one last improvement to handle interlacing.

The proof of concept video after the break shows off the he did. It’s a bit fuzzy but that’s how composite video looks normally.

Continue reading “Using An Oscilloscope As A Composite Video Adapter”

Adafruit’s Custom Rasp Pi Distro Eases Some Pain

Many of you have still not yet received your Raspberry Pi. When you do, you’ll find that there is work to be done in the operating system to get things working as you might want them to.  The wonderful folks over at Adafruit have tackled this by releasing their own distribution of Linux for the Raspberry Pi.

Based on the shipped distribution “Wheezy”, Adafruit’s distribution “Occidentalis v0.1. Rubus occidentalis” or “the Black Raspberry” now includes the following:


Android 4.0 On Raspberry Pi

The folks over at the Raspberry Pi foundation are showing off their latest wares. This time around it’s Android 4.0 running on the Raspberry Pi. Although this is a pre-release announcement, it sounds like the work is rather far along. Hardware acceleration for video playback is in place, but there are still some audio issues that need to be fixed before it will be ready.

We know the foundation isn’t the first one to pull this kind of thing off. Look around and you can see some other proof-of-concept videos which show Ice Cream Sandwich running on the board in one stage or another. But the demo from the video after the break gives us hope that rock solid support is just around the corner. After all, Netflix runs on Android and so does XBMC. Both running on the RPi brings the device one step closer to the holy grail of dirt cheap and mostly-open set top boxes. The one thing we haven’t seen yet is the killer control method for the device. If you’ve got one up your sleeve you should post some details and send us the link.

Continue reading “Android 4.0 On Raspberry Pi”

Checking Network Status With A Traffic Light

If you’ve ever dealt with a buggy Internet connection, you know how frustrating it can be. This project takes the guesswork out of mashing F5 over and over, or simply walking over to your router and ‘turning it on and off again.’

Necessity is the mother of invention, and when the folks at the Bitlair hackerspace in Amersfoort, Netherlands got tired of opening up a terminal to see if their network connection was down at this weekend’s Haxogreen camp they did what any self-respecting hackerspace would do: make a traffic light monitor the Internet.

The traffic light is controlled by a Raspberry Pi the Bitlair folks had lying around attached to a spare traffic light they somehow obtained with a relay. Green means the Raspi can reach 8.8.8.8, red means there is no connection, and flashing lights means there is packet loss.

Not bad for a project put together in a few hours. Now if we only knew how they obtained a traffic light, ‘just lying around.’

Video after the break.

Continue reading “Checking Network Status With A Traffic Light”

Reading Analog Sensors With The Raspberry Pi

Adafruit just posted an awesome tutorial on reading analog sensors with the Raspberry Pi. It’s a great walkthrough that can be applied to your next Raspi project as well as any project where you just need one more analog input.

Earlier, the folks over at Adafruit posted a tutorial on using a MCP3008 ADC with the Raspi to directly read analog values using a Raspi. Sometimes, though, you don’t need eight analog inputs and a 12-bit ADC to get a project off the ground. Adafruit’s tutorial for reading analog values without an ADC relies on a single 1μF ceramic capacitor attached between a digital input and ground. By pulling the sensor line high for a millisecond or two, the capacitor charges at different rates depending on the value of the analog sensor.

Yes, it’s just an RC timing circuit but seeing as how the Raspi doesn’t have an analog input, we figure this tutorial could help out a few people.